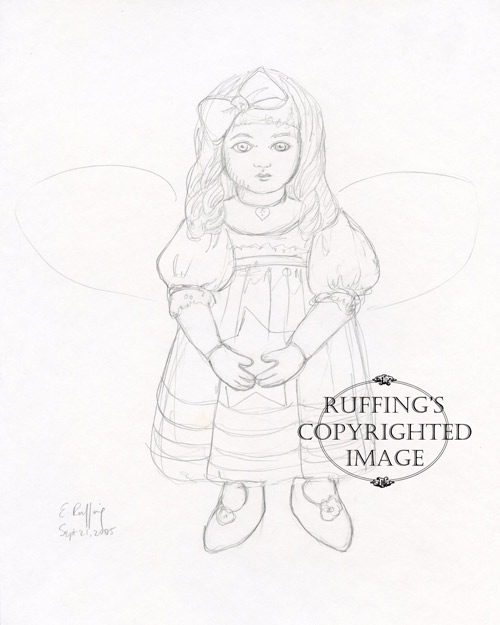
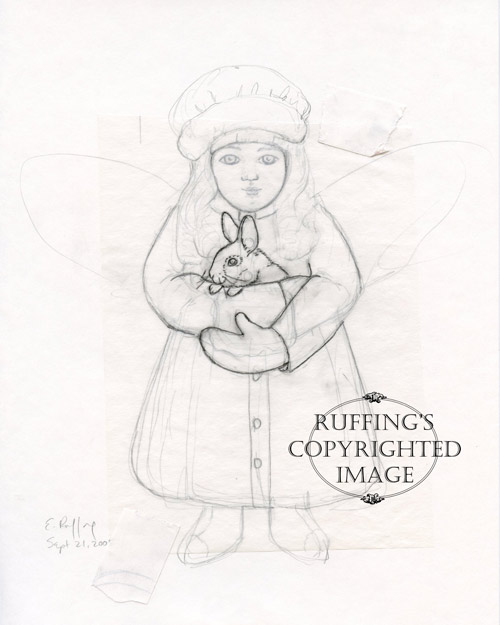
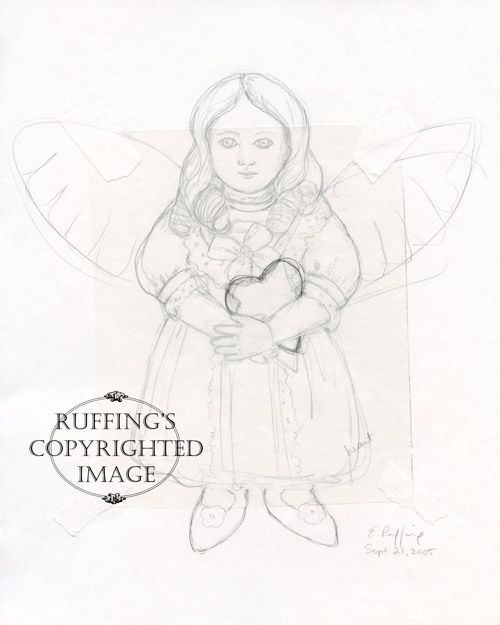
 I’ve completed my first set of original, one-of-a-kind art dolls, and these are some of the sketches I drew for them, before I turned them into patterns to sew. Above is “Serenity Starr“, and below are “Cottontail Charlotte“, and “April May“. They all turned into angels, and have since flown off to their new homes.
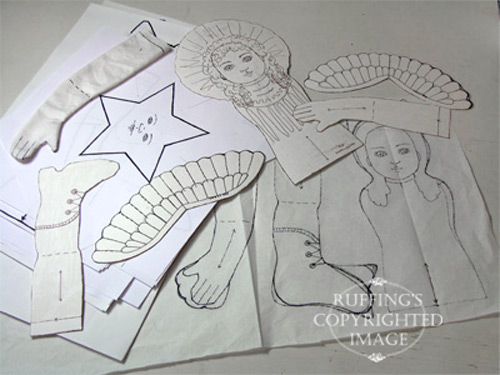
 Once I had an idea of how I wanted them to look, I experimented with making patterns for them, using 100% cotton sheeting. I used a sateen-finish sheeting, so I would get a nice smooth surface for painting. I learned that your initial doll shape changes a lot once your doll is stuffed, and so adjustments are necessary. Your pattern design usually needs to be a little wider than you think, and slightly taller.
Each angel got a set of hand-quilted wings, which were stuffed with 1/4 inch batting, and then hand sewn onto each doll body. I made wooden stands for my angels first, so I would be able to leave the right amount of space between the wings and the doll bodies. That way, I was able to slip the stands between the wings and the bodies.
 Next up, I’m going to be trying some hand-painted, jointed art dolls, for a little more dimension.
 These are some of my sketches for pattern prototypes. They’ll be sewn, stuffed, and then redrawn until I like the results.
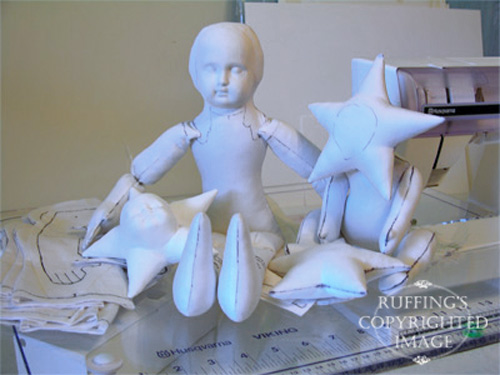 For instance, I’m going to redraw those feet, above, because they came out more pointed than I wanted them to be. Making patterns for doll bodies and doll clothing takes a lot of experimentation.
I’m going to be experimenting with Creative Paperclay, and Li-Qua-Ché pourable papier mâché, to add some sculpted parts and details to my fabric dolls, as well.


