 I haven’t been feeling well and missed my quilt class this past weekend. I rallied and got my homework together in time for the midweek class instead. I was going to just pay the five dollar penalty for not doing my homework, but I wanted to get back to my normal routine as much as I could.
I sewed this block all by hand, using templates I made from poster board and plastic template sheets. The finished block size is 12 inches square, and 12 1/2 inches square including the seam allowances.
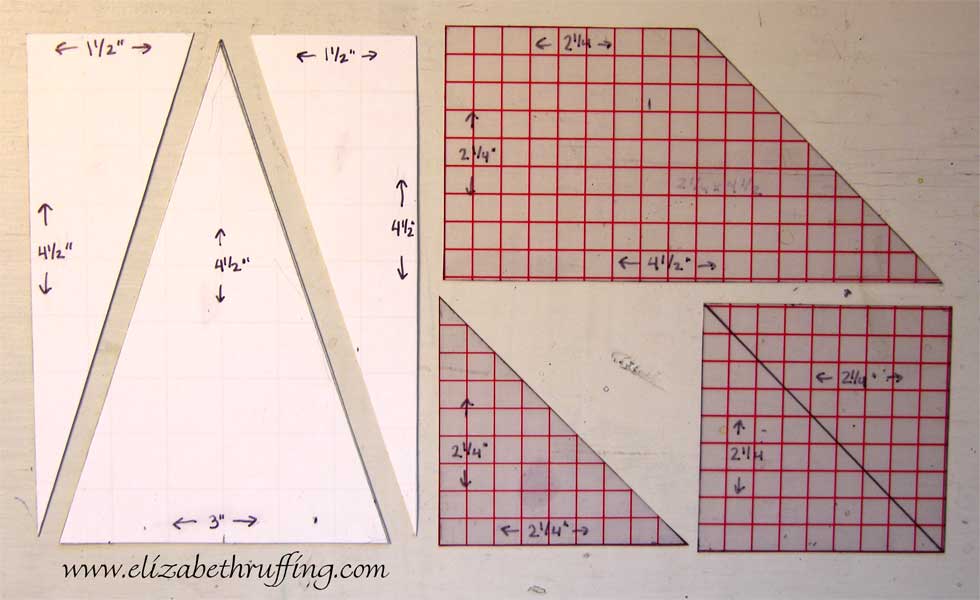 The yellow and white portions of the block are based on a 3 by 4 1/2 inch rectangle. The yellow triangle is formed by drawing a line to the center point of the opposite short side of the rectangle.
The blue and white portions of the block are based on a 4 1/2 by 4 1/2 inch square. Trace one out on plastic, draw two lines dividing the square into quarters, which divides the square into four smaller squares. Drawing a line from corner to corner of the smaller squares forms the triangle, and the trapezoid.
Once you cut all the template pieces out as I have above, flip them over right side down on the wrong side of your fabric and trace around them with a pencil. A mechanical pencil works best. It also helps to lay your fabric over a piece of sandpaper to stabilize it.
Once all the shapes are traced, cut them out leaving a 1/4 inch seam allowance around each one. (The block’s center white square is 3 inches by 3 inches without seam allowances, and 3 1/2 by 3 1/2 with seam allowances.) I then piece them together by hand using a standard running stitch. It takes longer, but I find it is much more accurate and less frustrating than joining small pieces by machine. It is also calming and, I think, fun to do since you can do it anywhere, even while in bed watching TV.


