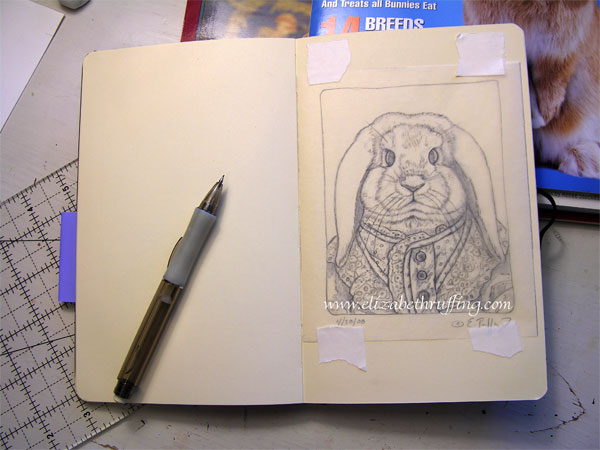
 Moving on…This a quick rundown on transferring a drawing to watercolor paper (or a surface of your choice). The first step is to cut a piece of tracing paper slightly larger than your original drawing, and tape it over the original drawing. I’m using Scotch 3M Safe-Release tape (the white kind you find in art and craft stores) so it won’t disturb the surface of my sketchbook when I remove the tracing paper. There are different kinds of artist tapes, that don’t leave residue, for different surfaces. I use a mechanical pencil to outline the main areas of my drawing onto the tracing paper. I use solid pencil lines to represent areas where I will want to paint a hard edge (like the outer edge of the head), and dotted lines where I will want to paint a soft shaded edge (like a shadow).
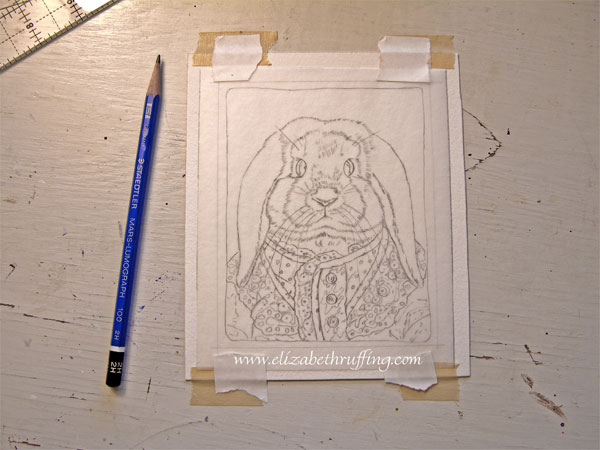 Once I have a tracing, I tape my watercolor paper to a firm surface, my work table in this case. I tape it down with Scotch Drafting Tape this time, for a more secure hold. I don’t want it to slip. I tape my tracing in place over the watercolor paper using the Safe-Release. I can keep an eye on the tracing if it starts to move, and so it doesn’t matter as much. To be more secure, you can use the drafting tape instead. I sharpen a hard pencil. I like to use a 2H. If it is too sharp or hard, it will cut the tracing paper. So experiment first for a good balance.
 I slip a piece of transfer paper (I use Saral) between the tracing paper and the watercolor paper. You can use homemade graphite paper, if you wish. To make some, take a piece of tracing paper and a 2B pencil (the wide flat ones work best), and cover the paper with graphite. Once you’ve covered it, take a cotton ball with some rubbing alcohol on it, and rub it across the graphite-covered surface to even it. Let it dry and you’ve got your own transfer paper. Carefully trace your drawing with your hard pencil, avoiding leaning too hard on your drawing as you go. Putting an extra piece of paper under the ball or side of your hand is helpful so you don’t make smudge marks through the papers with your hand.
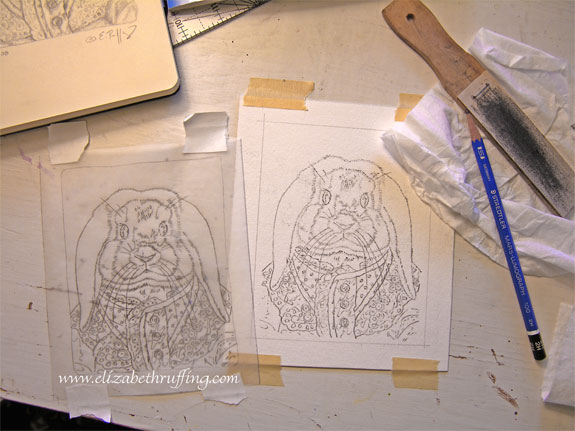 When you’ve transferred all your lines, remove the tape from one corner of your tracing and double check that you’ve gotten all the lines transferred. Once everything looks fine, remove the tape and the graphite paper. Don’t slide it any more than you need to. Lifting it up makes fewer smudges. You will have some smudges anyway.
 Take a clean kneaded eraser and press and release the eraser on the watercolor paper, gently lifting the excess graphite off. This is how you get the smudges off, but you also want lighten your lines, if necessary, leaving only faint lines to paint by. Some watercolor colors will lock the graphite lines in place and you won’t be able to erase them. So, it is best to work with the faintest lines with which you can stand to work. Knead your eraser frequently to avoid putting the smudges back onto your paper. Kneading it keeps it “clean” (at some point, it will become too full of graphite and you will need to get a new eraser).
That’s about it. If you are transferring to canvas, you will want to secure your tracing to it with canvas tape (tape for use with canvas), because the others won’t hold. If you have canvas on stretcher bars, you will want to put a book or some other filler under the canvas to keep it rigid while you transfer your lines.


