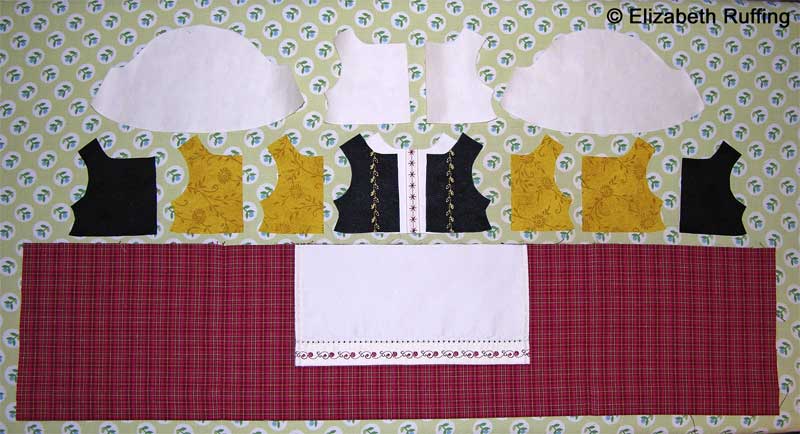
 I selected a red plaid, a black-on-black print, a gold-on-gold print, and an off-white cotton sateen for my doll dress. I knew I’d be adding some decorative stitching, and so I stayed modest in my print selection, choosing nothing too busy-looking. I didn’t have a piece of red plaid wide enough for my skirt, and so I had to piece it. I divided my pattern in half for the front panel, and in quarters for the two back panels, adding 1/4 inch seam allowances.
Matching a plaid is a bit tricky. I find the easiest way to do it is to center my front panel on the plaid, cut it out, and then fold under my side seam allowances. Then I place the front panel on another section of plaid, right sides up, and move it around until the pattern is aligned. Being careful to note where the seam line is, I gently flip the fabric over, right sides together, and pin along the seam line. I then hand baste along the seam line, open it up to double check I have it in the right place, and then I sew it by machine. I also find it is easiest to choose a line in the plaid design to use as a guide for each seam line and cutting line, whenever possible.
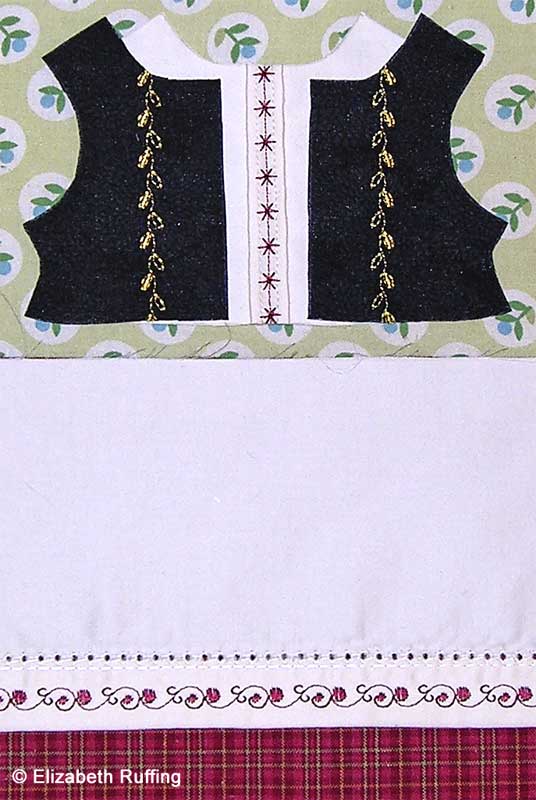 Instead of trying to machine stitch a decorative stitch directly on these tiny dress pieces, I cut my fabric out in a larger-than-necessary size first, a square or a rectangle, and did my decorative work on those. I did this for my decorative stitches and for the two pin tucks I made in the front of my bodice. I made see-through plastic templates from a plastic quilter’s template sheet for the pattern pieces that needed decorative work, and marked my seam lines with a permanent marker on the plastic. Then, after I did my decorative stitching and my pin tucks, I positioned my templates over my work, until I liked their placement, and then drew around them with a marking pencil. Then I cut out my fabric in the final dress pattern shape.
I got to try out my mirror stitch function on my new sewing machine too. On the vest, I flipped my leaf design so the two sides of the vest would mirror each other. Pretty cool. I used tear-away stabilizer under my fabric and Fusi-Knit interfacing, where necessary, for the decorative stitching to avoid puckering. I used rayon thread on top for the decorative stitching, with regular cotton sewing thread in my bobbin.


