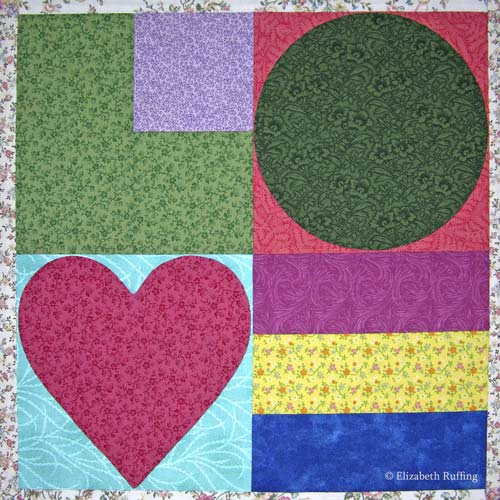
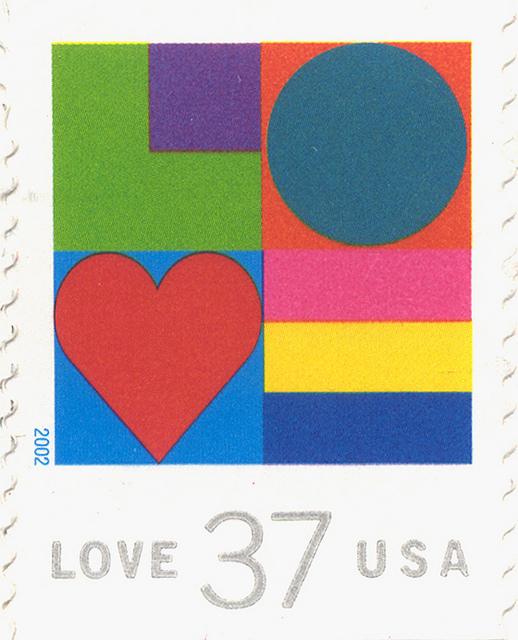
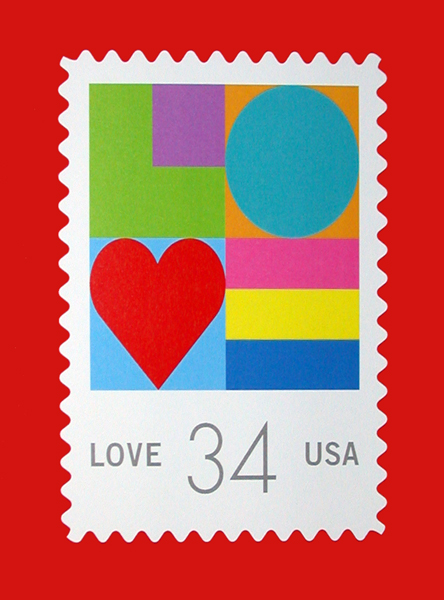
 I was looking at Facebook this morning and I saw a familiar postage stamp go by on my feed. Erika, of Miss Sews-It-All, had featured Michael Osborne’s 2002 Love Stamp from the U.S. Post Office, on her blog, suggesting it would make a great quilt block. I immediately remembered that I had thought the same thing, and had made one, back in 2003. I went rummaging and found it. I thought it would be nice to share for Valentine’s Day.
 My original pattern was more difficult to find, but at last it reappeared. I can’t even remember where now, but there were a bunch of quilt patterns I had drawn up with it. I put them all together for safe keeping. I will have to check the rest of them out another time. I saw a cute kitty quilt block in there too, which was based on a quilt my parents had.
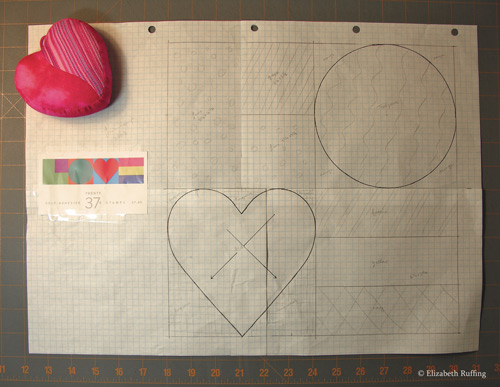 Michael Osborne’s Love Stamp design was more oblong than perfectly square, as I recall, and so I fiddled to make quilt blocks that would imitate the look of the stamp “letters”. This afternoon, I traced my pattern onto 8 1/2 by 11 inch sheets of paper, with one “letter” on each page, and made a PDF of my Love Stamp Quilt Block pattern that you can find and download here. Obviously, this pattern, or set of four patterns, is based on Michael Osborne’s copyrighted design, and so it is for personal, home use only. No selling it or anything made from it. Just open it, save it, and print it on 8 1/2 by 11 inch paper. You’ll need four sheets of paper. The final quilt block is 12 by 12 inches square, once it is in a quilt.
 The measurements listed in my instructions include a 1/4 inch seam allowance for all the square and rectangular pieces you’ll need to cut.
I used freezer paper for the appliqué shapes, the heart and the circle. I cut those two shapes to size, out of the freezer paper. I used an iron to temporarily attach the freezer paper shapes to the back of my fabric, and then cut them out adding a 1/4 of fabric all the way around, to turn under. Then I turned under the edges, and sewed them to my backgrounds by hand. Marcia from Quilter’s Cache, a wonderful resource for quilt blocks and directions, has a tutorial here on hand appliqué.
Alternately, you can cut the appliqué shapes to size, if you’d rather use machine raw-edge appliqué, fuse them to your background with WonderUnder, and then machine zig zag, blanket stitch, or satin stitch around the shapes. There are a lot of options for appliqué techniques out there. I have a tutorial for machine, raw-edge appliqué on fleece here. With cotton quilting fabric, you can use the cotton setting on your iron, and you don’t need a press cloth. No matter which technique you use, I find it is best to cut those background squares a little larger than necessary, and then trim them down to size after sewing the appliqués.
The rest is pretty standard piecing, which can be done by hand or by machine, and goes together easily.


