 I made this little Valentine Bird using the side, underbelly, and wing templates from this Martha Stewart bird pattern. I added a quilted tail and heart using my own pattern which you may use if you like. Seam allowances are not included…the lines are your sewing lines. I used the lines on Martha’s pattern as my sewing lines as well.
I constructed mine differently from Martha’s site’s directions. I didn’t enlarge any of the pieces. I just printed them on heavy paper, cut them out, and traced around them with a mechanical pencil onto the back/wrong side of my fabrics. I cut the shapes out of the fabric, leaving a little less than a 1/4 inch seam allowance around the outside of my pencil lines.
I took a small piece of yellow fabric for my beak, flipped it right sides together with my bird’s head and sewed along the line where the beak meets the head. Then I just flipped it back the right way, like paper piecing in quilting. Next I sewed the seamline along the back of the bird from the point where the underside of the beak meets the body to the tip of the back end, just sewing along the sewing lines, not past them. I turned it right side out, and then pressed under the seam allowance where the body meets the tail.

The tail, the heart, and the wings where all sewn with cotton quilt batting underneath. I left an opening for turning them right side out, trimmed the batting out of the seam allowances, turned the shapes right side out, and then slip stitched the openings closed. I added a little extra stuffing in the heart first. I hand quilted the wings and tail in lines about a 1/4 inch apart.
I took the quilted tail and slip stitched it to the bird’s body where I turned under the seam allowance. I let the back overlap the tail by about an inch.
I flipped the body right sides together again, loosely (I didn’t turn the beak back inside out). I hand stiched the underbelly to the sides of the bird, right sides together, leaving the area near the tail open by about an inch on either side. From this opening, I turned the bird right side out. I added a small handmade sack of Poly-pellets for weight, and stuffed him with Poly-fil. Then I slip stitched the opening closed, folding the tail in half to get the seam to come together.
The wings were attached with quilting thread run through the openings of heart-shaped buttons on either side, and the eyes are black buttons attached with white thread, also sewn right through, button to button. I hand embroidered my intitials on one side of the heart, with a “+” below them, and my Valentine’s intials on the back, also with a “+” below, using a simple back stitch and yellow embroidery floss. Lastly, I used some pearl cotton to make a loop through my bird’s beak to hold the heart, knotted it, and slipped the end inside the heart by pulling it through with my needle.
Happy Valentine’s Day!
Update: I made another variation of a Love Bird later. Please see this post:
http://elizabethruffing.com/2009/09/say-it-with-bird.html
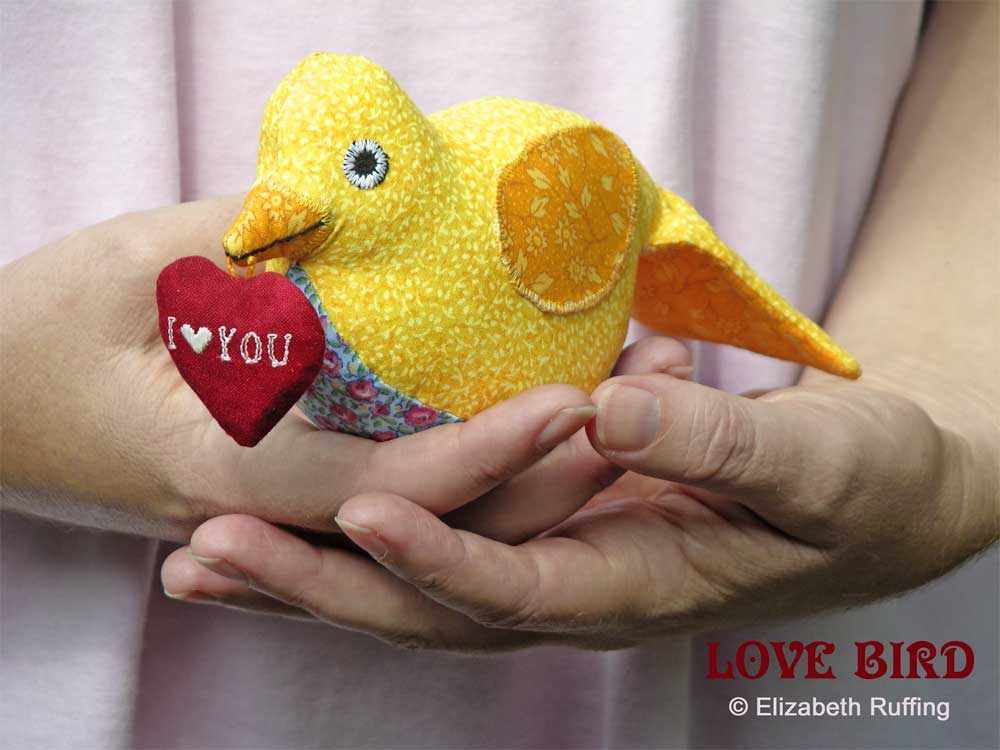
 This is my new little “Love Bird”. He’s part carrier pigeon.
 I’ve been fiddling around for two days, investigating all the things he can say in addition to “I (heart) YOU.”
 He favors brevity, but he gets his point across.
 I’m going to be offering these as custom orders, with a choice of one or two colors, and a choice of message. Each one comes with a handmade hang tag. The message will also appear on the tag in quotes. I can do initials and names, as long as the names aren’t too long. Eight or nine characters or fewer, including spaces, seem to look best. Contact me for details about ordering one.
 My Love Birds are made from 100% cotton quilting fabrics, which have been prewashed, and they are stuffed with Poly-fil polyester stuffing. Their features are machine appliquéd, and their tails are hand quilted. A small pouch of Poly-pellets in their tummies make them sit nicely.
 Some of you might remember my Valentine Bird, which was my inspiration for making this pattern. For my Valentine Bird, I had added a tail and a heart to an existing Martha Stewart pattern. For my Love Bird, I drew a more compact body and tail, incorporating the whole top of the bird in one pattern piece, and machine appliquing on the wings, beak, and eyes.
 Of course, the most important part of all the bits and pieces that go into making a Love Bird is LOVE.


