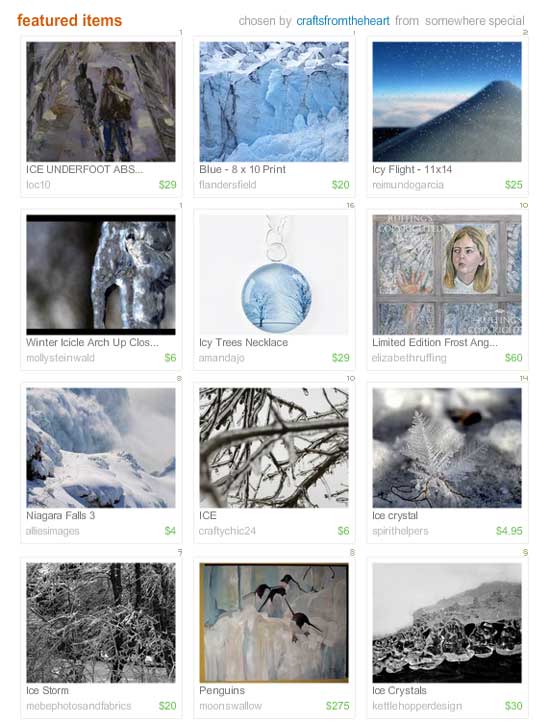
 Linda Pare at Crafts from the Heart added my “Frost Angel” giclée print to her “Help me I’m hot…I’m dreaming of winter” treasury list on Etsy. Thanks, Linda!
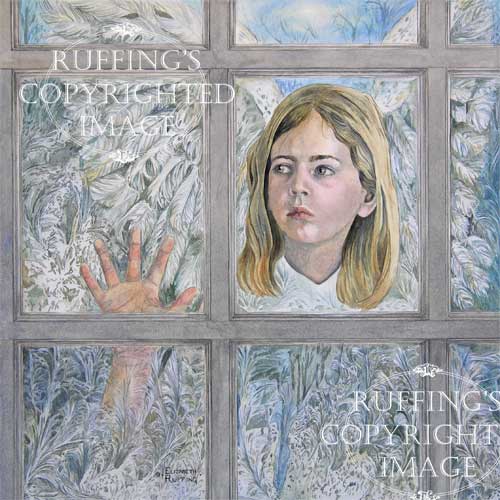 I’m having winter fantasies myself. Making snow angels sounds very appealing in this heat.
Handmade original cat art dolls, Hug Me Slugs and Friends stuffed animal plush, figurines, designer doll dresses, quilts, prints, greeting cards, gifts, clothing, fine art paintings, needlework, and sewing
Linda Pare at Crafts from the Heart added my “Frost Angel” giclée print to her “Help me I’m hot…I’m dreaming of winter” treasury list on Etsy. Thanks, Linda!
I’m having winter fantasies myself. Making snow angels sounds very appealing in this heat.
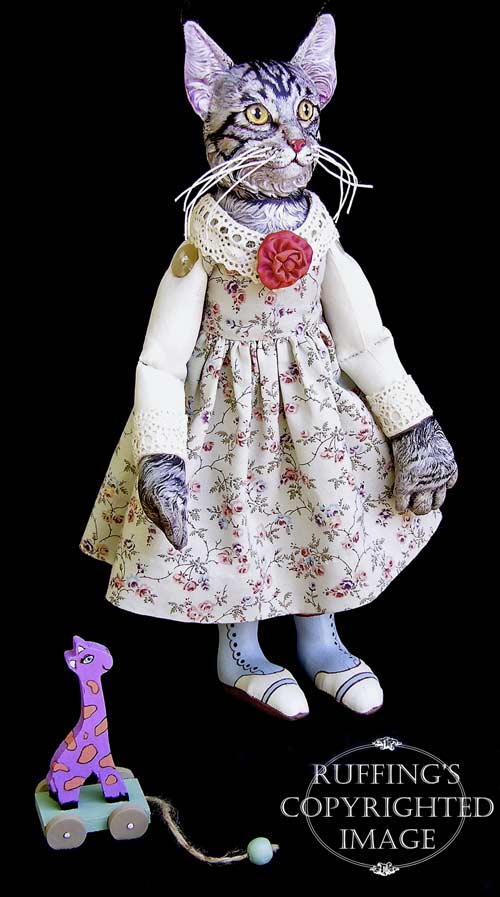
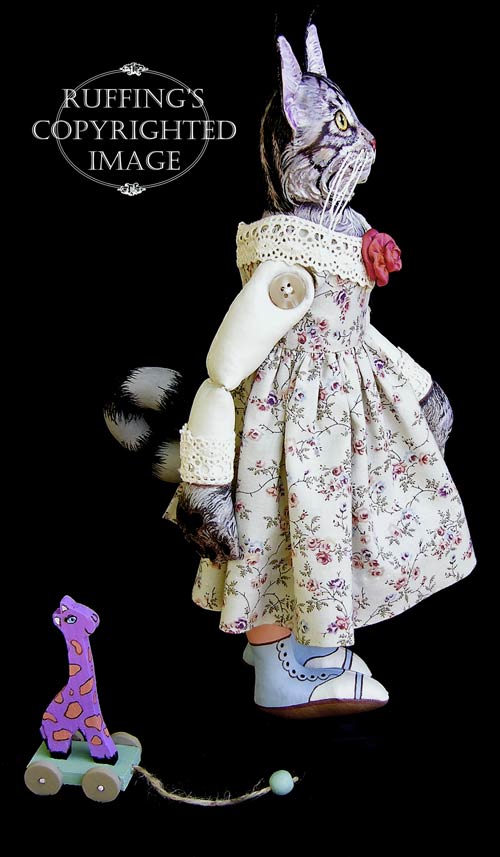
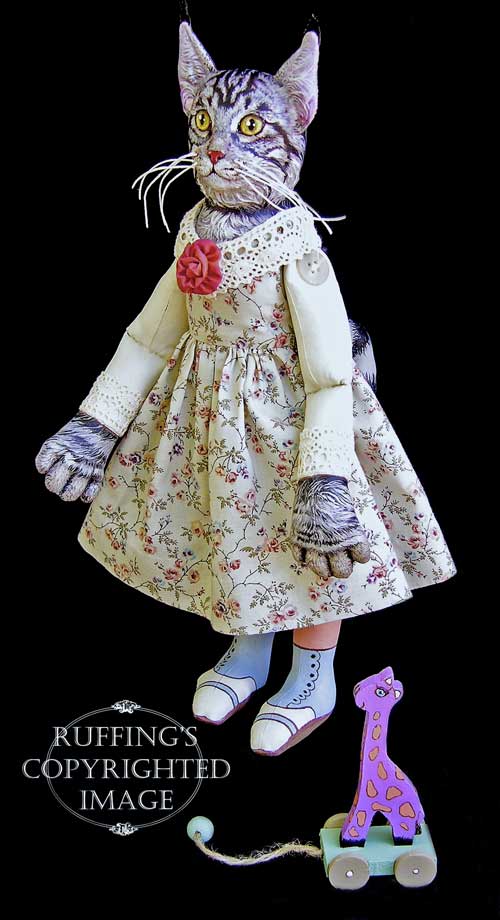
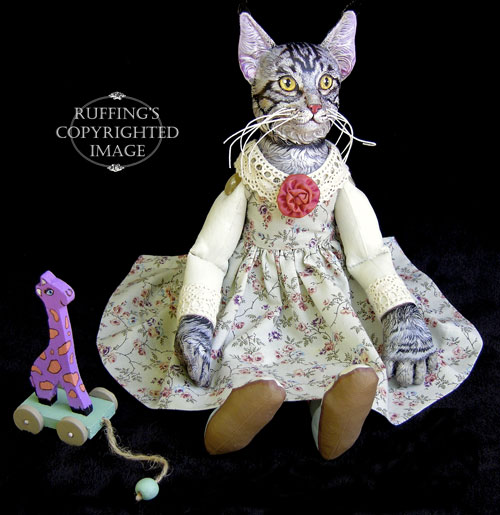 Catarina is a lovely silver tabby Maine Coon Cat.
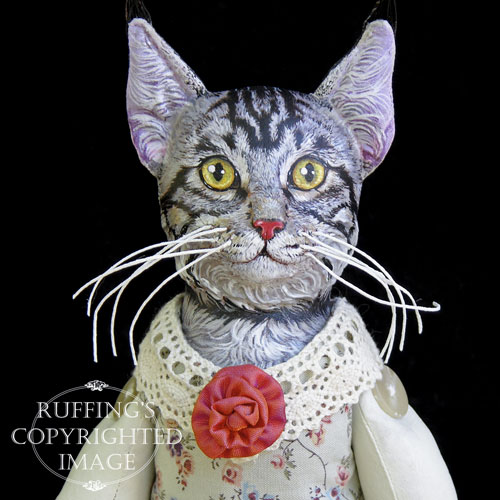
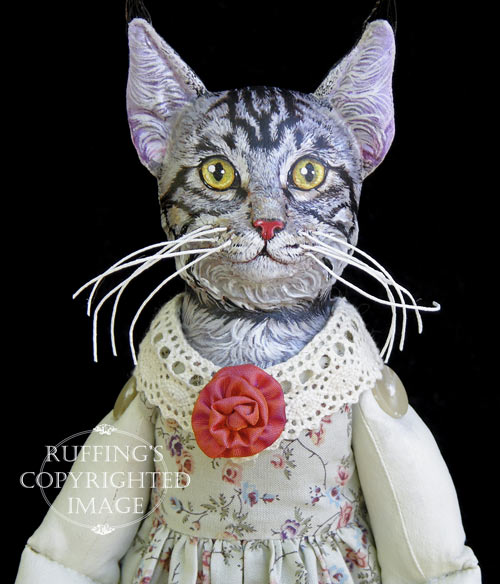 You can tell she’s a Maine Coon cat by her large tufted ears, her big oval eyes, and her long whiskers.
 Catarina, in spite of her name, has no idea she’s a cat.
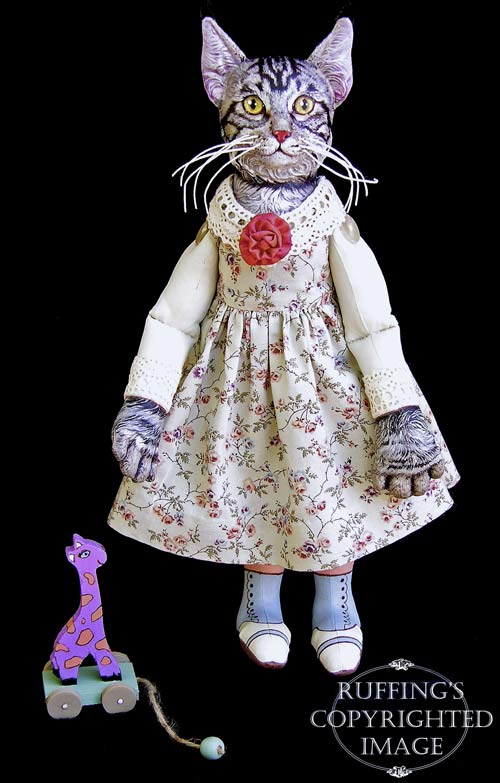 She’s quite sure she’s a person, but just a bit more clever and a great deal more fashionable.
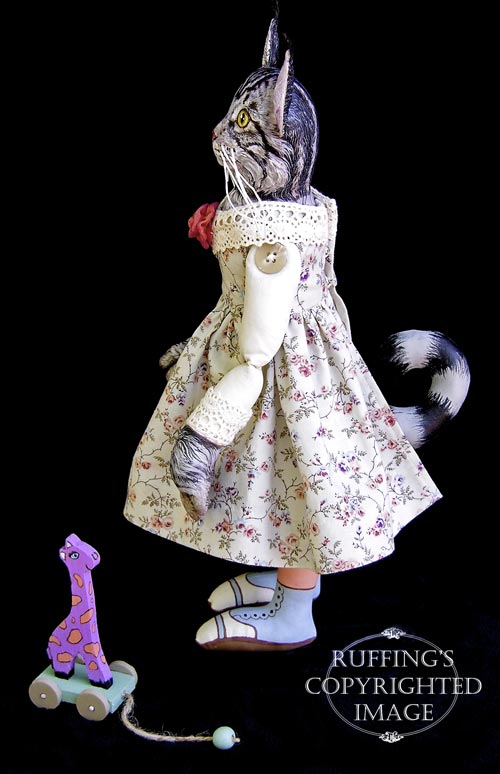
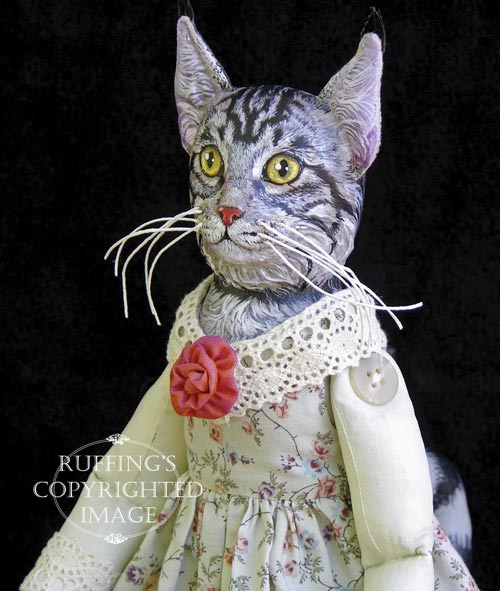 She loves her flowered dress with its lace shawl collar and cuffs. The rosette on the collar looks just right with her pretty nose.
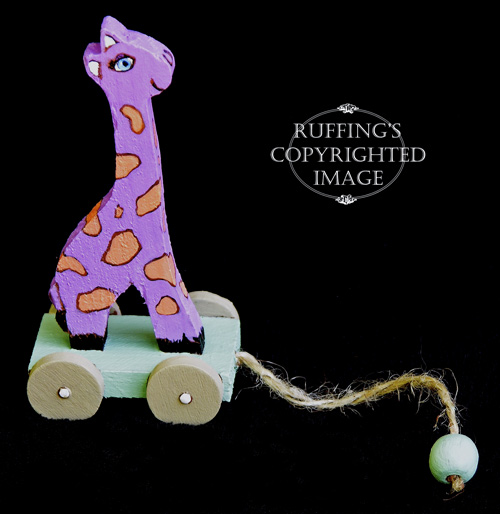 Her favorite pull toy is Harold. He’s a purple giraffe. Catarina doesn’t know what a giraffe is, but she doesn’t think he’s a person, like herself.
 When they take a walk, he rolls along behind her, unless they’re going down a hill.
 Catarina is an original one-of-a-kind work of art, created from my own design and patterns. She is made from 100% cotton fabric which is sewn, stuffed, and completely hand painted with acrylic paints. She is 13 inches tall and meant for display only.
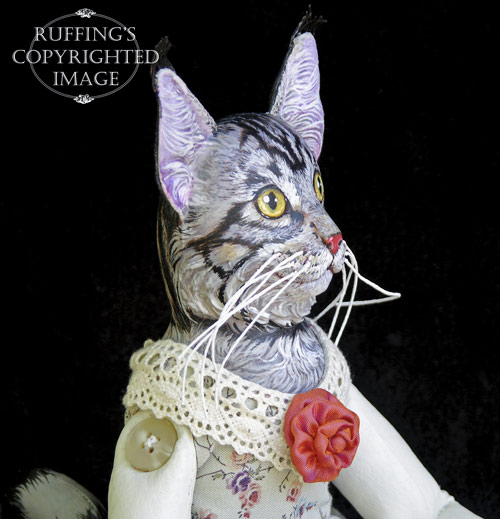 I sculpted the front of her face from paperclay, which I smoothed into the fabric. Her whiskers are made from stiffened pearl cotton, threaded through the clay before it dried. The tufts on her ears are stiffened cotton thread, sewn into the tip of each ear.
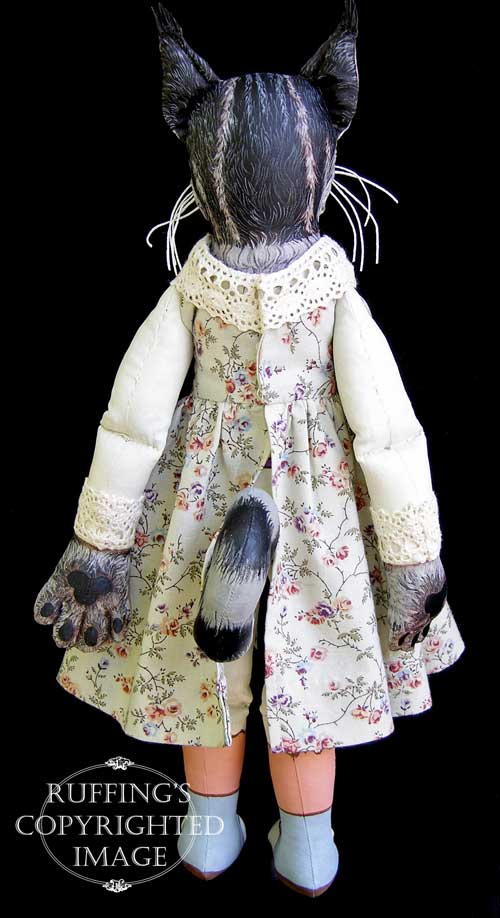
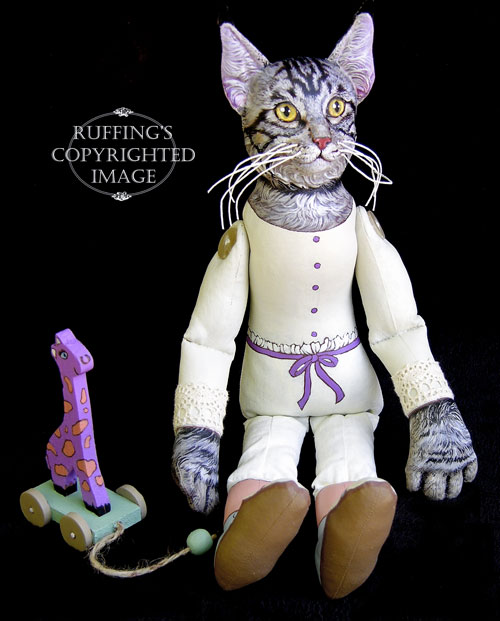 Her arms are button-jointed, so she can be easily posed, and her paws are needle-sculpted.
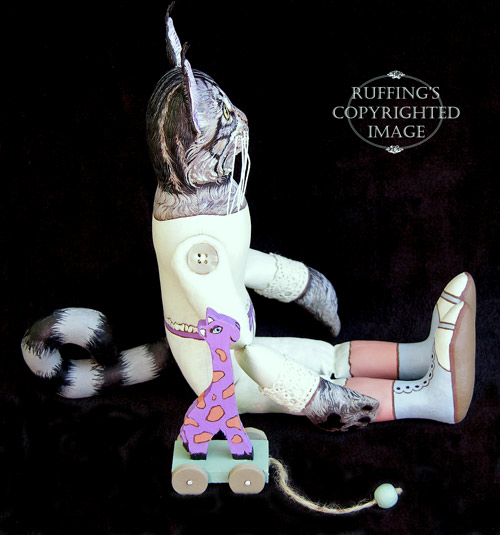 Catarina’s striped tail supports her very nicely, so that she can sit up all by herself. She can also sit on a chair, or stand with a doll stand. (Chair and doll stand not included.)
 I made Catarina’s fashionable dress from cotton fabric that has a delicate pattern of dainty leaves and roses which are blue, orange, and purple.
 The lace at the neckline and cuffs is real cotton lace, sewn on by hand.
 She has painted white bloomers, and her kitty legs are covered with orange tights that match the roses in her dress. She wears cute little two-tone high button shoes in blue and ivory.
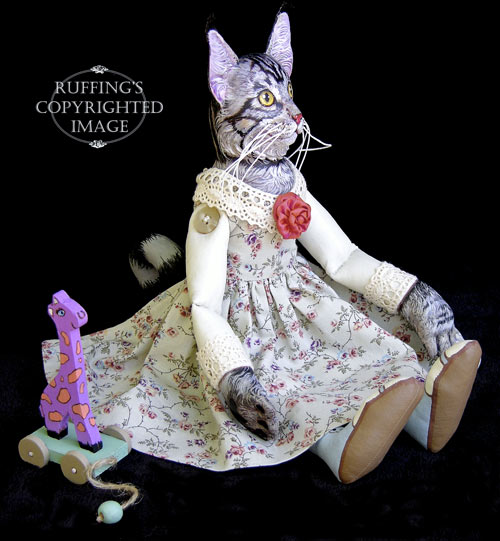 Harold the giraffe is made of wood, which I hand painted. He is 3 and 3/4 inches tall and his base is 2 inches long.
 Catarina and Harold are signed and dated, and sealed with matte varnish for protection and preservation.
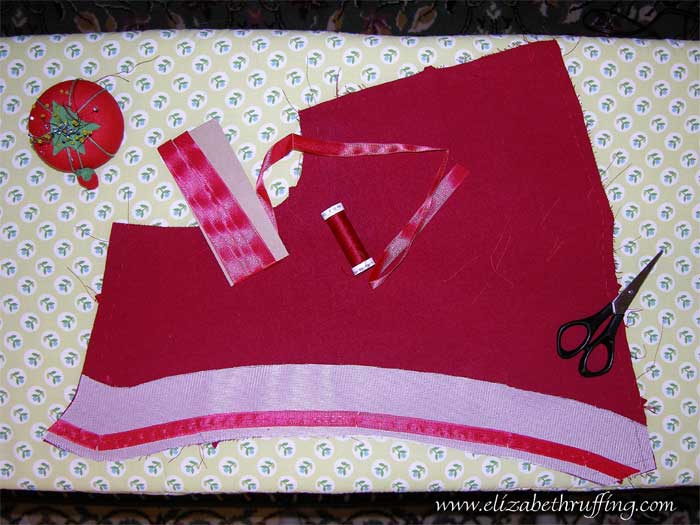 I transferred my corrected sewing lines onto my pattern pieces and re-cut a couple of pieces where the seam allowances were too narrow from my sizing mistake. It is a good idea to buy extra fabric as mistakes almost always happen. In the “old days” fabric stores would give you a little more than you asked for, to compensate for shrinkage and pattern repeats, or just to be generous. This doesn’t happen too often now. Depending on what I am making, I estimate how much extra yardage I might need if I had to re-cut the largest piece. If that becomes too extravagant, I take my chances and try to be extra careful.
I also drew extra lines on my front bodice paper pattern pieces as guidelines for strips of interfacing, about 2 and 5/8 inches from the center edges. Since this is a wrap dress, the front edges are on the bias, which has a tendency to stretch. Unlike the skirt part of the dress, I don’t want this to grow. In fact, I want to make it just slightly shorter, by 1/4 of an inch, than the pattern pieces. This is a modification of a technique from Sandra Betzina’s Power Sewing. This will keep the dress from flopping open when I bend forward.
I cut out Fusi-Knit interfacing, following the lines I have drawn on my paper pattern. I just lay the interfacing over the paper and trace the lines. Then I remove 1/8 of an inch from either end of the interfacing pieces, to make them a total 1/4 inch shorter from top to bottom. I find it is easier to look at my cut-out fabric and figure out which side up the interfacing should be when I cut it out. The glue side should be against the wrong side of your fabric piece. For me, it is just easier to figure this out while I have the fabric piece in front of me.
My bodice is lined with the same fabric I am using for the rest of the dress, rayon challis. I lay my facing pieces of my bodice, the ones I am using as lining, on my ironing board, wrong sides up, and using my fingertips, I very slightly push the bias center edges toward their middles, to make them shorter. I lay my paper pattern pieces over the fabric pieces to check for size. I want to make the edges 1/4 of an inch shorter from top to bottom than the pattern edges. I want the middle third of this area to be taken in the most. I use steam from the iron to shrink the edges to size. Hover the iron over the fabric to let the stream shrink the edges. On rayon, this works very well.
 Once the center edges of the bodice are the corrected size, I lay the Fusi-Knit on top. Adjust the temperature on your iron to the synthetics setting, wait a moment for the iron to cool a little, then use the iron to “tack” it down to the fabric in a couple places so the interfacing won’t shift. Fusi-Knit requires a little extra attention so you don’t melt it. I melted some just today! Lay a press cloth over the Fusi-Knit and follow the manufacturer’s instructions to bond it to the fabric. Remember not to touch an overly hot iron directly to the Fusi-Knit during the construction of garments as well. Use a scrap piece of fabric and interfacing to get an idea of the proper temperature settings. This will save you a possible mess. I have melted fusibles onto my iron and my ironing board before, which reminds me…make sure you have the rough glue side of your fusible against the fabric and not your iron. I have done this without thinking a few times too.
I interfaced my back collar pieces while I was doing this as well.
Again, using the paper pattern as a guide, I measured some hem tape to the same shortened lengths of the front edges of my bodice pieces. Stay tape or twill tape is fine to use too, but hem tape is what I had and it was light-weight, like my fabric. I hand-basted the hem tape along the sewing lines of the front edge, just as an added measure to prevent stretch should the elasticity of the interfacing loosen over time. I clipped the hem tape at the curves at the top near the neck area.
Oddly, I still haven’t looked at the pattern directions! I’m relying on my memory, but I really wish I had kept notes when I made this dress before. I usually put things together my own way, based on modifications I’ve made, and notes would have been helpful. I did find some on the pattern pieces themselves, but that was after I studied my previously-made version of this dress! Notes are nice.
 Vintage me and vintage Dad.
If you need any help finding anything on our site or have any questions, please contact us at [email protected]
We will be posting our creations in our Ruffing’s shop, here on this website, and are in the process of moving everything here. If you are looking for something and don’t see it yet, please feel free to ask!
Please click the photo below to subscribe to our mailing list and receive updates when we have something new to share:


