Posted on

Masking

I got my masking done on my little watercolor. Masking at its best is still like painting with thin rubber cement, and here I was trying to “paint” a lace collar with masking fluid, which was quite difficult. I can do this, I know, but I may take a departure here. The handout on the Claybord I recently bought says you can scratch the surface with a wire brush to make hairs. I might experiment and see if there is a way to scratch lace onto it. I think it might make an interesting effect, if it works.
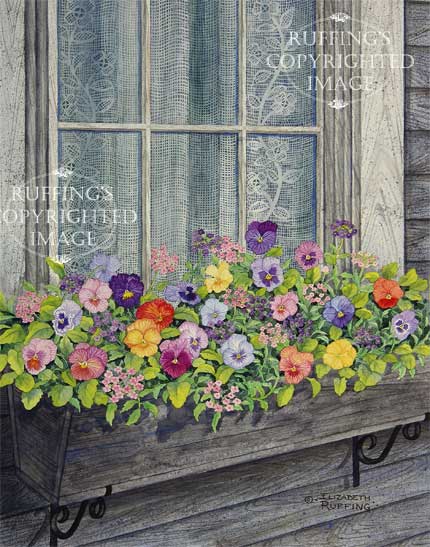
In “Window Box with Pansies“, above, I used masking fluid to paint the lace. Then I painted the watercolor over it. The masking was removed with some dried rubber cement. You can make your own eraser out of rubber cement by pouring some into a cap and letting it dry. You pry it out when it’s dry and wad it up into a ball. It works very well for removing masking fluid. You press and lift, and the masking fluid comes up with it.
Masking has its challenges aside from being somewhat “gunky” to work with. First there is the issue of your brush getting ruined. You can put plain soap on your brush (I wipe it on a bar of Ivory soap) as you paint with the masking fluid to protect your brush. Rinse your brush with water, wipe it on a paper towel, and re-soap your brush frequently before dunking it into the masking fluid. This will keep your brush hairs from getting glued together. Then there is the problem of not being able to see the masking fluid well on your paper. It used to be easier to find gray masking fluid, but now most of what you run into is yellow or white, which means you can’t be sure what you are painting as you paint. Then there is the issue of your watercolor shying away from the masking. Watercolor doesn’t always like masking fluid and doesn’t always stay right up against your masked lines. All in all, it’s a bit hit and miss.

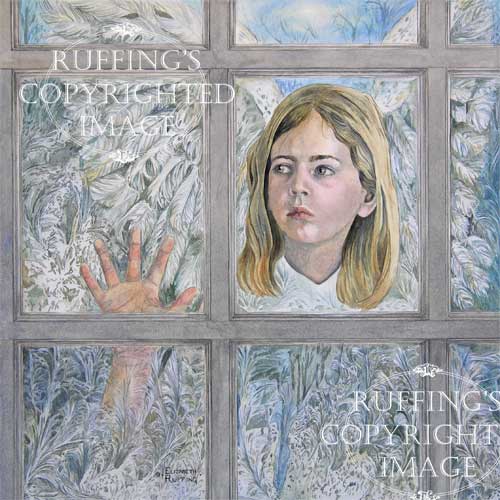
The Frost Angel“, above, was done without masking, by working “dry brush” in sections. This means the whole background wasn’t wet to begin with. You work on dry paper. This gives you more control, but it isn’t feasible in some situations, like when you want a larger, fluid, or blended background, as you would with a sky. The masking fluid protects areas where you can’t stop to control everything. Also, working out the details and having to be conscious of where you are going in a painting like “The Frost Angel” is like being lost in a maze sometimes. You have to remember what you want to be light and dark at all times, and not mix them up.

Watercolor purists use the white of the paper for their whites, and they avoid using opaque paint, which is, technically, referred to as gouache. I was taught to be a purist. Why this is important, I cannot tell you. I think some of us embrace the sheer difficulty of doing this. I do love a challenge, but I have also done this, and I know I can do this, already. Right now I am curious to see what else I can do, and I am thinking I want to scale this drawing up to fit my Claybord and give it a whirl. I’m interested to see if I can scratch lace into a painted area…just to see if I can.
Posted on

Expanding my choices

Even though I’ve already transferred my drawing, I continue to have other ideas about how I feel like painting, in general. I went on a run to pick up some masking fluid today, and an extra kneaded eraser. I hung out in the art supply store for a while, seeing if anything might intrigue me. I picked up a couple of different painting surfaces, held onto them for a while, and put them back. I finally settled on some Claybord/Aquabord that is meant for use with watercolor. I keep looking for a one-size-fits-all painting surface solution since I keep feeling frustrated. This sounded like a good potential compromise, if it works well. I’ve never tried it, and so it will be interesting to see what effects it gives. It will also be interesting to see if I try it, considering all the wavering I’ve been doing 🙂

This surface is also available in a cradled format, which gives it that deep profile which is popular as of late. Personally, I do not feel all that contemporary, and prefer frames to that more modern look. I like to have the option to put a painting in a frame, and your framing options all but disappear when your painting has a thick profile like that. I feel like I’m butting heads a lot lately with what I perceive to be popular, and I’m getting unnecessarily confused over it.

I’m also feeling drawn more toward fantasy art, angels in particular. Something is brewing inside and I’m not sure what it is yet. A sense of dissatisfaction, some nervousness, perhaps a desire for comfort. I don’t know. I feel like I’m having some growing pains.

I suppose the sane thing is to stay the course with the four small drawings I’ve already done, and do them on the watercolor paper I’ve already cut and marked. I’ll see how I feel about it as I go.

Posted on

Forging ahead in the face of uncertainty…Transferring

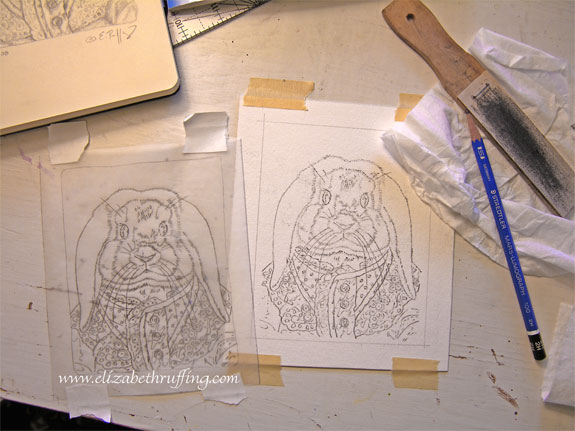
Moving on…This a quick rundown on transferring a drawing to watercolor paper (or a surface of your choice). The first step is to cut a piece of tracing paper slightly larger than your original drawing, and tape it over the original drawing. I’m using Scotch 3M Safe-Release tape (the white kind you find in art and craft stores) so it won’t disturb the surface of my sketchbook when I remove the tracing paper. There are different kinds of artist tapes, that don’t leave residue, for different surfaces. I use a mechanical pencil to outline the main areas of my drawing onto the tracing paper. I use solid pencil lines to represent areas where I will want to paint a hard edge (like the outer edge of the head), and dotted lines where I will want to paint a soft shaded edge (like a shadow).

Once I have a tracing, I tape my watercolor paper to a firm surface, my work table in this case. I tape it down with Scotch Drafting Tape this time, for a more secure hold. I don’t want it to slip. I tape my tracing in place over the watercolor paper using the Safe-Release. I can keep an eye on the tracing if it starts to move, and so it doesn’t matter as much. To be more secure, you can use the drafting tape instead. I sharpen a hard pencil. I like to use a 2H. If it is too sharp or hard, it will cut the tracing paper. So experiment first for a good balance.

I slip a piece of transfer paper (I use Saral) between the tracing paper and the watercolor paper. You can use homemade graphite paper, if you wish. To make some, take a piece of tracing paper and a 2B pencil (the wide flat ones work best), and cover the paper with graphite. Once you’ve covered it, take a cotton ball with some rubbing alcohol on it, and rub it across the graphite-covered surface to even it. Let it dry and you’ve got your own transfer paper. Carefully trace your drawing with your hard pencil, avoiding leaning too hard on your drawing as you go. Putting an extra piece of paper under the ball or side of your hand is helpful so you don’t make smudge marks through the papers with your hand.

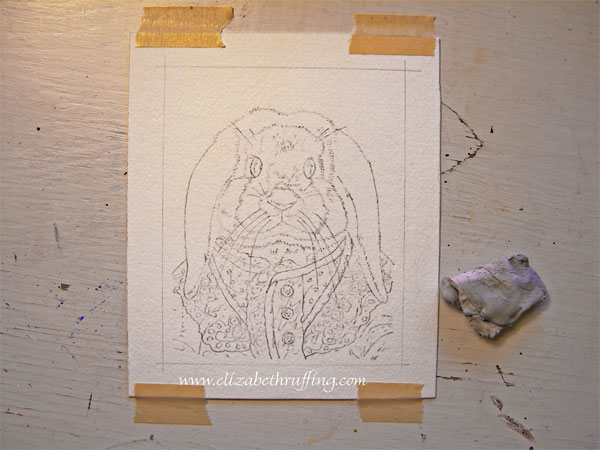
When you’ve transferred all your lines, remove the tape from one corner of your tracing and double check that you’ve gotten all the lines transferred. Once everything looks fine, remove the tape and the graphite paper. Don’t slide it any more than you need to. Lifting it up makes fewer smudges. You will have some smudges anyway.

Take a clean kneaded eraser and press and release the eraser on the watercolor paper, gently lifting the excess graphite off. This is how you get the smudges off, but you also want lighten your lines, if necessary, leaving only faint lines to paint by. Some watercolor colors will lock the graphite lines in place and you won’t be able to erase them. So, it is best to work with the faintest lines with which you can stand to work. Knead your eraser frequently to avoid putting the smudges back onto your paper. Kneading it keeps it “clean” (at some point, it will become too full of graphite and you will need to get a new eraser).

That’s about it. If you are transferring to canvas, you will want to secure your tracing to it with canvas tape (tape for use with canvas), because the others won’t hold. If you have canvas on stretcher bars, you will want to put a book or some other filler under the canvas to keep it rigid while you transfer your lines.

Posted on

Getting ready to paint?

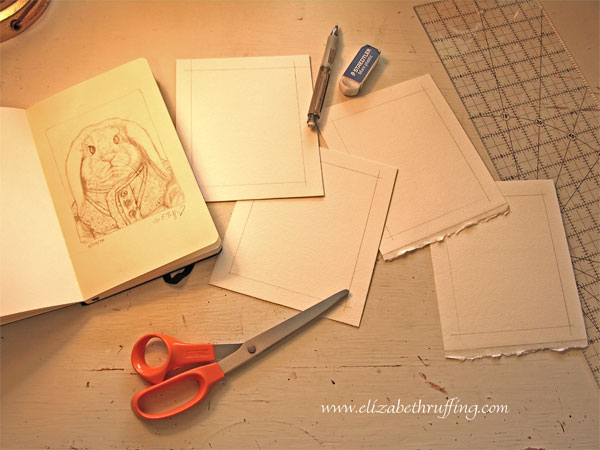
After a lot of fussing over how wide I wanted my borders to be, I cut out some watercolor paper. I don’t know what’s gnawing at me, but something is. It may just be that nervousness you get when you are about to start a painting, or maybe it is something more. Last night, I started thinking the little animals in my recent drawings looked uncomfortable, or restricted, in their clothes, and then I started thinking that was a metaphor for my own discomfort. Or perhaps I was just reading something into the drawings based on my own feelings. Art is a tricky two-way street, of sorts. It is, in one part, contrived by the artist to create an effect, while at the same time, it often reveals things about the artist, even to the artist herself (or himself). I say this realizing it is a bit humorous since I am in a quandary over pictures of animals wearing dresses. But the weird thing is that this is always true.

So, on some level, I am feeling constricted, whether it is by painting medium, subject, marketability issues, or just in general. I’m having some trouble getting to the heart of what it is that I want to do that I’m not doing. I can’t decide if I am stymied by wanting to do more things than I can possibly do all at once, or if there is something, some idea, that wants to be expressed that isn’t being expressed. I could suggest many possibilities, but I just don’t know which one is the answer, if there is one answer. All I can do is try different things on for size and see if any fit.