Posted on

Stitch-along, Bluebird Quilt Block Part 3, Satin Stitch

Back to the bluebird block…I finished embroidering the raw edges of the branch using the blanket stitch. I experimented with an alternate stitch, but liked the blanket stitch better. For the rest of my raw edges, for the most part, I used a satin stitch. The satin stitch was pretty easy and it looked very nice. Just a rundown on the basic steps first…Poke your threaded needle through your fabric from the wrong/back side to the right/front side of the fabric, just to the inside of your raw edge. I’m using a purple line in my photos to represent the actual edge of your appliqué. (You can click my photos to make them larger.)

On the right/front side of your fabric, poke your needle through to the back of your fabric along your raw edge, and, in one movement, back out to the front of your fabric, just inside the raw edge, and just next to the point where your first stitch emerged.

Pull your stitch gently taut without making it tight enough so that your fabric puckers. You will be repeating these basic steps over and over along your edge to finish your raw edge.

Take your next stitch just under your first stitch as you repeat the same steps.

Keep an even tension on your stitches by pulling your floss gently.

Continue along your raw edge until you have reached the end of the shape you are working on. You will switch colors of embroidery floss depending on the color of your appliqué shapes. Again, I made a little knot in the back when I ended a color or ran out of floss on my needle. Since the block will be quilted, it shouldn’t matter too much.

You will need:
  • Assorted colors of embroidery floss depending on your fabric choices (I used DMC black/310, white, 168, 260, 317, 370, 392, 646, 726, 742, 783, 797, 826, and 842)
  • An embroidery needle (I think mine was a size 10)
  • A hoop (I used a 9 inch wooden hoop for an 11 1/2 square of fabric. If your square is smaller, you might want a smaller hoop.)
Following the edges of each colored shape, follow the basic satin stitch steps to finish each edge.

I took a few random stitches here and there just for effect, like on the bird’s belly and chest.

I added a little white stitch in his eye for a highlight.

His claws are also done in a satin stitch. You can see the blanket stitch along the edges of the branch in this picture too. I tried using a lighter gray on the top of the branch, and a slightly darker gray along the lower edge of the branch. Where the branch got very narrow, I used a satin stitch right over my fabric because I felt it was too thin to hold up on its own.

That is about it for finishing the embellishment on this block. It will be trimmed down and squared off later when I set it into its destination. It’s finished size will be 9 inches, which means it will be trimmed down to about 9 1/2 inches to include seam allowances. I will be careful not to cut through any of my embroidery stitching to make sure it doesn’t come out later. But, we will wait to trim it for now. I am still debating over how I will use the block. We shall see…
Posted on 1 Comment

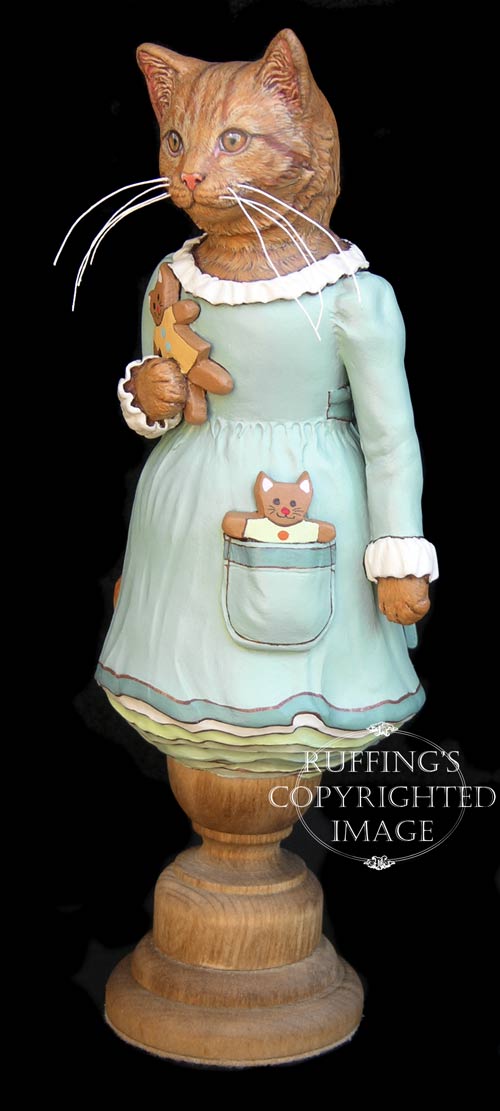
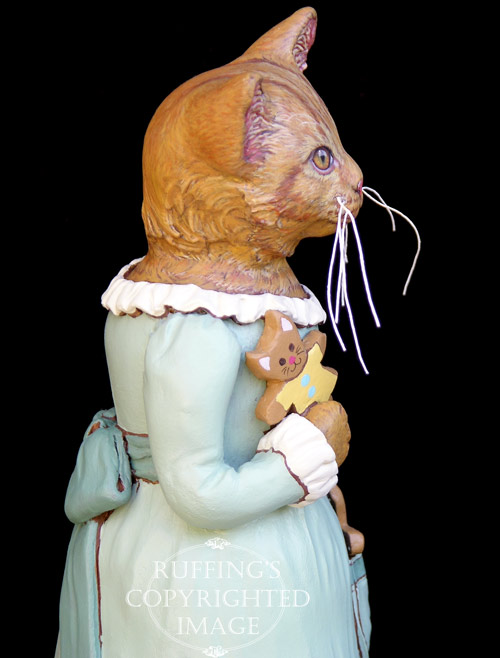
Ginnie, Original One-of-a-kind Ginger Tabby Cat Folk Art Doll Figurine by Max Bailey

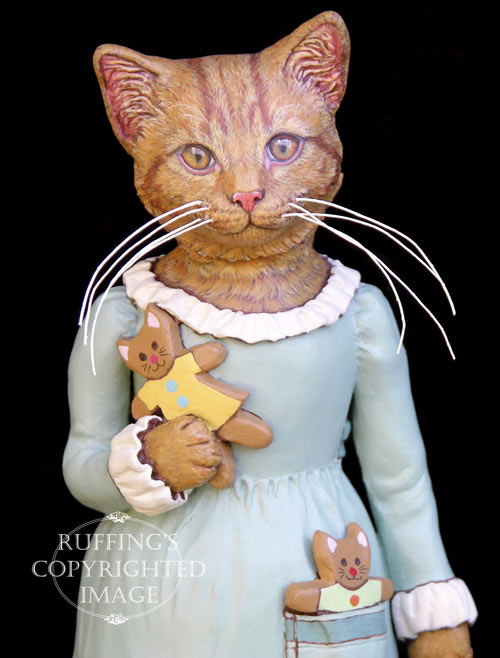
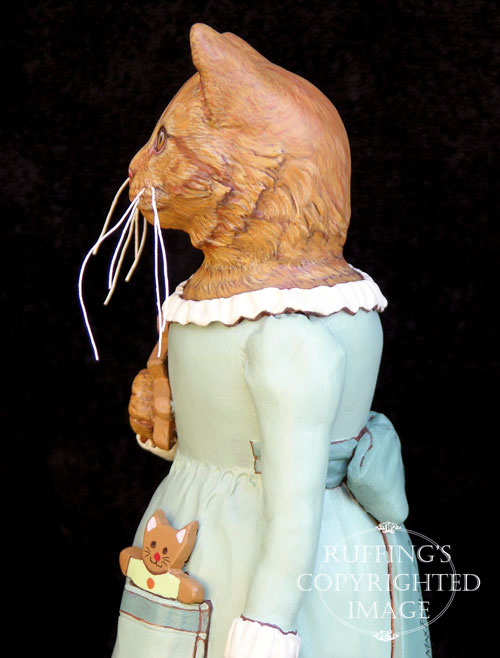
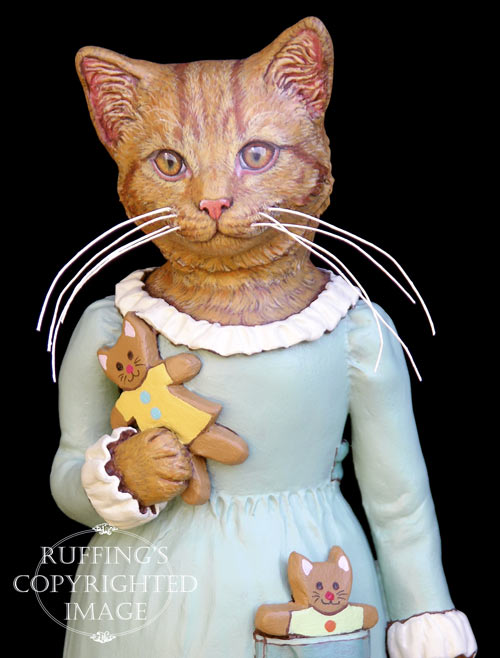
Ginnie, Original One-of-a-kind Ginger Tabby Cat Folk Art Doll Figurine by Max BaileyEvery Saturday morning Tony the Baker takes a batch of freshly baked gingerbread kitties from the oven, and decorates them with colored frosting, currant eyes, and candy buttons. They are his specialty. He sets them on trays and proudly places them on display in the bakery window.

Tony knows that shy little Ginnie, the ginger tabby cat with the sweet face, will stop on the sidewalk to admire them. She always does.

Ginnie, Original One-of-a-kind Ginger Tabby Cat Folk Art Doll Figurine by Max BaileyShe will look wistfully at the cookies, her head tilted slightly to one side, then sigh softly and continue on her way. Tony will gaze at Ginnie through the window, admiring her beautiful coloring, her amber eyes, and her graceful ways.

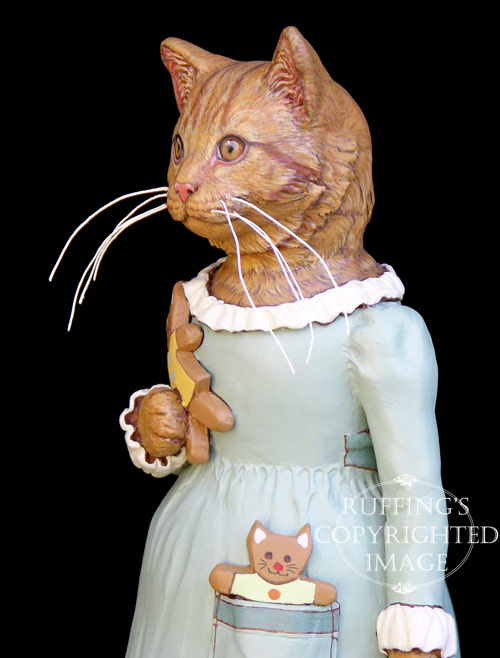
Ginnie, Original One-of-a-kind Ginger Tabby Cat Folk Art Doll Figurine by Max BaileyGinnie has two loves in this world so far………the color green, and gingerbread kitties.

Ginnie, Original One-of-a-kind Ginger Tabby Cat Folk Art Doll Figurine by Max BaileyOn this particular Saturday, Tony the Baker appears suddenly in the doorway, holding two gingerkitty masterpieces he has just made especially for Ginnie.

Ginnie, Original One-of-a-kind Ginger Tabby Cat Folk Art Doll Figurine by Max Bailey “I made these for you,” Tony manages to say as he holds them out to her.

Ginnie, Original One-of-a-kind Ginger Tabby Cat Folk Art Doll Figurine by Max Bailey“Oh, I couldn’t, Mr. Baker,” Ginnie tells him, and only she knows that she is blushing. “I have to watch my waistline.”

Ginnie, Original One-of-a-kind Ginger Tabby Cat Folk Art Doll Figurine by Max Bailey“There could be no harm in a little nibble now and then,” answers Tony. “Here is one for you, and one to give to a friend.”

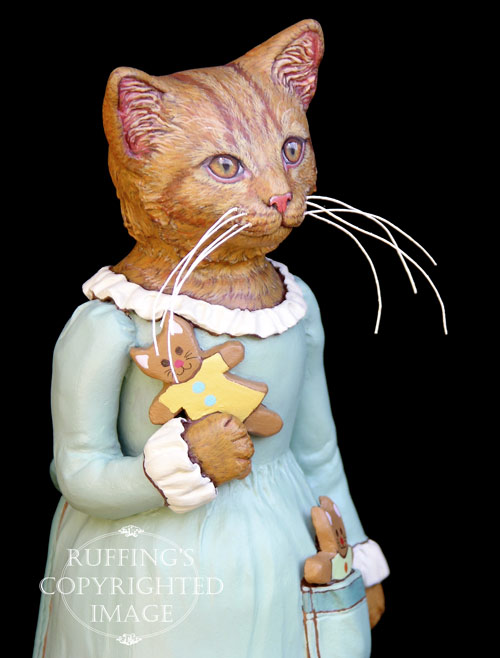
Ginnie, Original One-of-a-kind Ginger Tabby Cat Folk Art Doll Figurine by Max BaileyGinnie thinks how pleased her friend will be when she gives her the gingerkitty with the green shirt. She takes it and puts it in her pocket, for she is generous of heart. She extends her paw for the other.

Ginnie, Original One-of-a-kind Ginger Tabby Cat Folk Art Doll Figurine by Max Bailey“Thank you kindly, Mr. Baker,” she tells him, and holding her gingerkitty somewhat near her heart, Ginnie continues down the sidewalk, glancing back at Tony the Baker only once, or maybe twice.

Ginnie, Original One-of-a-kind Ginger Tabby Cat Folk Art Doll Figurine by Max BaileyGinnie now has three loves in this world so far.

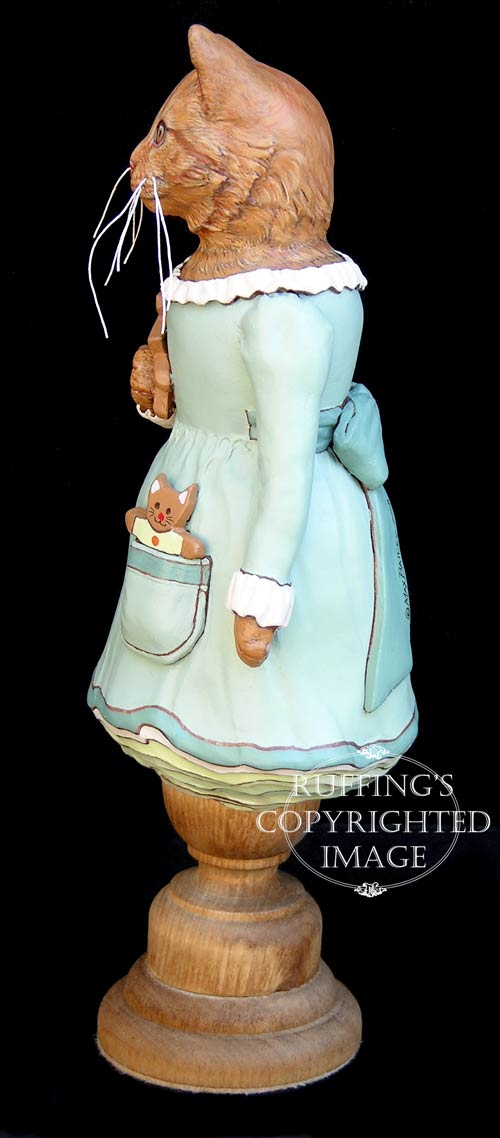
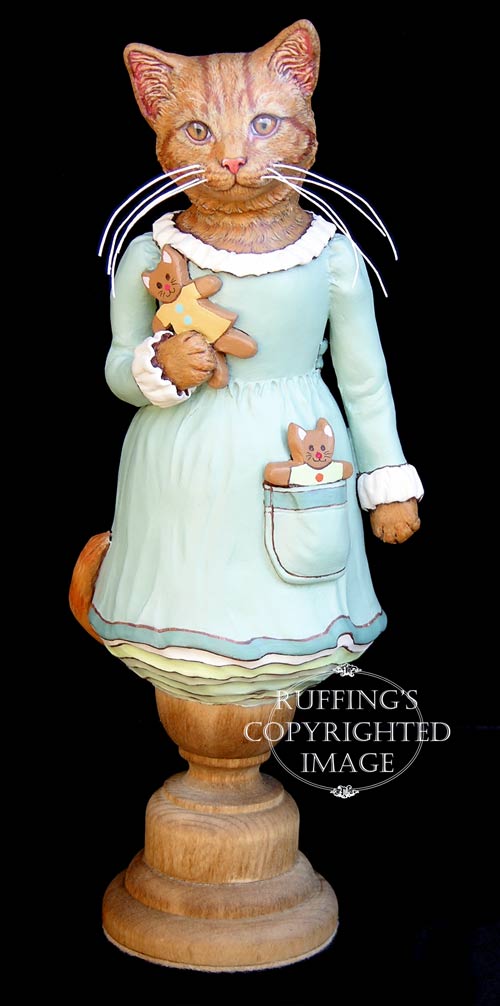
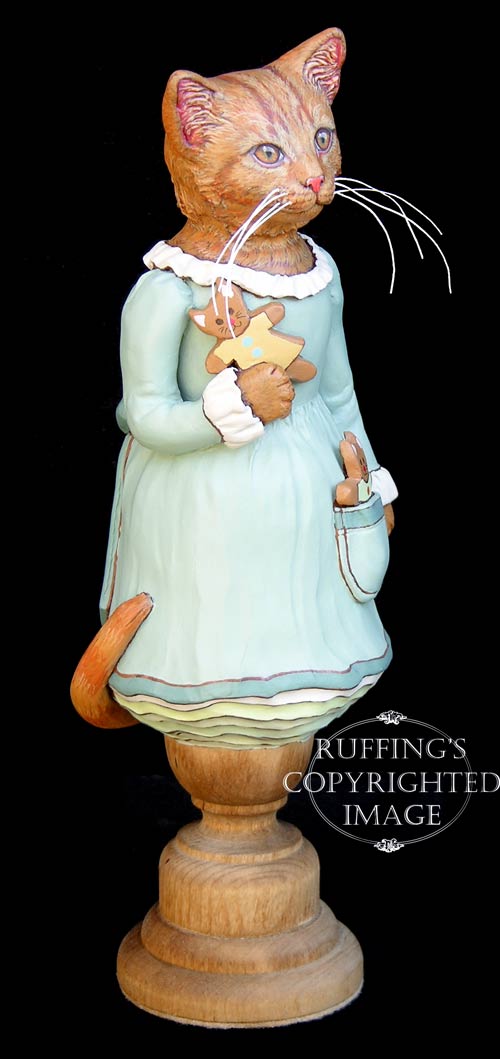
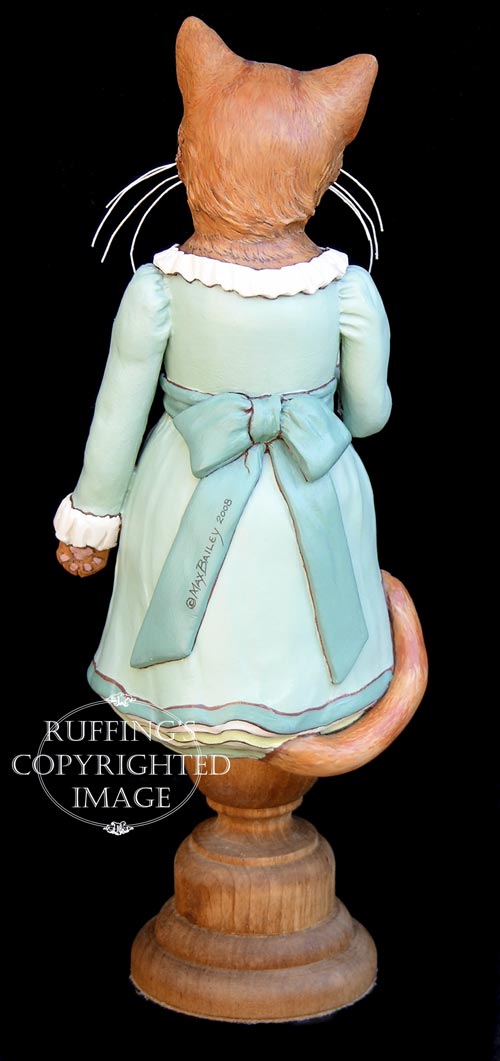
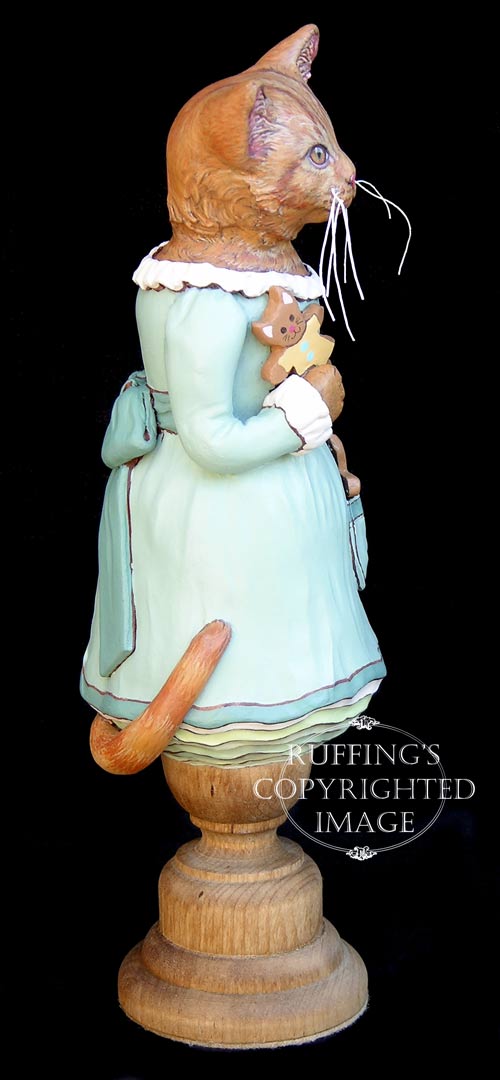
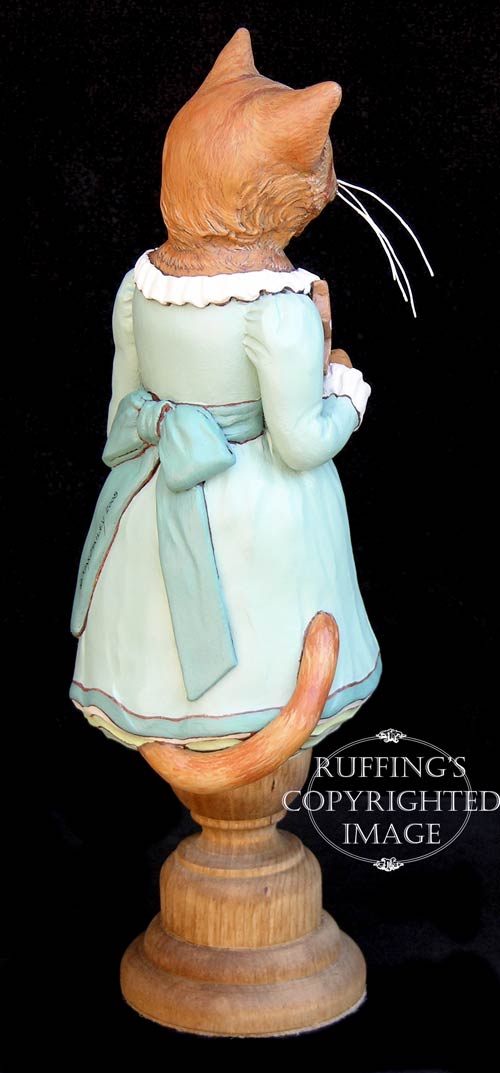
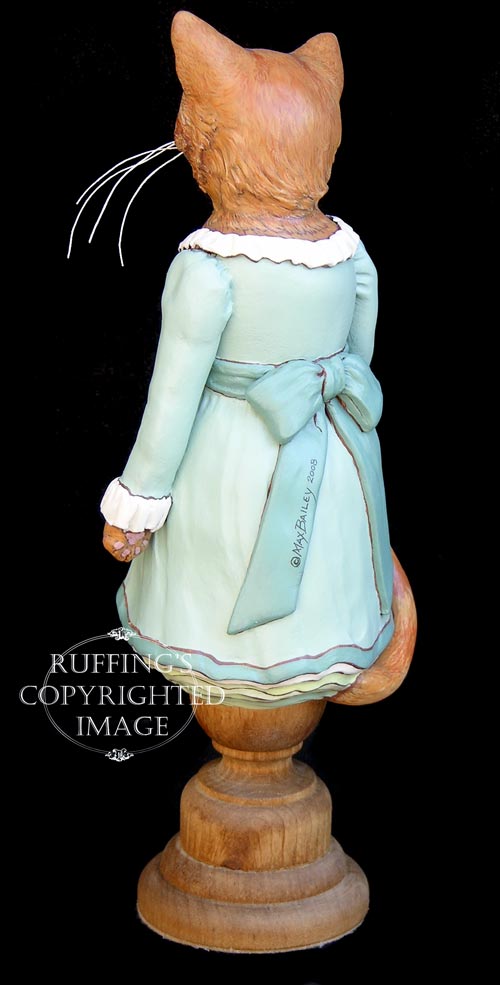
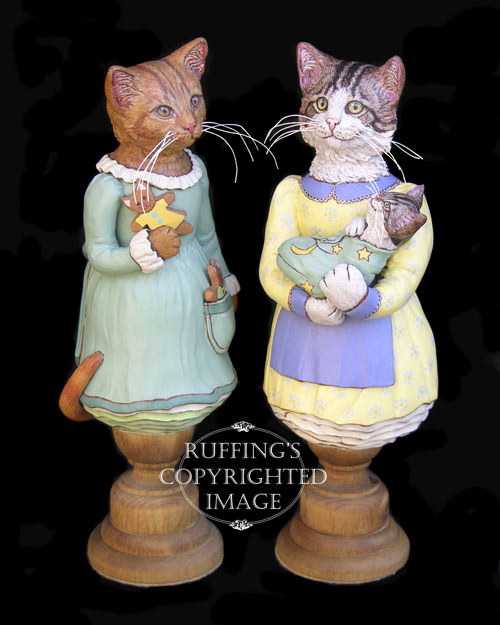
Ginnie, Original One-of-a-kind Ginger Tabby Cat Folk Art Doll Figurine by Max BaileyGinnie’s dress is her favorite color green, with a darker green sash that ties in the back in a very pretty bow, and a stripe of darker green across the pocket and around the hem. Antique white ruffles set off the dress at the neckline and at the bottom of the sleeves. Below her dress, you can see her many petticoats, one white, then each a different shade of green.

Ginnie, Original One-of-a-kind Ginger Tabby Cat Folk Art Doll Figurine by Max BaileyI hand sculpted Ginnie (and her cookies) from paperclay, and used stiffened cotton thread for her long graceful whiskers. She is an original one-of-a-kind work of art, meant for display only. No molds are ever used in my work.

Ginnie, Original One-of-a-kind Ginger Tabby Cat Folk Art Doll Figurine by Max BaileyGinnie is completely hand painted with acrylic paints, then signed and dated and sealed with matte varnish for protection and preservation. She rests firmly on a turned wooden base that is stained and sealed in golden oak, and she stands 9 1/2 inches tall.

Ginnie, Original One-of-a-kind Ginger Tabby Cat Folk Art Doll Figurine by Max BaileyUpdate: Ginnie has already been adopted. Thank you!

Ginnie, Belinda and BoBo, Original One-of-a-kind Tabby Cat Folk Art Doll Figurines by Max BaileyGinnie’s friends are Belinda and BoBo (above right).

Posted on 1 Comment

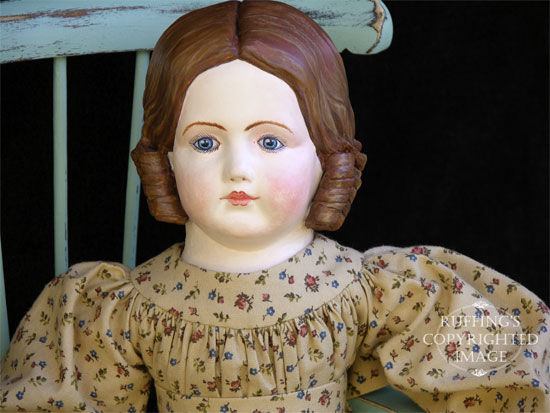
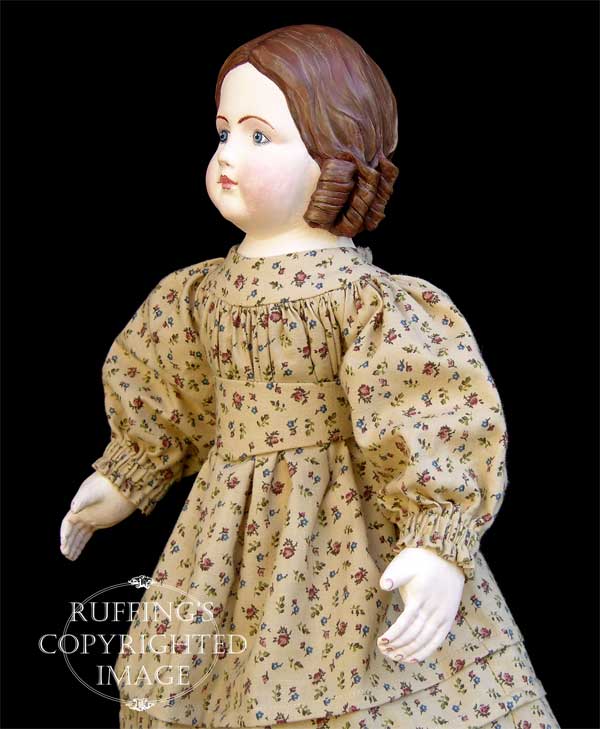
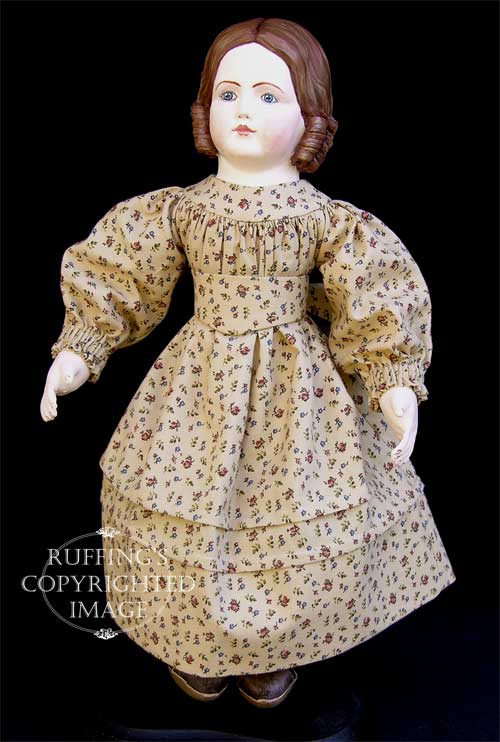
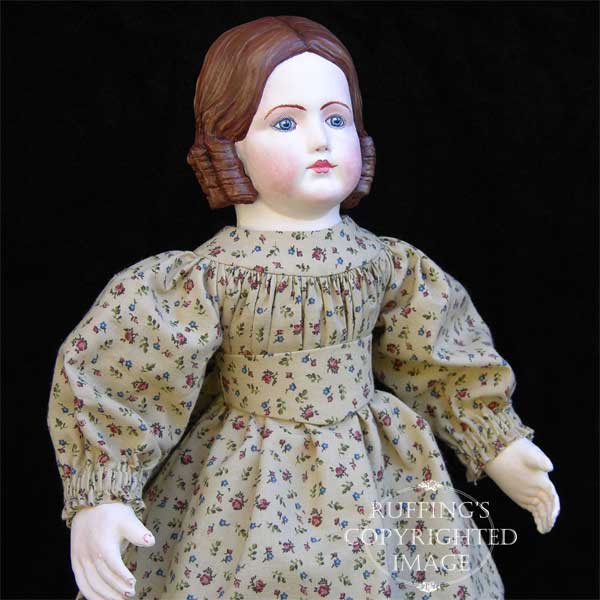
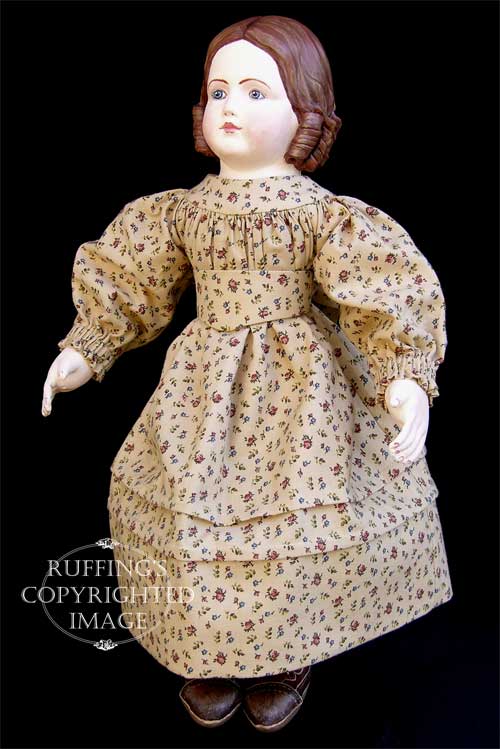
Emily, handmade original one-of-a-kind folk art doll by Elizabeth Ruffing

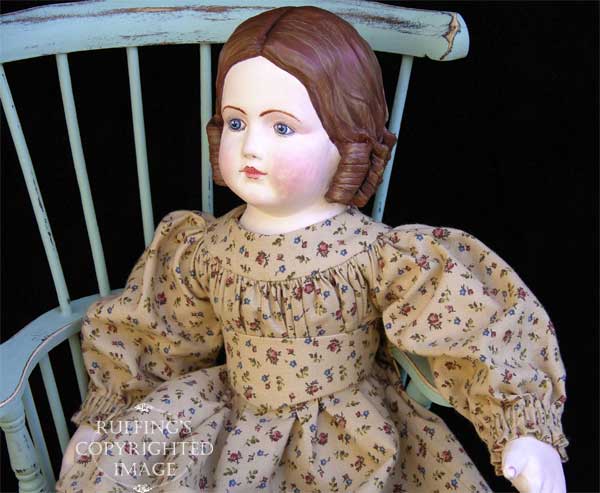
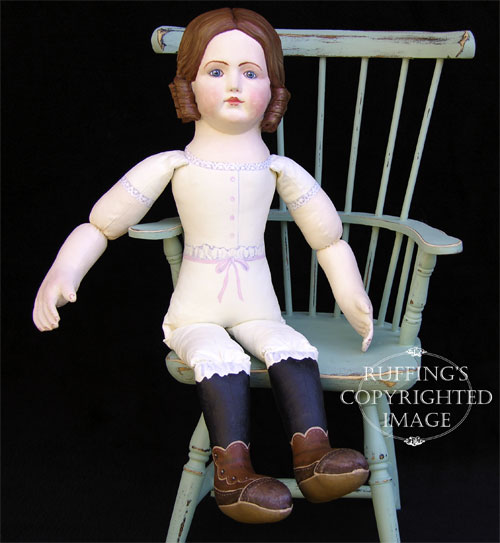
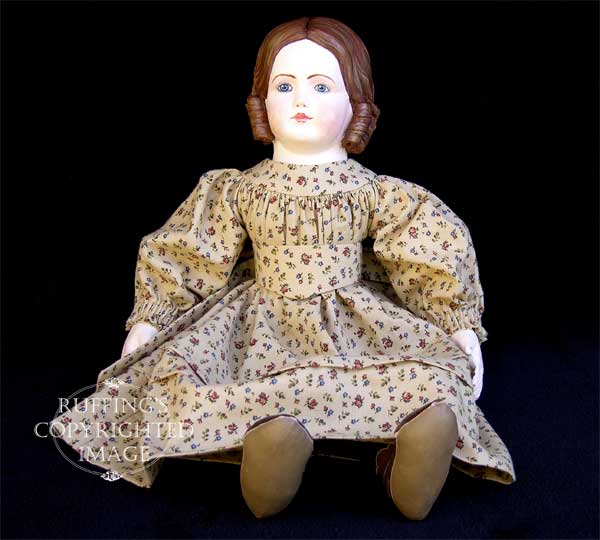
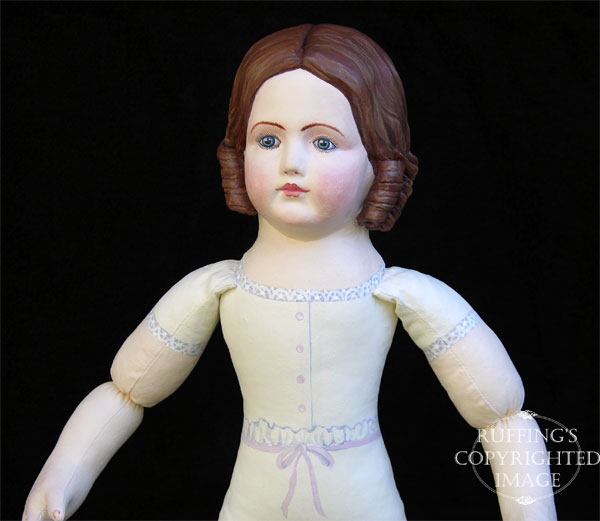
Emily handmade original one-of-a-kind art doll by Elizabeth Ruffing, Ruffing'sThis is my one-of-a-kind original folk art doll, Emily, named after the famous poet Emily Dickinson.

Emily handmade original one-of-a-kind art doll by Elizabeth Ruffing, Ruffing'sEmily was inspired by the charming Izannah Walker dolls of the 1800’s.

Emily handmade original one-of-a-kind art doll by Elizabeth Ruffing, Ruffing'sI designed both her body pattern and her dress pattern myself, and then carefully sewed each in 100% cotton fabric.

Emily handmade original one-of-a-kind art doll by Elizabeth Ruffing, Ruffing'sEmily’s fingers are hand quilted and lightly wired to give them a gentle curl, and her arms bend slightly at the elbows.

Emily handmade original one-of-a-kind art doll by Elizabeth Ruffing, Ruffing'sHer arms bend at her shoulders, and her legs bend at her hips and knees. Emily’s bottom is weighted with Poly-Pellets so she can sit nicely. (Chair not included.)

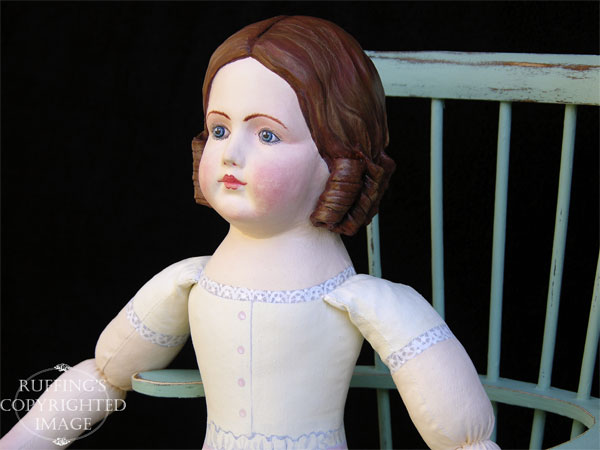
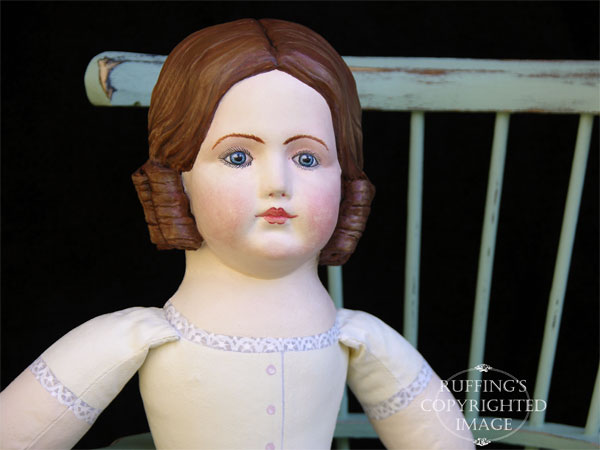
Emily handmade original one-of-a-kind art doll by Elizabeth Ruffing, Ruffing'sI made Emily’s antique reproduction Jumeau face using papier mâché.

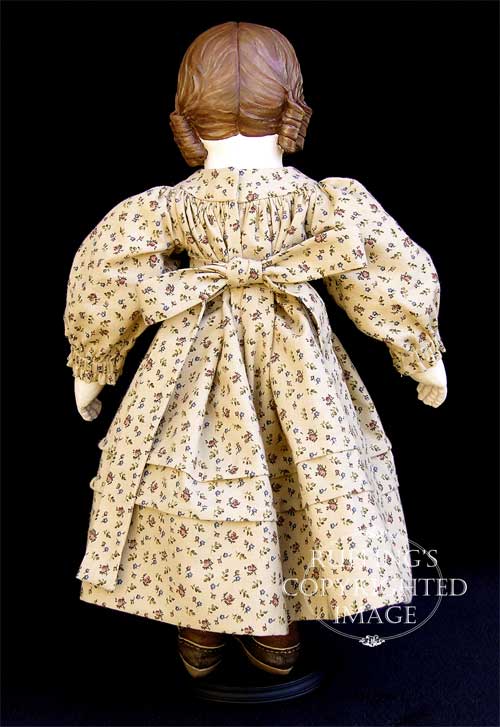
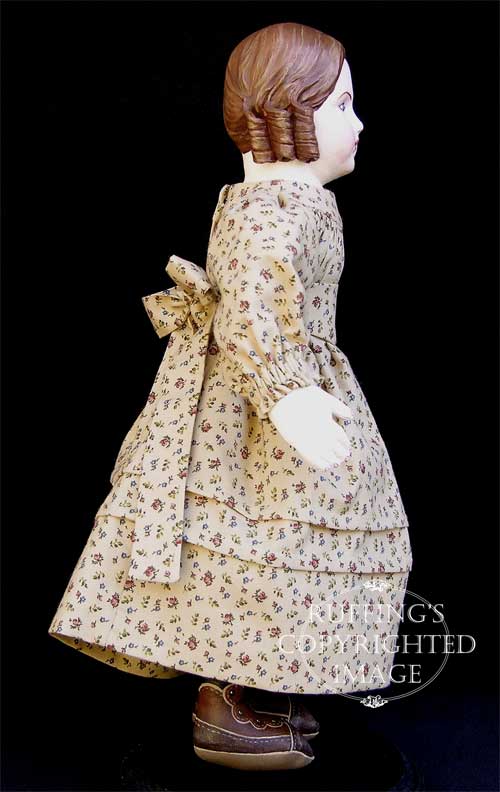
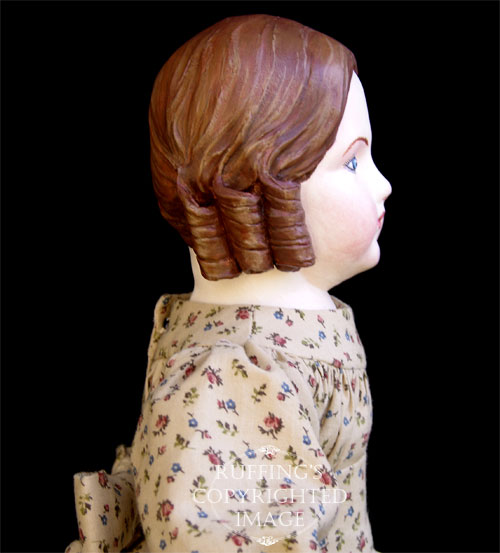
Emily handmade original one-of-a-kind art doll by Elizabeth Ruffing, Ruffing'sHer hand-sculpted ringlets on either side of her head are hand sculpted from paperclay.

Emily handmade original one-of-a-kind art doll by Elizabeth Ruffing, Ruffing'sEmily was painted with gesso, and then detailed with acrylic paint. Her blue eyes are hand painted.

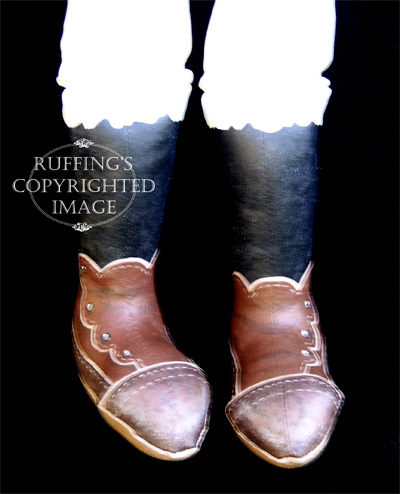
Emily handmade original one-of-a-kind art doll by Elizabeth Ruffing, Ruffing'sHer shoes are painted on as well, with tiny buttons up their sides.

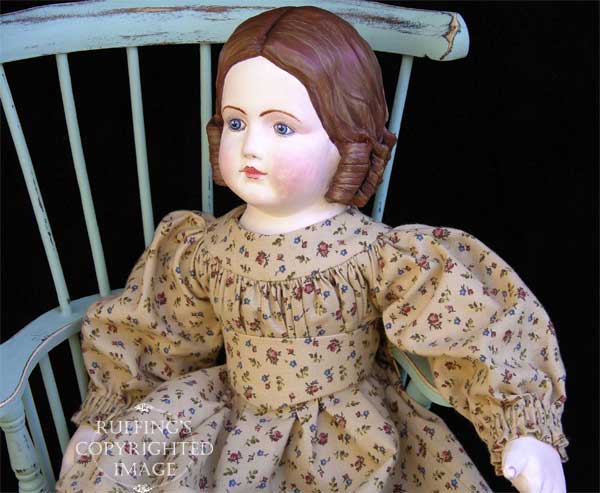
Emily handmade original one-of-a-kind art doll by Elizabeth Ruffing, Ruffing'sI made Emily’s dress from a tan calico quilter’s cotton. It is dotted with little burgundy and navy blue flowers.

Emily handmade original one-of-a-kind art doll by Elizabeth Ruffing, Ruffing'sEmily’s sash dips to a “V” shape in the front, and it holds in all the fabric gathers at her yoke. Her sash ties in the back to make a pretty bow.

Emily handmade original one-of-a-kind art doll by Elizabeth Ruffing, Ruffing'sI sewed two pin tucks at the bottom of her dress and added a big three inch hem to make the skirt stand out nicely. All the seams are carefully finished.

Emily handmade original one-of-a-kind art doll by Elizabeth Ruffing, Ruffing'sHer antique-style undergarments are carefully detailed with painted-on lace, pink buttons and a bow.

Emily handmade original one-of-a-kind art doll by Elizabeth Ruffing, Ruffing'sEmily is approximately 15 inches tall. She is sealed with matte varnish for protection.

Emily handmade original one-of-a-kind art doll by Elizabeth Ruffing, Ruffing'sMany hours went into making Emily. She is a one-of-a-kind work of art. Emily is meant for display only.

Emily is signed and dated. She comes with a hang tag, a certificate of authenticity, and a copy of her story.

Update: Emily has been adopted. Thank you!

Posted on

Stitch-along, Bluebird Quilt Block Part 2, Blanket Stitch

Okay, I’m back…We are about to start embellishing the bluebird quilt block with hand embroidery stitches. If you would prefer to use machine stitching, a zig zag or satin stitch along the raw edges of the appliqué will work fine, or you can try out the decorative stitches that might have come with your machine. I’m going to start with a hand-embroidered blanket stitch. Here are the basics of the blanket stitch before we start on the block itself. The first stitch is made by poking your needle through from the back of the fabric to the front of the fabric, along the raw edge you want to finish (shown here with a purple line).

The second stitch is made by taking a stitch from the front to the back of the fabric, just to the side of your first stitch, but inside the raw edge you want to finish. In one movement, poke the needle back out to the front of the fabric, along your raw edge, just next to the first stitch, while holding the embroidery floss from your first stitch down so your needle will be on top of the loop of embroidery floss from the last stitch. (You can click on my pictures to make them larger, for anyone who might not know that already.)

Pull your embroidery floss taut, not too tight to make the fabric pucker, but just enough that the stitch is smooth. It helps to smooth it with your finger as you go. These are the essential steps. You will just keep repeating them along your raw edge.

Poke your needle in and out of your fabric again, coming our on top of the last loop of floss. Keep your stitches an even distance apart. When stitching around a circle, point your needle from the middle centerpoint of the circle outward to make the stitches fan out nicely.

Pull them taut as you go.

Repeat the same stitch.

Pull it taut, and continue all the way around. You will take one little stitch almost in place to lock it down when you reach your starting point again. Then you will carry your floss along the wrong side (back) of the fabric to the next raw edge you want to finish, or you will take a backstitch on the back of the fabric and cut the floss to end it. I make a little knot just to be safe. Since this block will be quilted and it will have batting behind of it, it doesn’t need to lie perfectly flat.

Okay…onto the bluebird block. Once again, you will need a few things:

  • A hoop (I used a 9 inch wooden embroidery hoop, but you may need a smaller one if your square is smaller than mine, which was 11 1/2 inches)
  • Embroidery floss (I used DMC 3777, but you will match your floss to the red of your berries)
  • An embroidery needle (I think I used a size 10)

Put your quilt block in your hoop, keeping the fabric taut, and tighten the screw on the side of the hoop to make it snug. Cut a length of embroidery floss about 20 inches long and separate out two strands of floss from the rest. Thread your needle with the two strands. A needle threader helps, but I just wet the ends with my tongue and cut them at a slant to make threading easier.

Pick a berry and start your blanket stitch as described above. Take a little lock stitch almost in place as you reach your starting point and carry the floss along the back of your fabric to the next berry. Repeat the process, ending and starting a new thread as you run out. I tried to work in clusters so I didn’t have to make my floss travel too far across the back. I used the blanket stitch on all the red berries.

My fabric appliqués lifted for the wear, and so I steam pressed them down again when I was done, following the manufacturer’s instructions for my paper-backed fusible.

Here’s a closeup of my blanket stitch. I found I got a little better at it as I went along. It would probably be possible to use this stitch on most of the raw edges, if you wanted to, but I think I will experiment with another stitch for the next area I do. More later…