Posted on

Bunny Treasury on Etsy, "Hop in! Bunnies Helping Bunnies"

Special thanks to Michele from Etsy for Animals for adding Max Bailey’s and A E Ruffing’s prints to her “Hop in! Bunnies Helping Bunnies 2” treasury list on Etsy! Many of the the Etsy for Animals members are helping out the Buckeye House Rabbit Society this month with donations based on their sales from their Etsy shops.

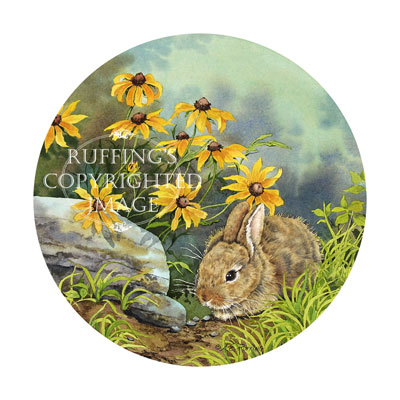
Our prints that are featured above are “Hiding”, a little cottontail rabbit with Black-eyed Susans, by A E Ruffing,

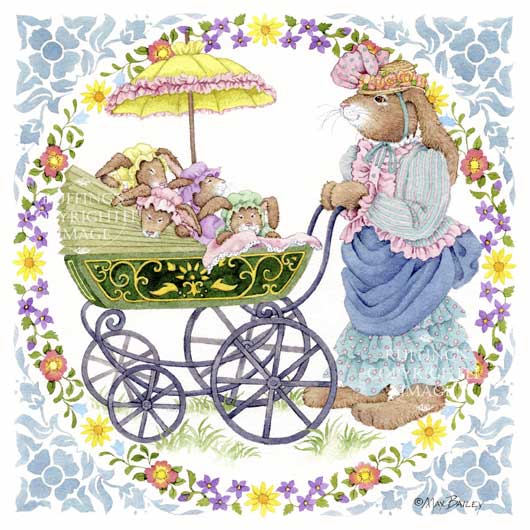
and “Proud Mom”, a Victorian mama bunny with a carriage-full of baby bunnies by Max Bailey. Both are available in our Etsy shop. 10% of sales (less shipping) of prints purchased from our Etsy shop will be donated to animal charities.

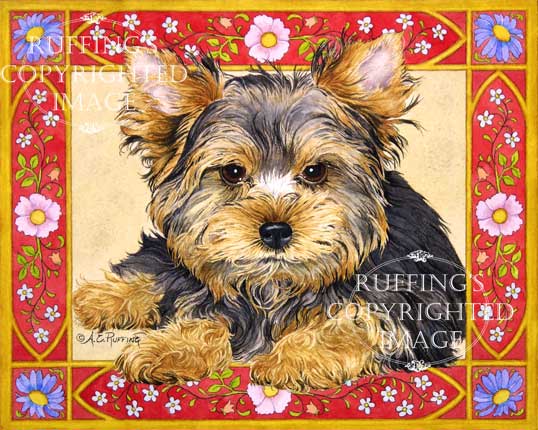
Michele also added my “Yorkie Puppy” to her “Baby Animals Say Happy New Year!” treasury list on Etsy, which features items for sale from Etsy for Animals members. This print is also available in our Etsy shop.

Posted on 1 Comment

Huggy Bunny, Original Doll by Elizabeth Ruffing

Huggy Bunny by Elizabeth RuffingThis is my new “Huggy Bunny”. He is an original one-of-a-kind doll, created from my own original design and pattern. He is hand signed on his bottom. Huggy Bunny is entirely handmade and is meant to be displayed and loved, and he is sturdy enough to be played with. His body is made of 100% cotton quilting fabrics, which have been fused to an extra layer of cotton sheeting for durability.

Huggy Bunny by Elizabeth RuffingHis little tail, and the edges of his clothes, and his pink parts are machine stitched with a zig zag over the raw edge appliqué. His ears and joints have been hand quilted. He has no loose or removable parts. He is stuffed with Poly-fil polyester stuffing.

I hand embroidered a coral stitch on his booties. His cute little eyes and mouth are hand embroidered as well.

Huggy Bunny by Elizabeth RuffingHuggy Bunny has love to give. Lots. And he’s happy to give it. He is a cheerful and agreeable sort.

Huggy Bunny is also part of the Etsy for Animals January challenge. 10% of sales (not including shipping) of prints from my Etsy shop and our collective Etsy shop will be going to animal charities. This month we are hoping to raise some money for The Cedarhill Animal Sanctuary in light of their recent emergency need for donations.

Huggy Bunny and The Rabbit Dances by Elizabeth Ruffing

Michele from Etsy for Animals added Huggy Bunny to her “Bunnies Helping Bunnies! EFA” treasury list on Etsy, along with my “The Rabbit Dances” greeting cards. Michele also posted Mr Bunny on the Best Friends Network forums, which is part of Best Friends Animal Society, a group that advocates kindness to animals and an end to pet homelessness. Thanks, Michele!

Please see Elizabeth’s Etsy toy shop for currently available soft dolls and art toys.

Posted on

Belinda and BoBo, Original One-of-a-kind Folk Art Tabby Cat and Kitten Doll Figurine by Max Bailey

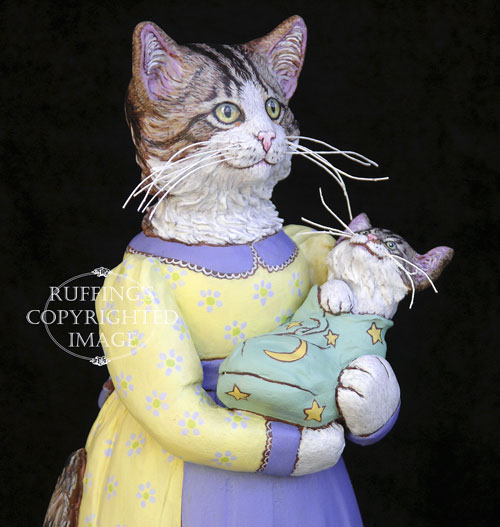
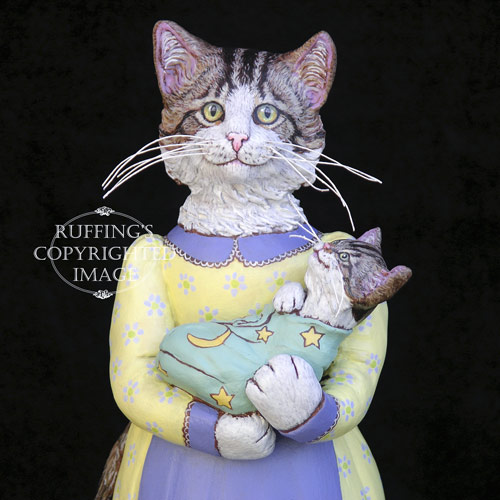
Belinda and BoBo, Original One-of-a-kind Folk Art Tabby Cat and Kitten Doll Figurine by Max BaileyEvery morning, Belinda bundles up her little baby boy, and takes him for a walk through the neighborhood. With the greatest pride, she shows him to her neighbors. She politely, and with much sincerity, asks for their opinions.
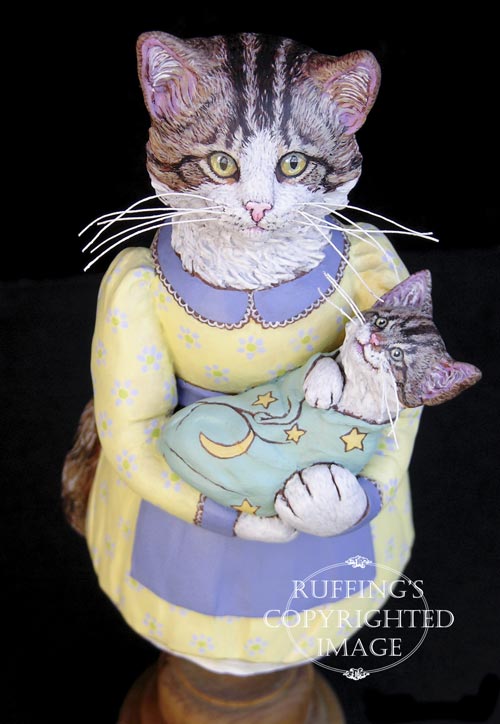
Belinda and BoBo, Original One-of-a-kind Folk Art Tabby Cat and Kitten Doll Figurine by Max Bailey“Is he not the most beautiful baby you have ever seen? Is he not more beautiful than the moon and all the stars in the heavens?” Belinda asks.
Belinda and BoBo, Original One-of-a-kind Folk Art Tabby Cat and Kitten Doll Figurine by Max Bailey“Surely he is,” they reply, and they nod and smile in agreement.
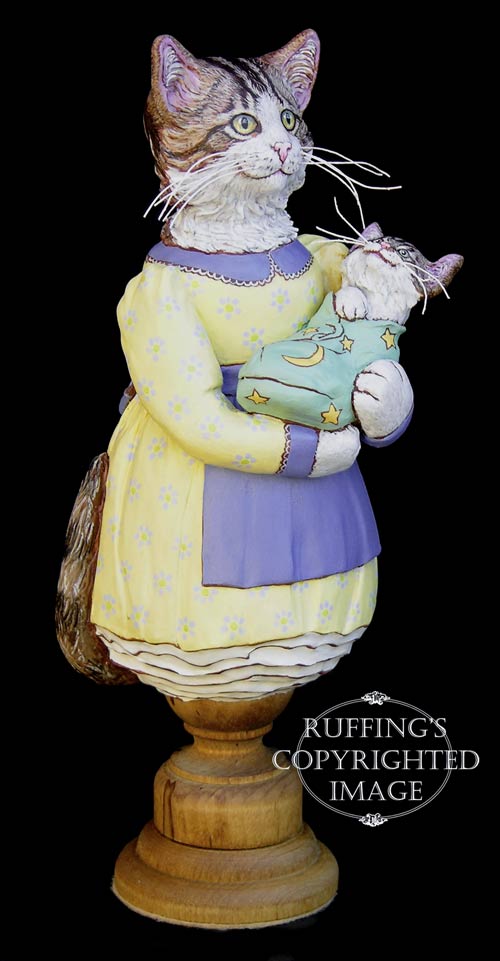
Belinda and BoBo, Original One-of-a-kind Folk Art Tabby Cat and Kitten Doll Figurine by Max Bailey“Does he not have the brightest little eyes and the cutest little whiskers?” she asks.
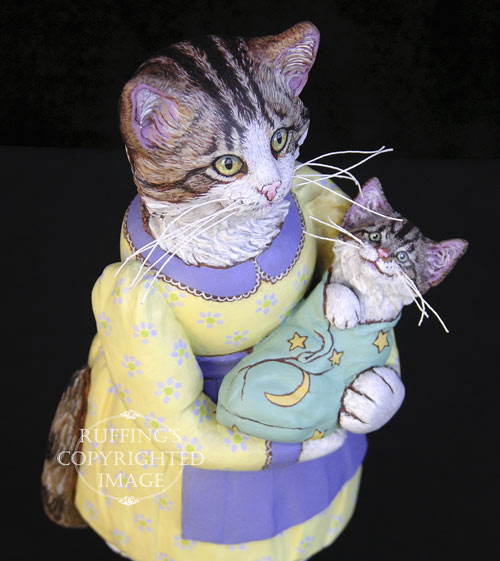
Belinda and BoBo, Original One-of-a-kind Folk Art Tabby Cat and Kitten Doll Figurine by Max Bailey”Oh yes indeed, Belinda,” they reply.

Belinda and BoBo, Original One-of-a-kind Folk Art Tabby Cat and Kitten Doll Figurine by Max Bailey“Does he not have the prettiest little pink nose?” she wants to know.
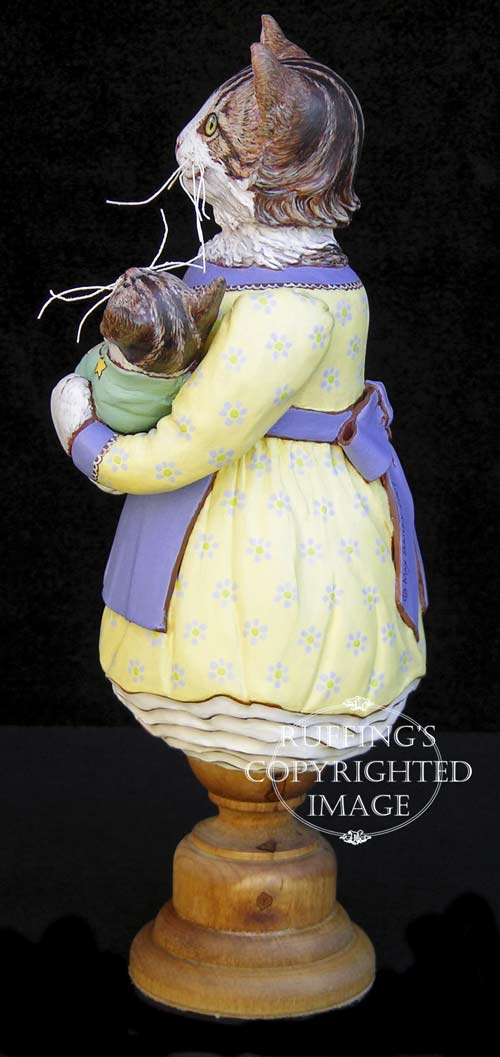
Belinda and BoBo, Original One-of-a-kind Folk Art Tabby Cat and Kitten Doll Figurine by Max Bailey“Beyond any doubt at all,” they answer.
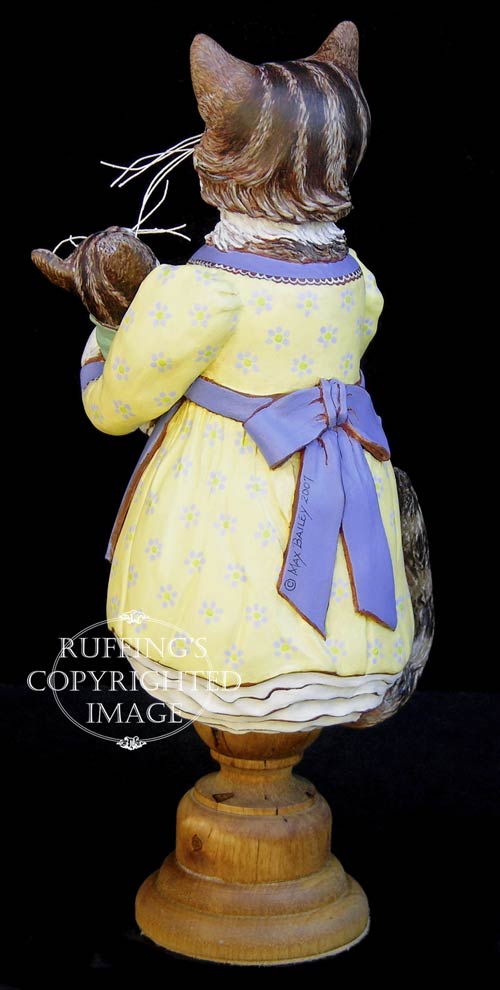
Belinda and BoBo, Original One-of-a-kind Folk Art Tabby Cat and Kitten Doll Figurine by Max BaileyBoBo loves his morning walks. He basks in the sunshine, and in the compliments. If you look carefully, you might see his tiny smile. If you listen quietly, you might hear him purring.
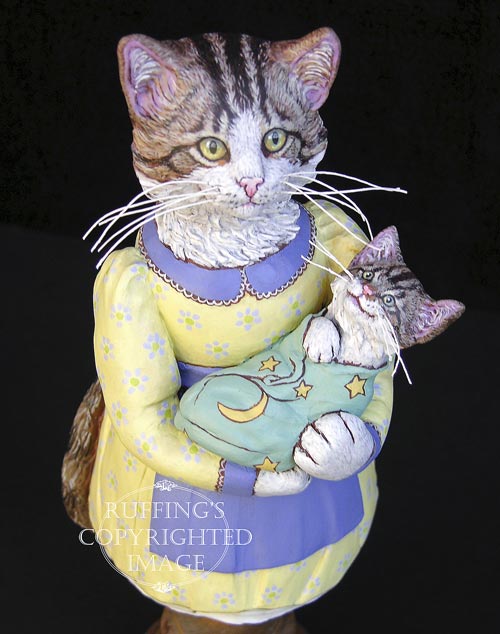
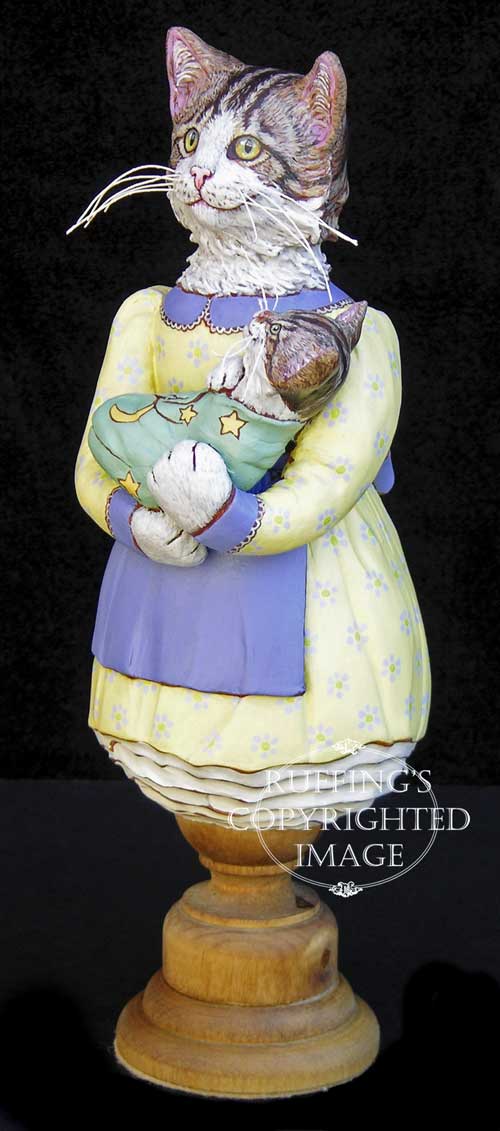
Belinda and BoBo, Original One-of-a-kind Folk Art Tabby Cat and Kitten Doll Figurine by Max BaileyBelinda is a tabby and white cat, as is her kitten BoBo. They have yellow eyes with a touch of green. Belinda’s old-fashioned dress is soft yellow with a pattern of pale blue flowers. The blue collar and cuffs with lace edging, match her blue apron, which ties in a big bow at the back. Her white petticoats swirl in a pattern beneath the bottom of her skirt.
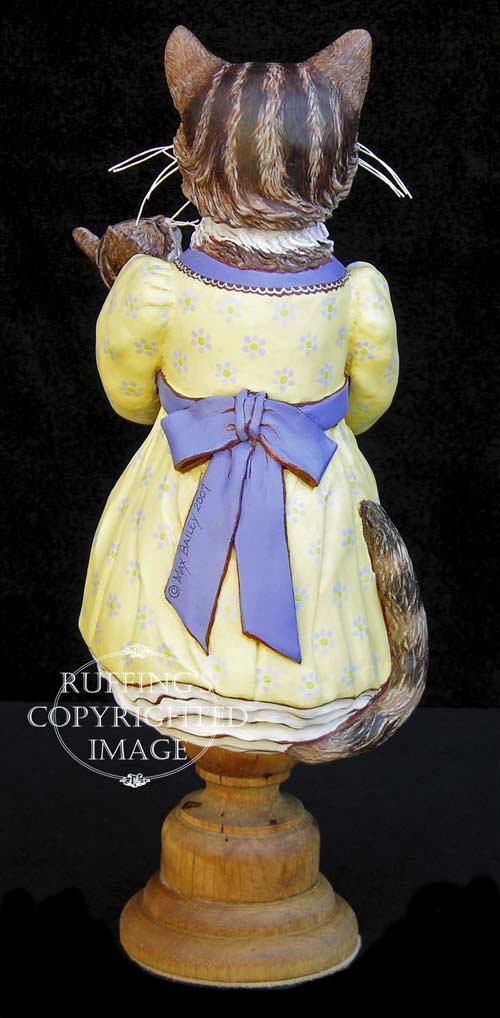
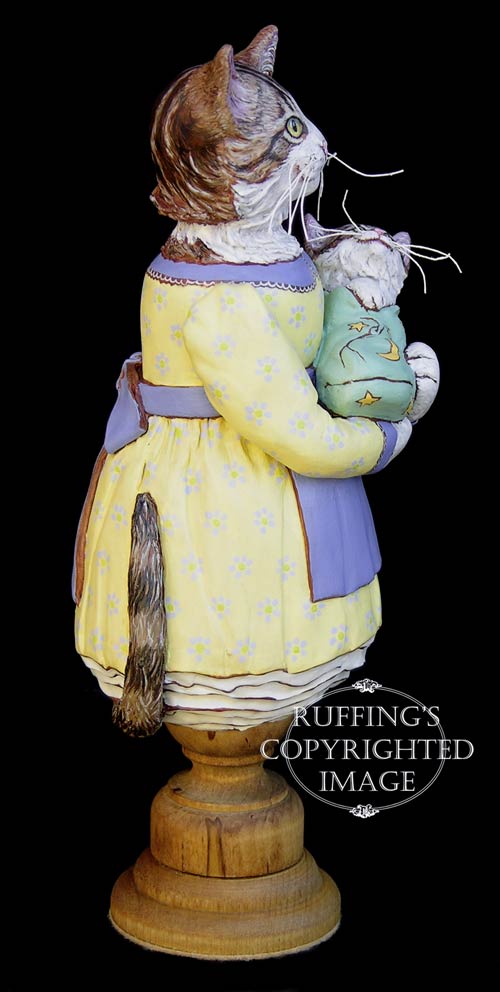
Belinda and BoBo, Original One-of-a-kind Folk Art Tabby Cat and Kitten Doll Figurine by Max Bailey

Belinda and BoBo, Original One-of-a-kind Folk Art Tabby Cat and Kitten Doll Figurine by Max BaileyBoBo is tucked into a sage green blanket decorated with the moon and stars. Only his head and one little white paw are showing.

Belinda and BoBo, Original One-of-a-kind Folk Art Tabby Cat and Kitten Doll Figurine by Max BaileyI hand sculpted Belinda and BoBo from paperclay, and used stiffened cotton thread for their whiskers. They are original one-of-a-kind works of art, meant for display only. No molds are ever used in my work. They are completely hand painted with acrylic paints, then signed and dated with matte varnish for protection and preservation.
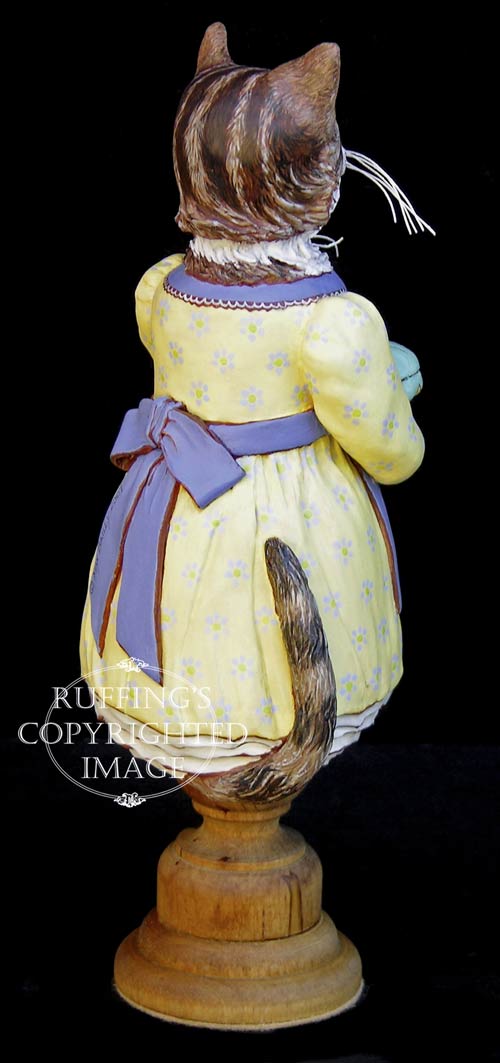
Belinda and BoBo, Original One-of-a-kind Folk Art Tabby Cat and Kitten Doll Figurine by Max BaileyBelinda rests firmly on a turned wooden base, with a rustic wood grain, which has been sealed in golden oak. She stands 9 1/2 inches tall.
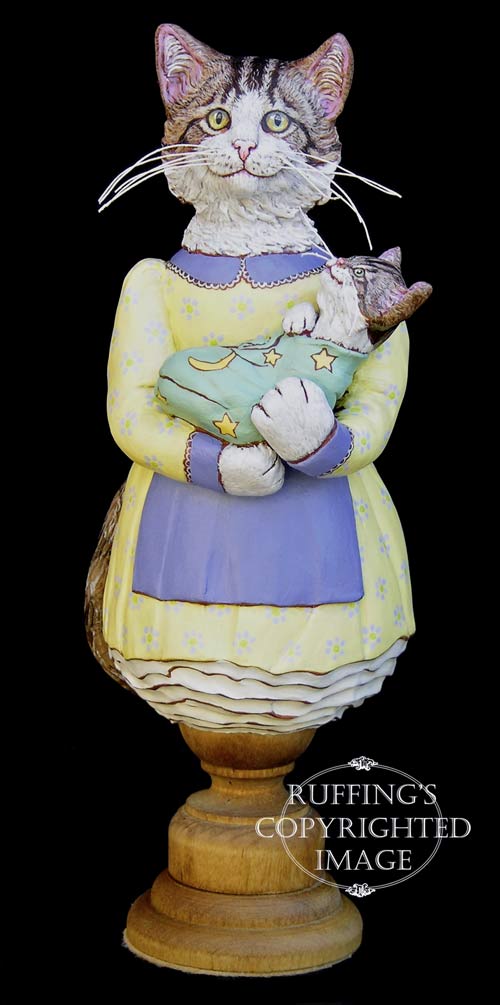
Belinda and BoBo, Original One-of-a-kind Folk Art Tabby Cat and Kitten Doll Figurine by Max BaileyUpdate: Belinda and BoBo have already been adopted. Thank you!
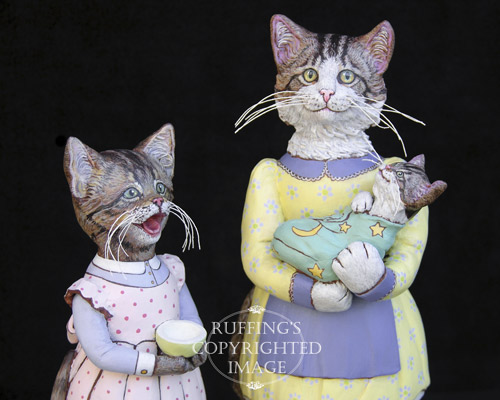
Belinda and BoBo, Original One-of-a-kind Folk Art Tabby Cat and Kitten Doll Figurine by Max BaileyBobo’s older sibling, Crybaby (above left) has also been adopted.

Posted on

Happy new year! Stitch-along anyone?

I haven’t yet finished my quilt block-of-the-month homework from this past year, or the year before, or maybe any year, but…I have just started two more classes. One is an appliqué class, and the first block is a bluebird. I was fiddling and couldn’t stop myself. I redesigned the whole block. Then I thought it might be a nice thing to share since I could show some raw edge appliqué in action, and then I could embellish my design with hand embroidery, which I am determined to learn. So…if you would like to stitch along with me, please download and print the PDF for my design. You will need to download Adobe Reader, if you don’t already have it. It is a nine inch square design, which won’t fit on 8 1/2 by 11 inch paper. So, you will use the center marks on the design for placement.

Please note this is my original drawing and it is copyrighted. In this instance, I am allowing copies to be made for personal use only. Selling my design or making items to sell from my design is not allowed, but you may make the design up to keep for yourself or to give to friends or whomever you like. Please credit me with the design if you publish your version of my design anywhere.

Okay…First of all, you will need some things:

  • Tracing paper
  • Ruler
  • Pencil (I like the mechanical kind)
  • Paper-backed fusible web (I like Wonder-Under)
  • 10 inch square or larger of background fabric (I used a pale lavender-blue cotton quilting fabric, 11 1/2 square)
  • Assorted fabric scraps in navy, royal blue, rust, tan, cream, gray, and two reds (I used cotton quilting fabrics)
  • Optional embroidery tracing paper, or graphite paper and a hard pencil (I used a 2H pencil)
  • Optional disappearing ink pen, or permanent marker (I used a Pigma pen)

Cut a ten inch square of tracing paper and draw a nine inch square on it. Mark the center on all four sides and mark the middle of the square with a cross. Match the center marks up with the center marks on my design and trace the design onto the tracing paper. You may simplify the design all you like. You’ll be working from the tracing. Using the color picture at the top of this post as a guide, simplify the design into shapes by what color goes where.

Flip your tracing over to the reverse side. If you don’t do this, your design will be facing the opposite direction when you are done.

Lay your paper-backed fusible web over the tracing and draw the shapes for each color onto paper side of the fusible web. Give yourself about an extra eighth to a quarter of an inch of paper-backed fusible around each shape. (For anyone who might not already know this, you can click on the blog images to make them larger if you need to.)

Fuse your paper-backed fusible shapes onto the wrong side of each of your fabric scraps, by color, following the directions on the package. Allow them to cool.

For the berries and the branch, you will simply cut along your drawn lines, except for either end of your branch where you will need to leave some extra fabric. You will trim your block down to size after it is stitched. Leaving a little extra on the sides of your block is a precaution against the small amount of fabric that gets taking up from stitching.

For the bluebird, you will leave an underlap where the edge of one color meets the next. This means you will leave an extra eighth to a quarter of an inch of fabric where one piece slips under another. It isn’t so important which piece goes under which. I started at the bottom of my bird, leaving a little extra at the top of each shape as I went up. So, the top of the tail, for instance, had a little extra fabric.

Where there is no underlap, you will cut along your pencil lines.

Peel the paper off the back of your shapes, and use the tracing as an overlay to help you arrange the pieces on your background fabric. Mark the centers of the sides of your background fabric so you can line up your tracing. I used pins to do this. Start with the bird, working from top to bottom, laying the tail down first. As you go, lay your tracing over the fabric to see that everything is arranged the right way.

Once your bird is in place, fuse according to your package directions.

Next, lay the branch down and check its placement by putting your tracing over the fabric. Instead of following the center marks for placement now, you can just line up the drawing with your bird. It’s easier.

Fuse your branch in place.

Lay down your red berries using the tracing as a guide as before and fuse them in place.

Using a hard pencil and a small piece of graphite paper, transfer the eyes and the claws of the bird onto your fabric. Instead of graphite paper, you can also draw on the back of your design and then flip your tracing to draw over the lines on the front. Or you can just “wing it” 🙂 That’s pretty much what I ended up doing.

I went over my pencil lines with a permanent marker so I could see them better. You don’t have to do this. If you use a Pigma pen, be sure to let it dry for 24 hours before applying stream or getting it wet so it won’t run.

Now you are ready to embellish the design with machine stitching or hand embroidery. Whew. We’ll save that for another day.