Handmade original cat art dolls, Hug Me Slugs and Friends stuffed animal plush, figurines, designer doll dresses, quilts, prints, greeting cards, gifts, clothing, fine art paintings, needlework, and sewing
I contacted Oliver Bunny’s veterinarian and asked what shaped pupils he thought various animals would have, round or oval, and if the oval pupils would be vertical or horizontal. I am lucky he and his colleagues enjoy questions.
Then I went about designing an exhausting array of colored eyeballs, most of which don’t exist in nature, with both round and oval pupils, along with emblems for my superhero stuffed animals, my Super Slugs and Wonder Bunnies.
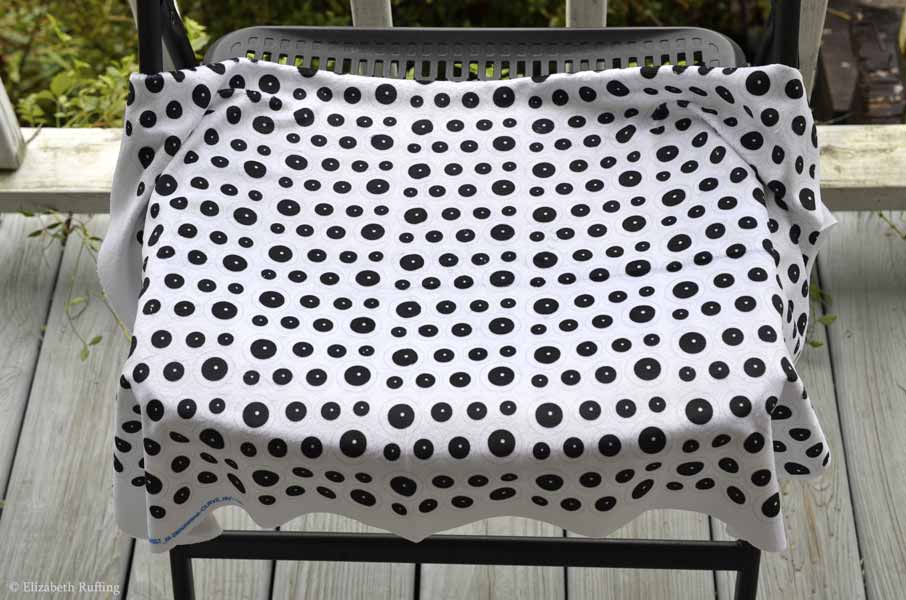
It took a while to get my custom fabric back from the printer, but my eyeballs and emblems look pretty awesome.
They came out of the washer and dryer a little softer looking, which is no surprise with fleece, since it has a fuzzy texture. I am trying to decide if I want to pre-wash my fleece custom fabric. If I do, I will do it by hand, by gently dunking it in the sink, and hang it to dry next time, to preserve the sharpness. The blacks came out nice and black too.
Update: I decided not to pre-wash the eyes and emblems, because I needed to coat them with some Liquitex fabric medium, to make sure the edges didn’t fray when I cut them out, which sealed the surface and made pre-washing unnecessary.
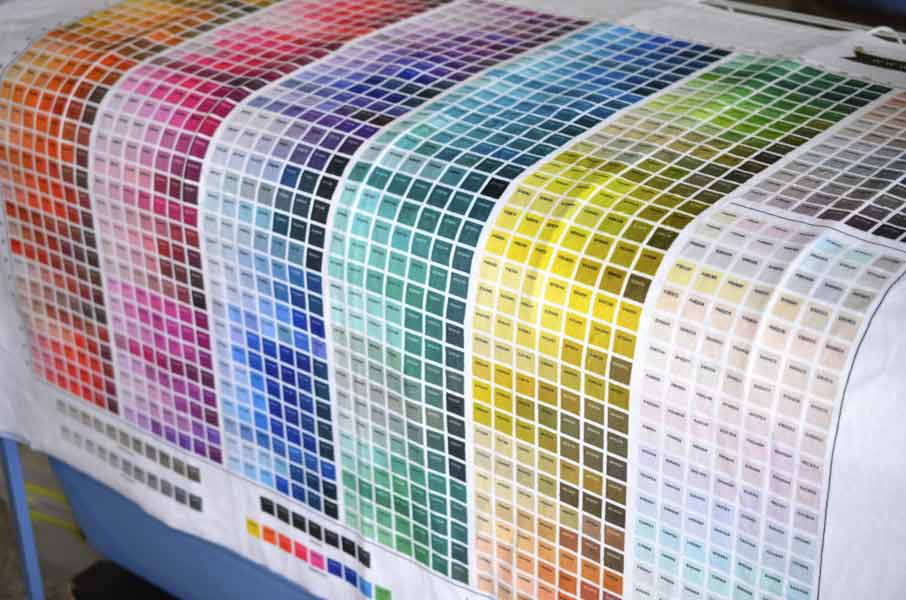
If you would like to use this wider color map file for custom fabric, I saved it here. It is 42 inches wide and 36 inches long. So, it will fit on one yard of fabric. It was printed at 150dpi, which is what Fabric on Demand recommended. It is good to have, so you can see what the colors you are picking in Photoshop will look like when printed on fabric.
I am working on revising my Super Slug stuffed animal superhero pattern. I ordered some special cape fabrics. I’m going to make a Wonder Bunny plush rabbit superhero cohort for him.
I’m also going to make some Hug Me Lambs stuffed animals, and I think, some lop-earred bunnies similar to the lambs, with fleece faces and ears, and either cotton print or fleece bodies.
I just received a group of really pretty planet and star fabrics, to use for capes for my superhero plush toys, from Brooklyn Fabric Company in Iowa. They have a sale until tomorrow, and they shipped them very quickly.
In other news…I’ve been feeling so tired! I know it seems like I’ve been doing a lot, but I have had so much fatigue.
The other night, I was saying to my mom that I thought something had to be wrong with me. At first, I thought it was sleep deprivation, and it may be, but I have also had this strange circular rash under my arm for at least a couple of months, maybe even four months, after my lymph nodes under my arm were swollen, assuming I would have seen it then.
I was concerned it was Lyme disease. My mom was sure that kind of rash always had a red center. I got worried and looked online. Looking online is a good way to get more worried! I found that, with a Lyme disease rash, sometimes the red center disappears, because your immune system attacks the bite area first.
After a lot of rigamarole sorting out my insurance in regard to where I was allowed to go, I ended up at an Urgent Care. Since the tests they have for Lyme are unreliable, and they don’t do them at Urgent Care anyway, if you present for Lyme, they usually go ahead and treat you for it. The doctor didn’t think it was Lyme, but we treated me for it just in case. I picked up my giant horse pills, three weeks of Amoxicillin, three times a day. Whoopee. I started taking them last night. My mom cheerfully said, “Only 59 to go!” Ick.
Update: After testing and biopsies, we found out my circular rash was granuloma annulare, which is harmless, with no clear cause. My white blood cell count however keeps coming back high. We’re still trying to figure that out along with the cause of my fatigue.
I have bushes and trees to plant and a certain little furry man to take for his checkup. I’ll see how I do. I’ve been warned to expect some side effects from the Amoxicillin.
Psychologically, I felt better last night, since I was blaming myself for feeling so tired. I’ve had a couple of inquiries about custom toys, and one night this past week, I felt so overwhelmed, I thought I would have to say I couldn’t do them. I felt like I couldn’t make any toys at all. I’ve had trouble even thinking straight lately, although I am feeling better and more rested now. I felt like I needed to go to the rest home and take a long, long nap.
I have been feeling guilty too, that I haven’t gotten my toys done. I’ve had the same nine monsters in progress since the beginning of January. I am hoping the antibiotic and some sleep will turn me around.
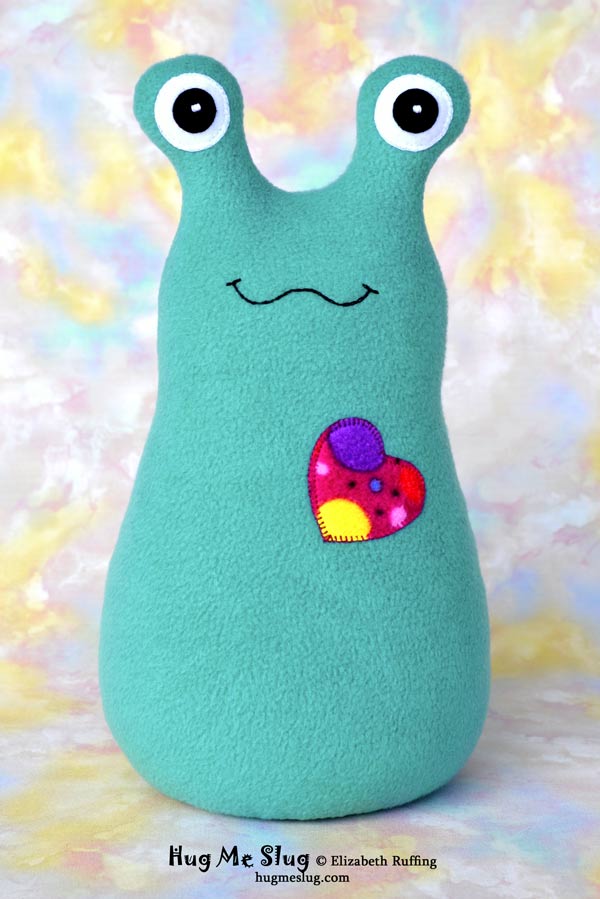
I have a new teal fleece Hug Me Slug joining my other stuffed animal plushies over our shop. I forgot to mention before that I now have the domains hugmeslug.com and hugaslug.com pointing to put website, so it will be easier to find us.
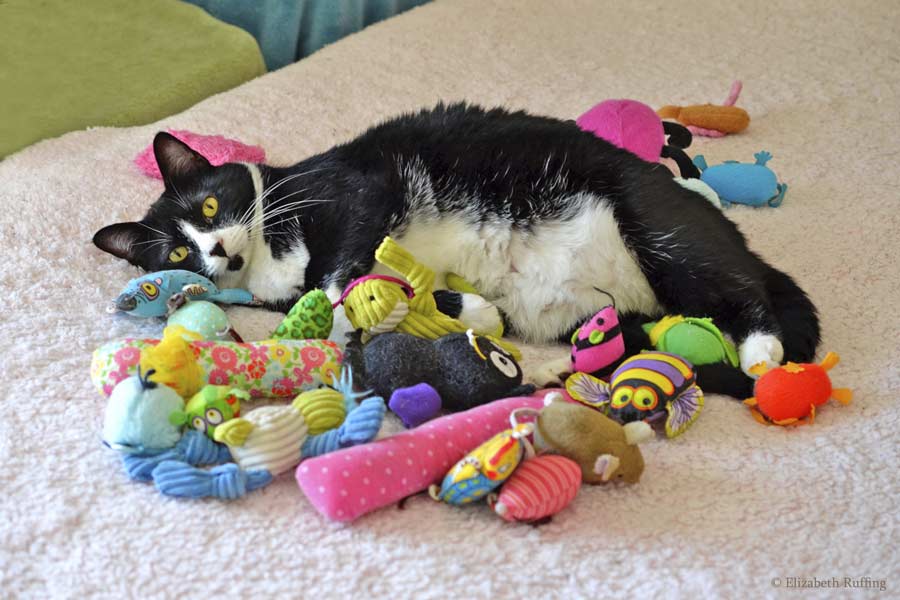
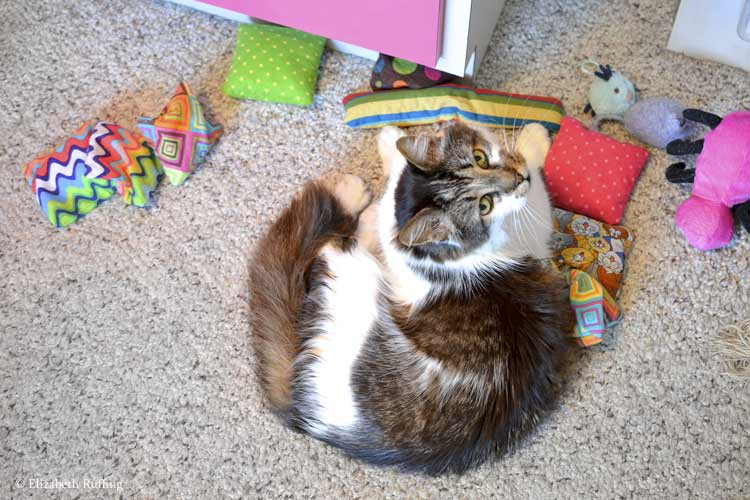
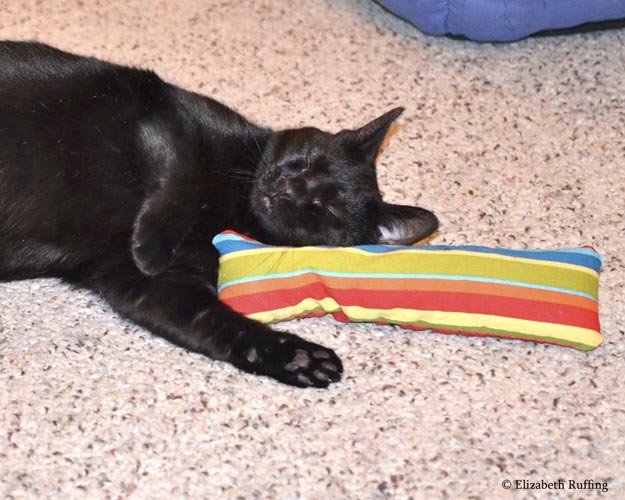
We’ve been hanging around home, avoiding the shoppers. Jojo did her own shopping and got all the cat toys, while Henrietta was occupied.
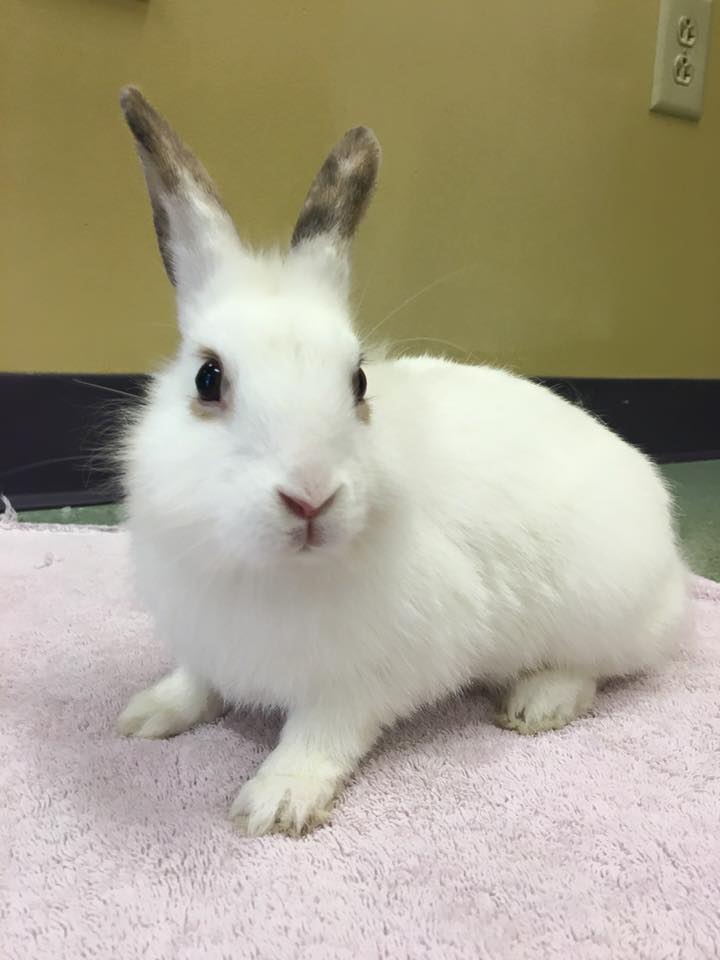
I hurried in to the vet to get Oliver Bunny his checkup and nail trim, before the traffic at the shopping centers started. He met a girl bunny named Daphne in the adoption room there.
Daphne
She liked him and nibbled on her cage to try to touch noses with him. He was hesitant. The vet asked if they made googly eyes at each other, and I told him she did, but he was nervous. He said, “Poor Daphne. She came on too strong.” Oliver finally settled back in by TV time. I told him I was sorry. He had the same reaction to the other two girl bunnies there, who were there the last time too. He doesn’t mind if big fat Santana jumps in my lap with him, or if Henrietta props her leg on his back while she gives herself a bath, but he isn’t sure about bunnies.
Santana is healing up and in a great mood. He appears to be enjoying the cats being closed up next door. Their new cat sitter showed up, which was a relief. I was afraid the same kid who didn’t take care of them before might be not taking care of them again. This one seems to be doing a good job of showing up daily.
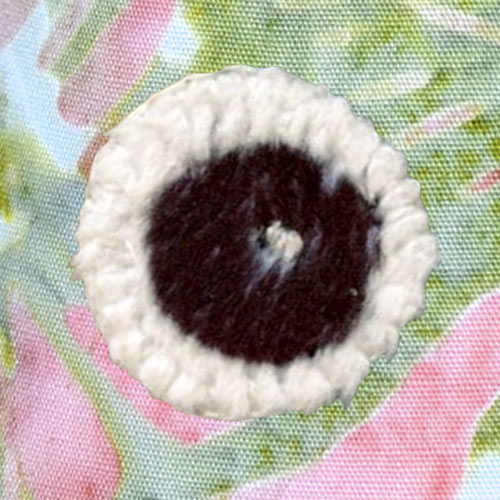
So…I mentioned a couple of posts ago that I ordered a color map of Minky fabric from Spoonflower and then a fat quarter with my toy eyeballs printed on their Minky as well.
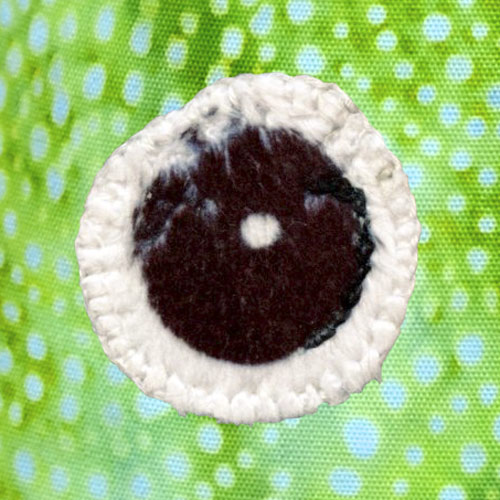
I’ll repeat those two photos here, above, to be more organized. As I said before, the fabric itself was nice and soft, and the colors were pretty. But I was a little worried about white showing through since the black didn’t cover the fibers all the way down to the base. Unfortunately, that didn’t work out for my eyeballs, as you can see below. The white showed through as I sewed, and the black edges of my circles got mixed with white. Everything was wobbling and mixing. (I used Photoshop to paste my eyeballs photos onto a clearer backgrounds, and so the edges shown are actually cleaner and neater than they were in reality.)
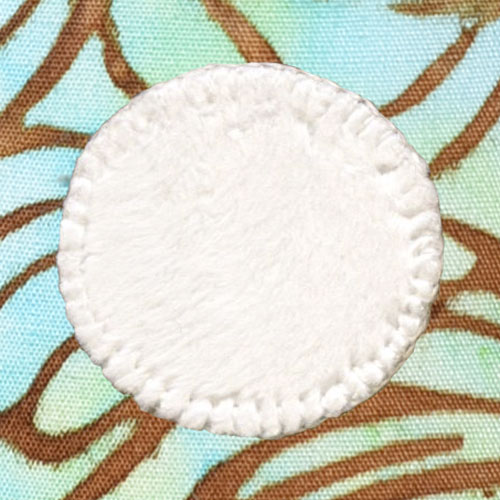
At first, I tried sewing the eyeball with no Wonder-Under paper-backed fusible stabilizer on the Minky, which made a bigger mess, since the outside edges were moving. I thought maybe if I were to stabilize the fabric, I might have better results.
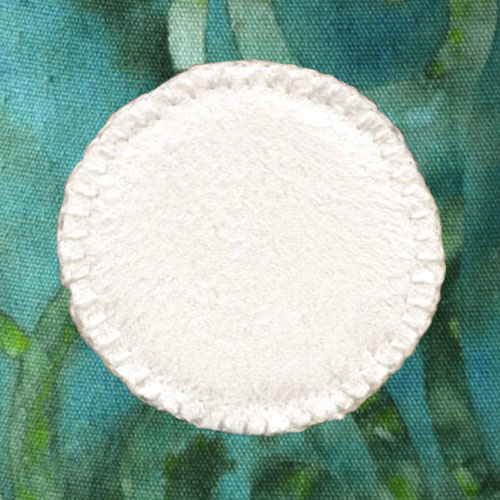
It looked a lot better, sewing with the Wonder-Under, as you can see above, or at least it did with just the white.
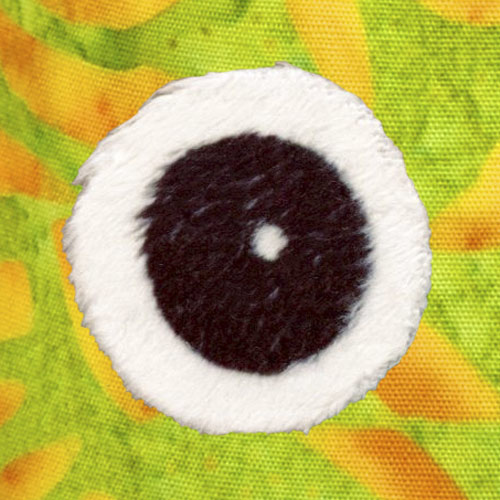
I fused a printed eyeball onto fabric with Wonder-Under, and you can see above that the black fibers were not making an even line and the white ones weren’t either. That is just the nature of the pile being too long for my project.
Oddly, the eyeballs that were printed along the edge of the fat quarter were ovals instead of circles. The Minky is a knit and it must have stretched along the edges while going through the printer.
When I tried sewing the fused eyeballs down, I had the same problems, with the white and black getting mixed up and everything losing its shape. The eyeball above was a slightly smaller eyeball, which came out even worse. I tried to accent the white dot in the pupil with embroidery floss, but that didn’t work.
The Minky fabric might work well for a blanket, but I think anything stuffed tightly, or with smaller seams, or with top stitching would probably have white showing through the colors.
I thought I might have better luck using a lower-pile fabric and I chose Spoonflower’s Faux Suede to try. I used the stabilizer again, and it came out pretty neat. I thought I might get lucky this time.
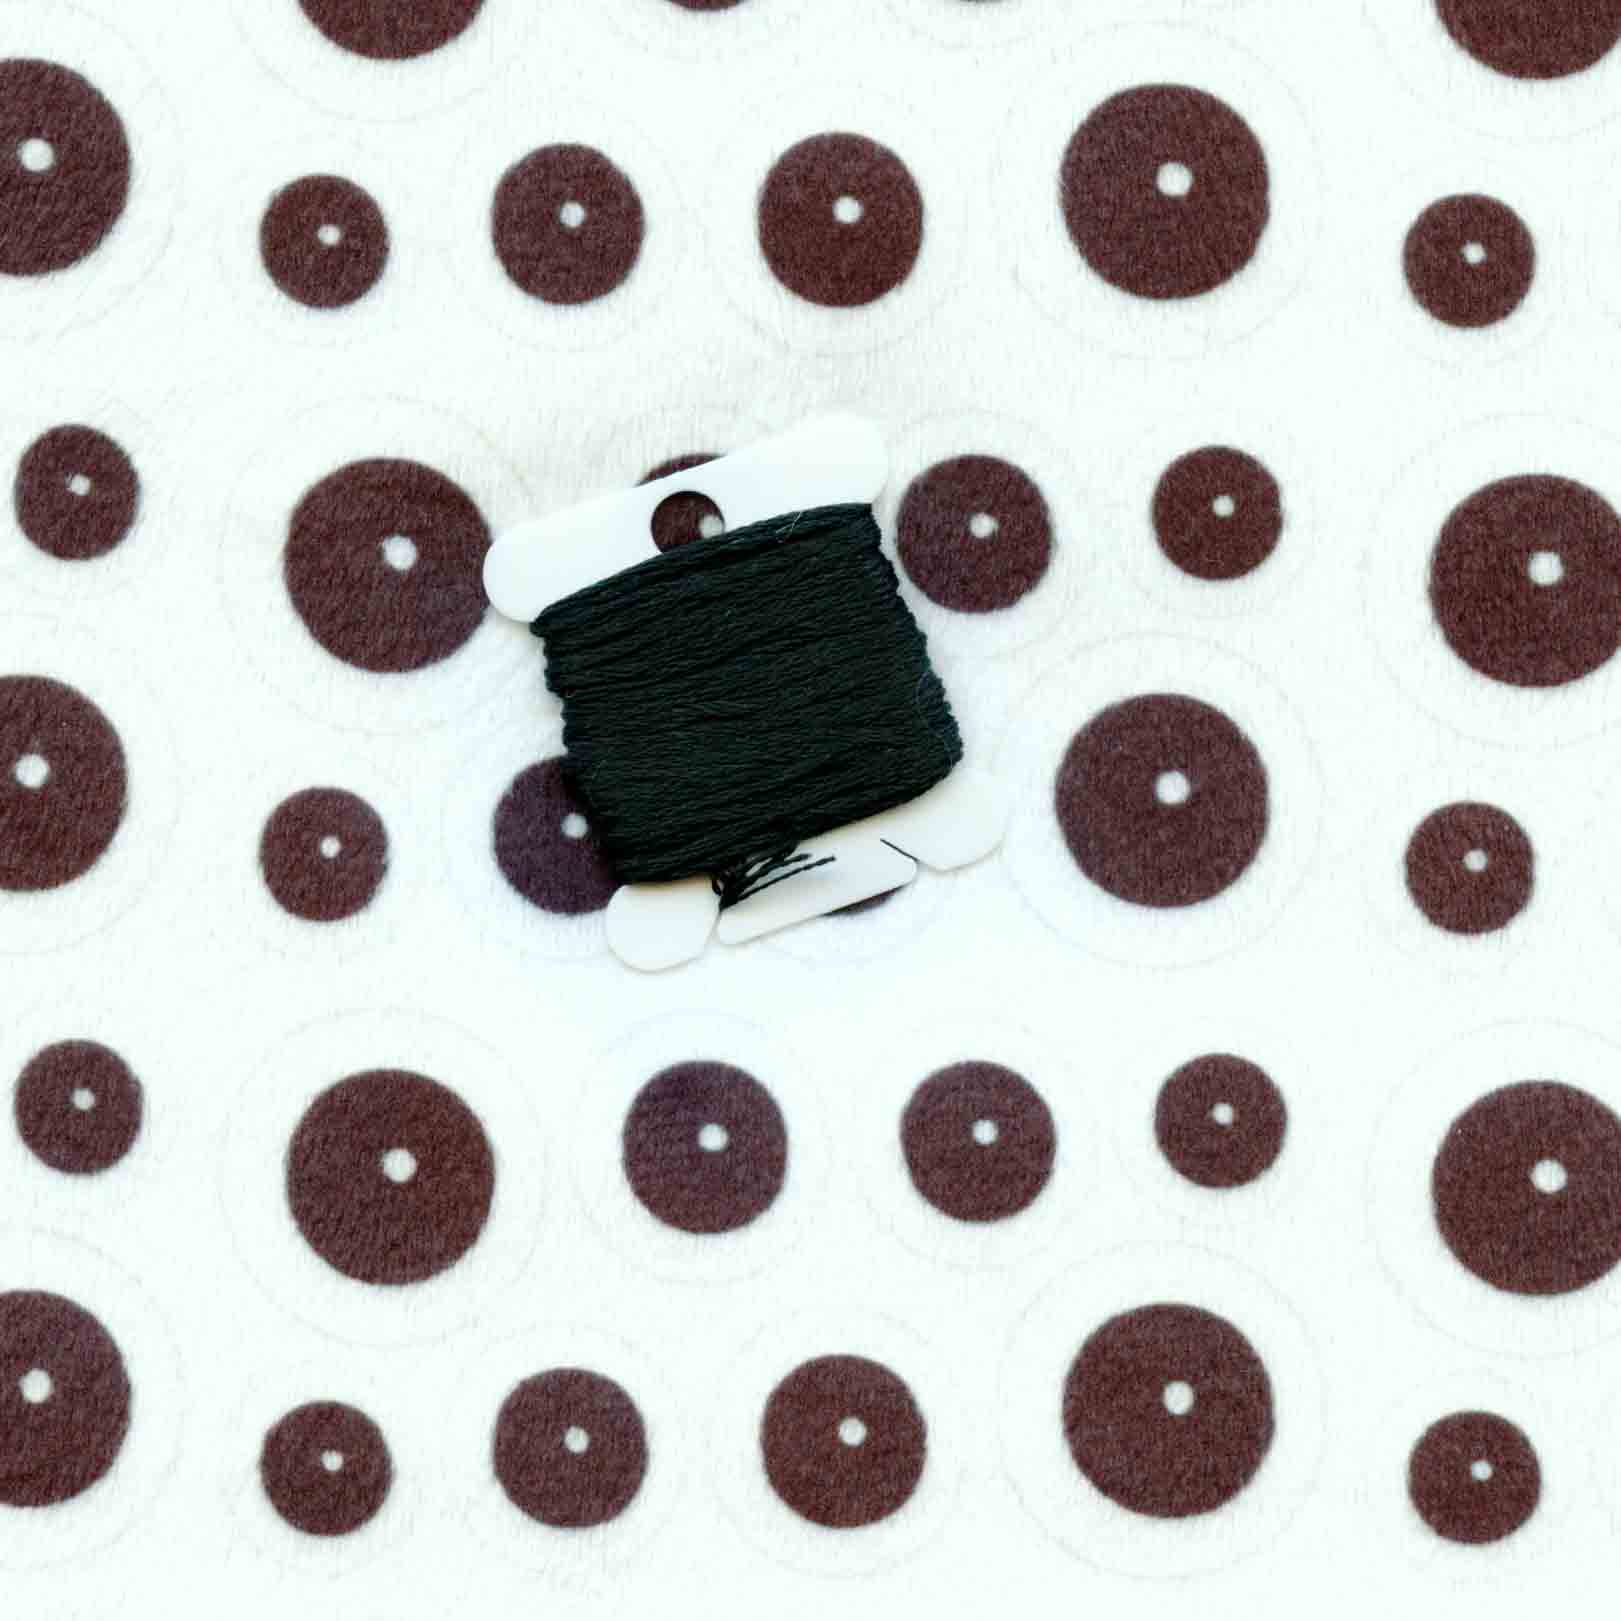
Unfortunately again, there was a problem. Above are my eyeballs printed on Minky, with a skein of black DMC floss for comparison. You can see they are close to black.
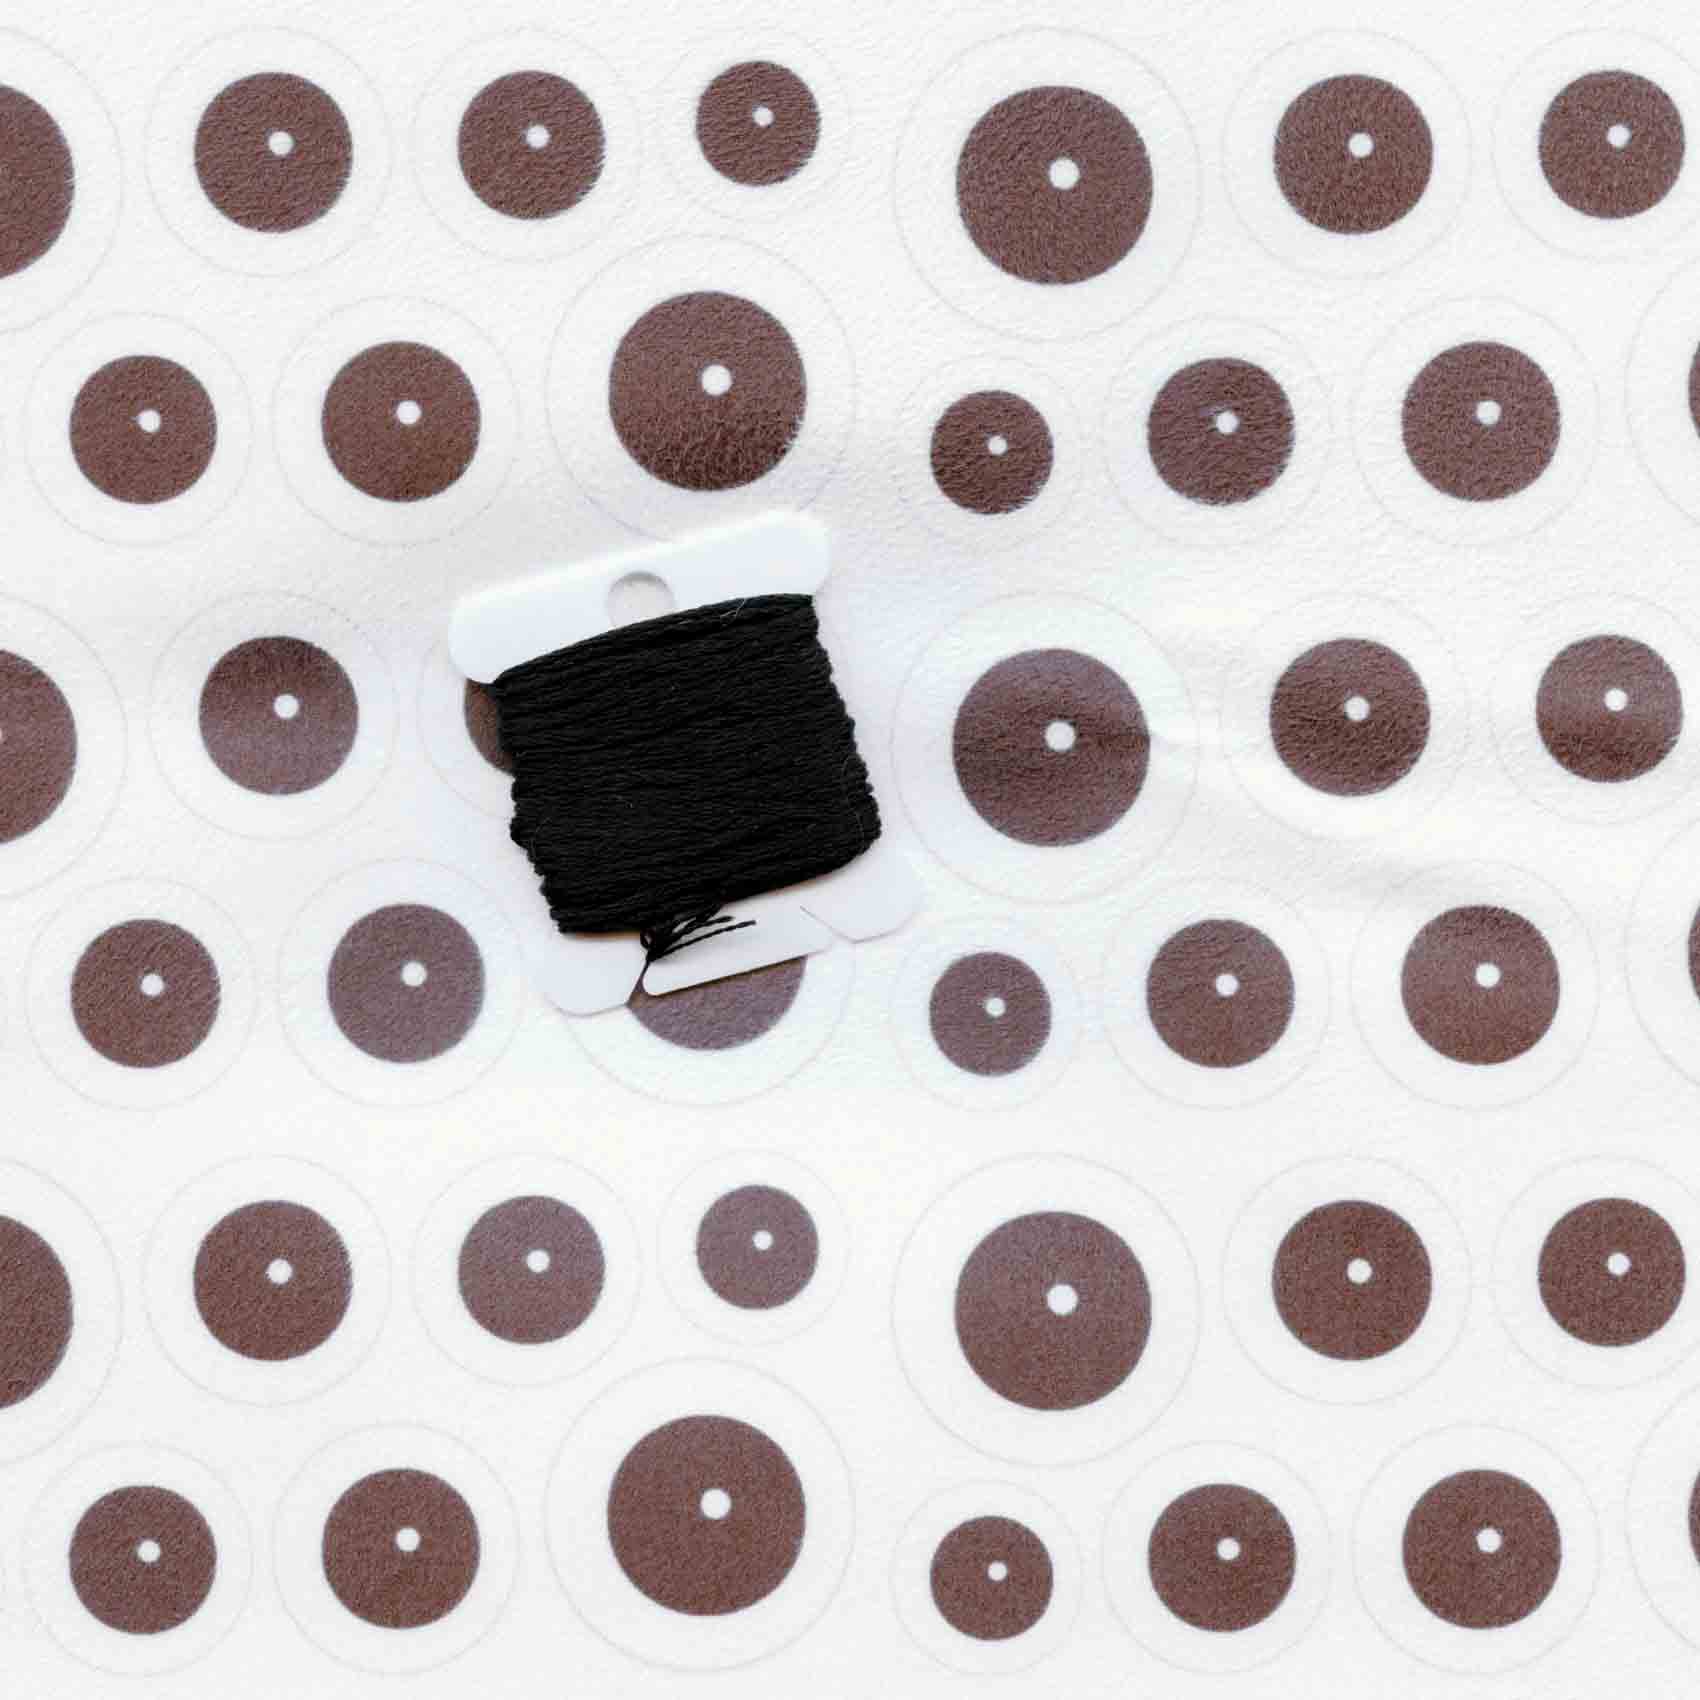
Above are my same eyeballs printed on Faux Suede, and you can see they are not black, but charcoal gray. My black in my file was hex color #000000, black as black can be.
The colors on my colored eyeballs, below, came out well, but the blacks were still gray. By the way, if you are making a file to print, be sure to use the type of file in the resolution you need at the beginning, so color information doesn’t get thrown out when you make the file smaller. Spoonflower uses 150 dpi. I used 150 dpi (ppi) and a .png file. I tried a .jpeg and kept having issues with my hex color #’s changing after I uploaded my files. I did double check my colors by downloading my files from the site, after uploading them to the site, to make sure my colors were the same. They were.
I thought there might be a mistake and wrote to Spoonflower, but there was no mistake. They just can’t print black on some fabrics, and have trouble printing black in general. They said their fabrics that get blacker blacks are Basic Cotton Ultra, Satin, Performance Knit and Performance Pique, but none of those are fuzzy like my toy eyes, plus the edges would fray on them if I were to try to sew them on by hand with a blanket stitch, as I do.
They were nice and sent me a refund on everything after I returned the fabrics to them. I only had to cover the postage to send the fabrics back. They also sent everything out right away, which was great. It was just disappointing about the blacks. I am going to try Fabric On Demand, another custom fabric printer, who carries fleece, to see how they do. They responded right away, but so far they have taken longer to send a sample. We’ll see how it looks. I hope I can find something that works for me.
Update: Both Fabric on Demand and Spoonflower have fleece now, and the black comes out nicely on both. I coated my eyeballs with some Liquitex Fabric Medium to make sure the edges didn’t fray when I cut them out.
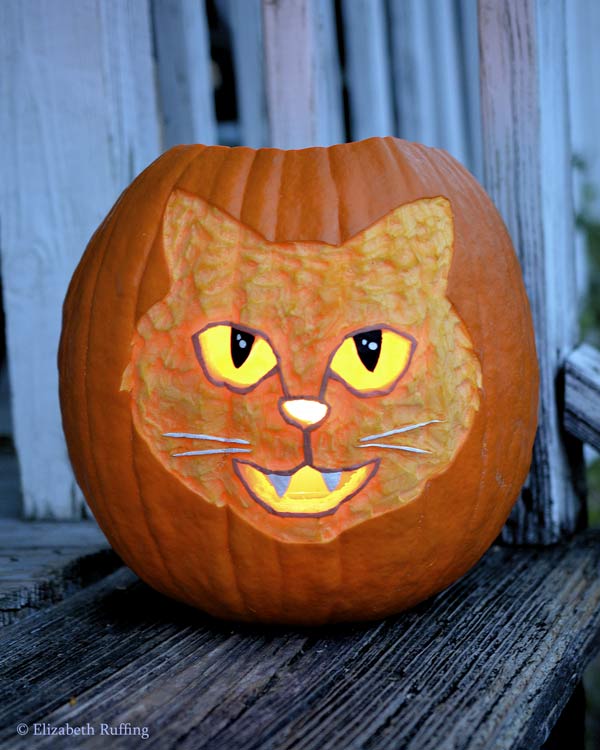
Boo! I don’t think I had carved a pumpkin for Halloween since high school, maybe college. Santana’s mom gave me one, and the day before Halloween, I decided to give it a go.
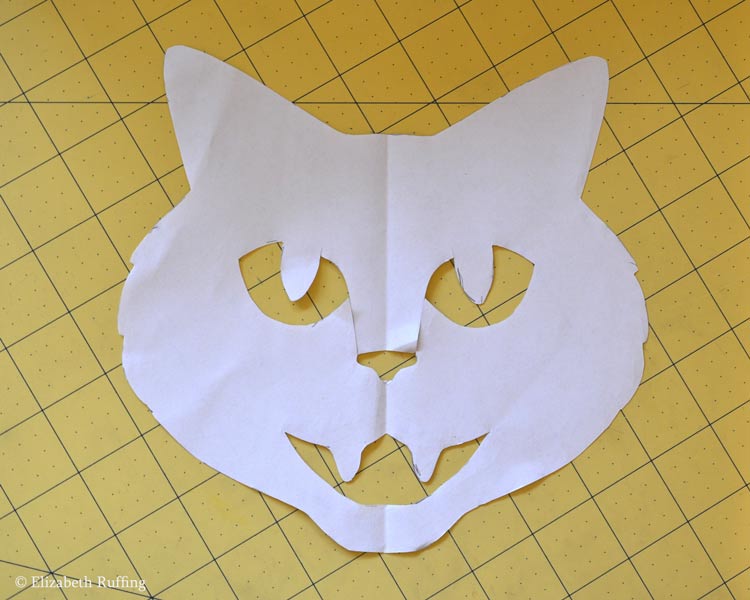
I sketched a quick template on paper, folded it in half, and cut it out, so I could trace the lines onto the pumpkin with a pencil. Then I used whatever I could find to carve it, a steak knife, an X-Acto knife, and a little stabby knife of undetermined categorization.
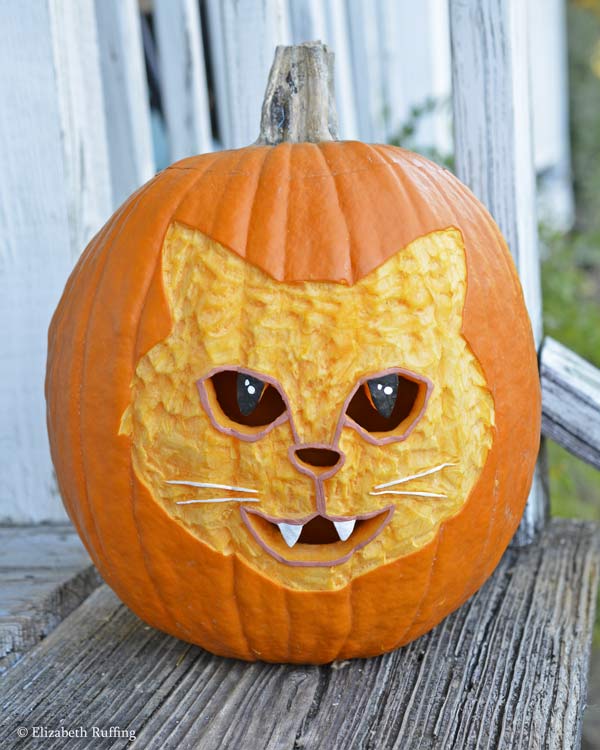
First, I “drew” the lines with the X-Acto knife. Then I chipped the surface away where I wanted yellow, with the X-Acto knife. Then I used the steak knife and the stabby knife to cut all the way through where I wanted the holes. I cut the top and scooped out the inside when I was done cutting. I made a bit of a mess, but filled in the lines and pupils with some acrylic craft paint.
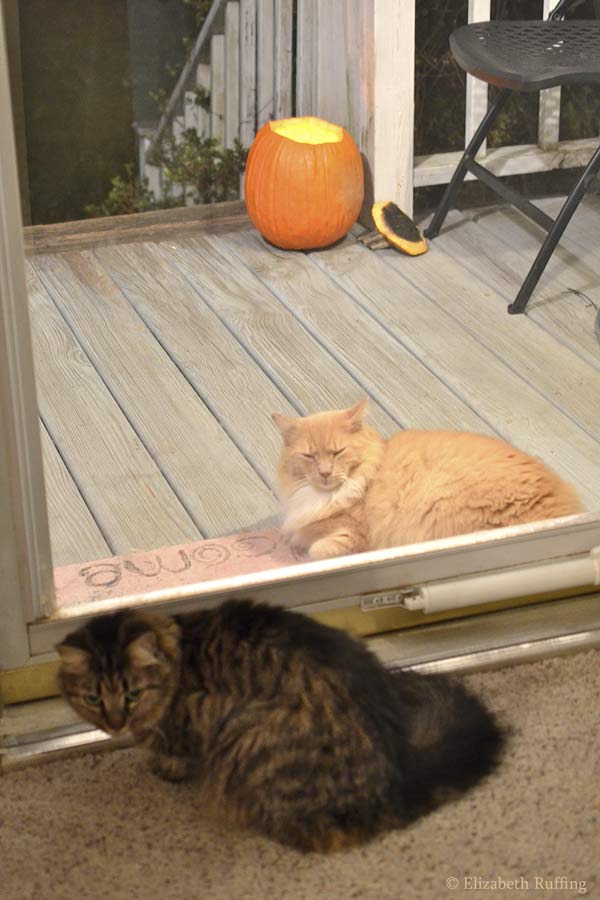
I set an emergency candle in a cat food can, first dripping a little wax into the can to get the candle to stand up. Santana kept the cat pumpkin, which was made in his honor, company while we had trick-or-treaters.
We had the best Halloween in years here, only about fifteen kids, which is more than usual, but they had great costumes. One family came with the mom and baby as astronauts, and the dad as the universe. He was all in black, with white lights across himself, so as he held the baby, the baby appeared to be floating through the sky.
One adorably baby lion tried to crawl up the steps. I met him halfway with the bowl of candy.
My favorite was a little superhero, maybe three years old. He had seen the Corgis at the previous stop, and wanted to know if we had any animals he could see. I told him I had a bunny rabbit. He looked incredulous, and said in a surprisingly low, gruff voice, “I wanna see the bunny rabbit.” I showed him Oliver, through the safety of the door, and they were both very curious about each other. The superhero made all kinds of grimaces. I’m not sure he believed Oliver was real, until Oliver reached out his head for a better look. That got a hilarious grimace and a big bizarre pirate laugh. I was still laughing the next day.
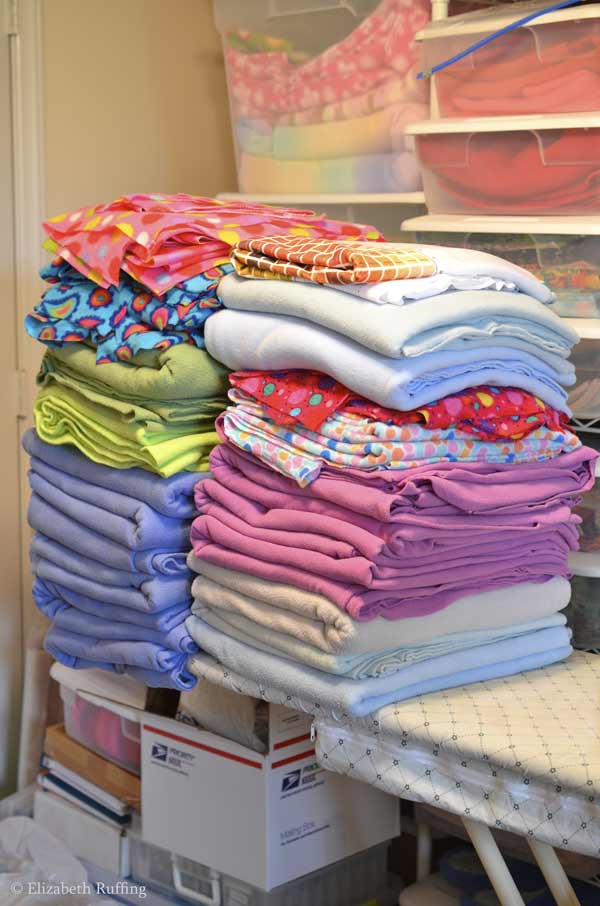
I took apart all those pajamas I got on clearance, and fleece throws this week. They are now pre-washed and folded, waiting for me with about a gazillion other lengths of fleece. I was going to try creating a design and ordering some Spoonflower fabric for toys, but thought, since I have so much fleece, I would try having them print eyeballs instead. I made up a repeat pattern in Photoshop Elements, and uploaded it to their site. It was straightforward, once I got the dpi of my image to 150 at the size I wanted.
I got my fat quarter in the mail this morning, printed on their Minky fabric. It looks pretty good. There is a small amount of stretching of my circles, near the edge. I don’t know if the black is as black as I might like, but the dye seems to have saturated the surface pretty well. That was my biggest concern, that white would show through the black. I am pre-washing the fat quarter right now, putting it through my usual steps. I will see how it comes out, once sewn on some slugs.
I think the printed eyeballs may be more consistent in shape and pupil placement than the ones I make by sewing the black onto the white. I don’t want them to lose their charm, but they will probably continue to be wonky enough for my satisfaction. 🙂 I may need to interface the backs so they don’t wiggle too much as I sew them on by hand.
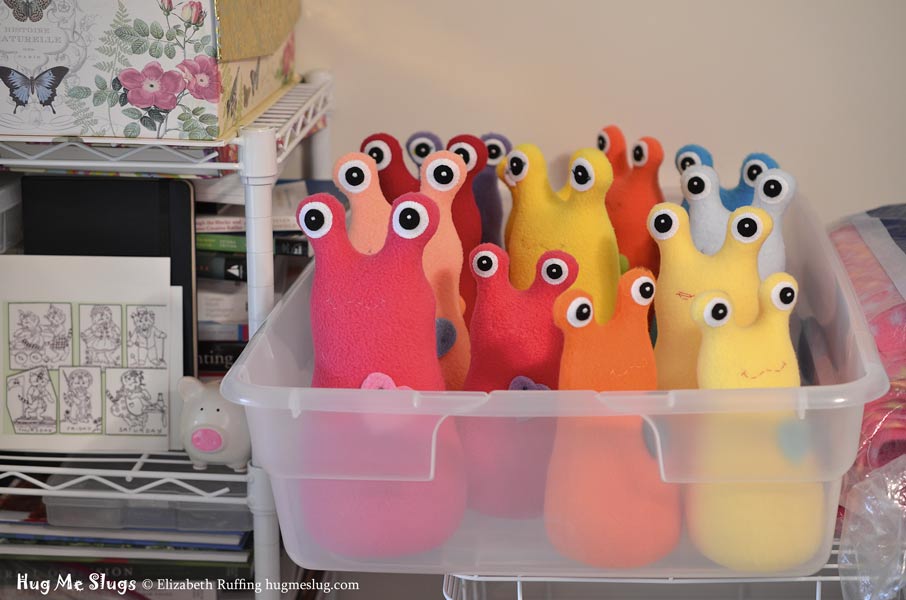
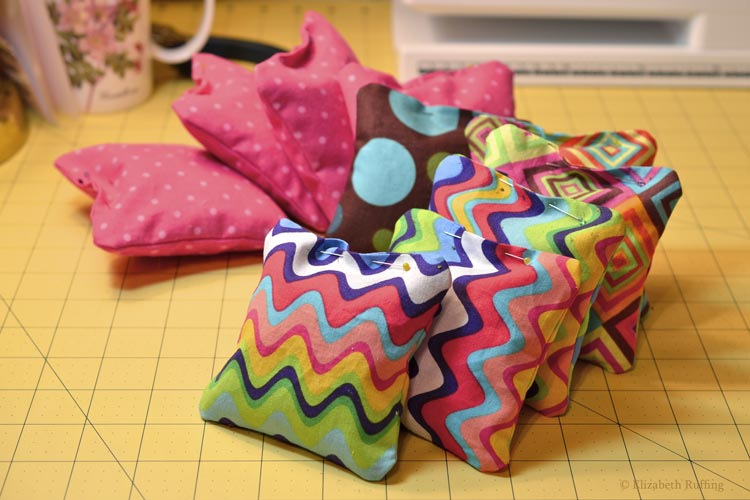
This is the current group of Hug Me Slugs I am working on. Thank you all for continuing to leave me such nice reviews. Aside from helping me out, those cheer me up. Getting appreciation back is great and helps me keep going, making things. It can be hard, working in a bubble of sorts, from home, so those mean a lot to me. I have been feeling better than I have in a while. Got to go get back to my sewing!
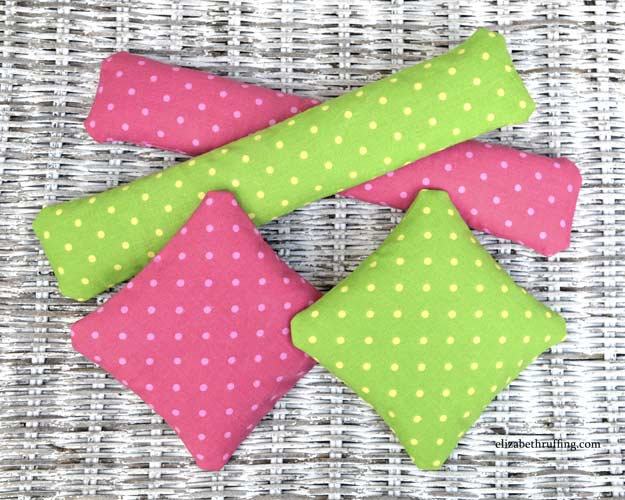
I made up free catnip toy patterns for catnip toy squares, cigars, and kickers, and a catnip toy tutorial to show how to make them.
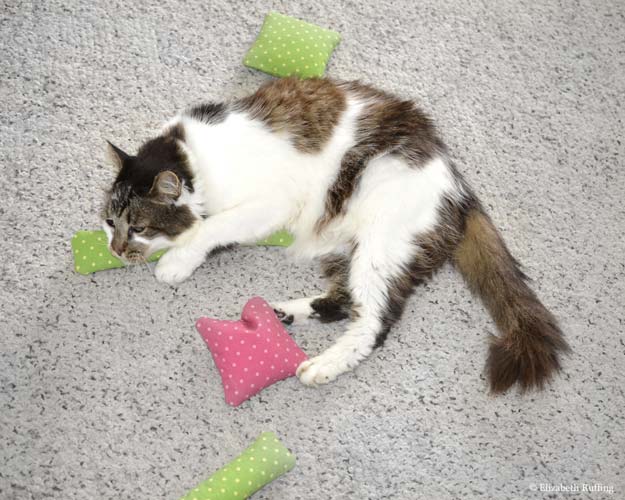
These catnip squares, cigars, and kickers are being enjoyed by all the kitties.
As I mentioned in my last post, we have additional kitties in the house. I decided I would make some catnip toys to smooth the jealous feelings and cheer everyone up. This is a tutorial showing how I made them.
I based the approximate sizes and shapes on catnip toys I got from Alley Cats and Angels, a local cat rescue here in North Carolina. They have a variety of catnip toys you can order by mail, and all the proceeds go to help their rescue cats. Their catnip squares, cigars, and kickers are all made by volunteers. They have additional catnip toy designs as well. They use potent organic catnip to fill their catnip toys. Our cats love them.
I made mine a little differently, with just catnip inside, instead of stuffing as well. The cats enjoy them either way.
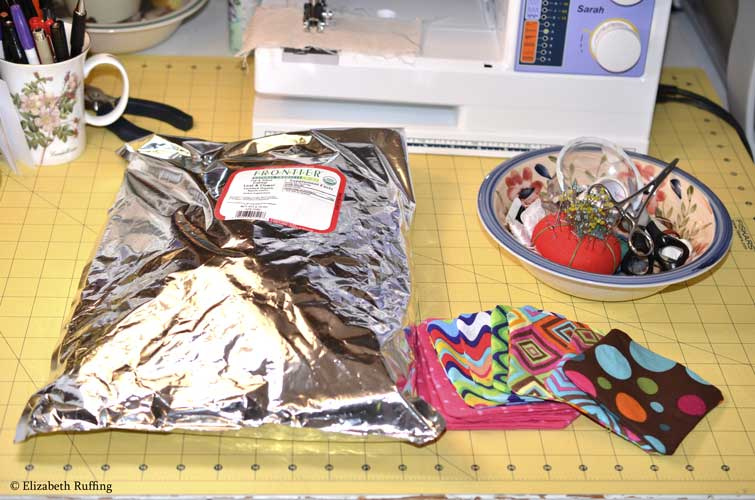
I used Frontier Catnip Leaf and Flower Certified Organic Catnip for mine. I found it online on amazon.com. It comes in a great big 1lb bag, shown below. You can also find organic catnip at Target, Walmart, PetSmart.
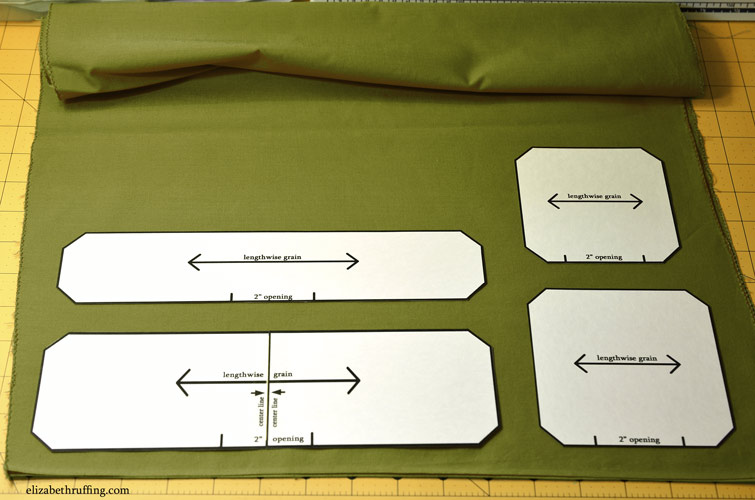
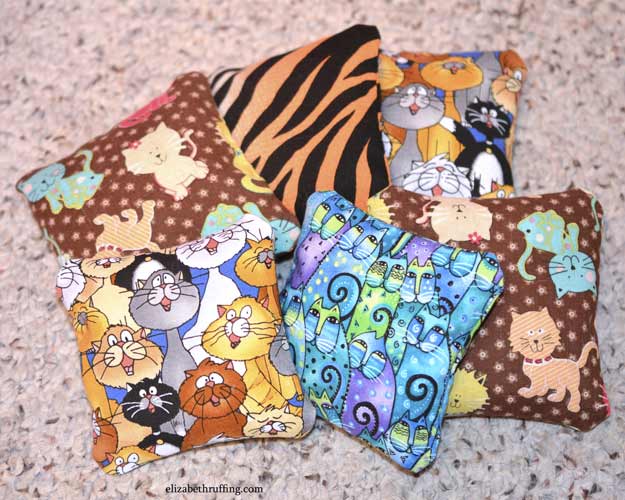
I made up template patterns for catnip squares, cigars, and kickers with a choice of cropped corners or squared corners. I made mine with the cropped corners, and my directions are for the toys with the cropped corners. Pictured below are the cigars and 4 1/2 inch squares.
You can also draw the shapes with the following measurements on card stock, and cut them out to use instead, if you don’t have a printer. If you want cropped corners like I have, mark a dot 1/2 inch down from each corner edge, draw lines across the corners, and clip the tips of the corners off your templates. These are the PDF’s of my catnip toy patterns. The sizes shown are the approximate sizes once sewn, before stuffing.
Save them to your computer and print them on 8 1/2″ x 11″ card stock. I had a little trouble printing them, and so be sure to check that you want to print them at “actual size” in the options that appear when you print. On my computer, the only link to print them that worked was the picture link of the little printer at the bottom of the PDF page which shows up when you hover your mouse over the bottom of the PDF page.
To start, cut your paper templates out of your printouts along the outer edges of the solid black lines. Clip off the corners of the paper templates to make the toys with cropped corners, as I did.
I pre-washed an assortment of cotton quilting fabrics to use to make my catnip toys. I followed the manufacturers’ instructions, washing the fabric on warm, after finishing the raw edges of each fabric with a zig zag stitch, on my sewing machine, so they wouldn’t fray in the washing machine.
I put the cotton quilting fabrics in the dryer for a few minutes, and pulled them out before they were totally dry. I ironed them so they would be nice and flat. I pre-wash all of my fabrics, to get rid of the chemical smell, and to shrink them, in case I want to wash them later.
Fold your fabric in half, selvage edge to selvage edge, right sides together. If you are using scraps, arrange them so the lengthwise grain is lined up and going in the same direction on each piece. The lengthwise grain line runs parallel to the finished selvage edge of your fabric.
The lengthwise grain is the grain line that stretches the least when you pull it. Give your fabric a small stretch to check, if there is no selvage edge left on your scraps.
The grain of the fabric is usually visible on quilting cottons. If you look closely, you will see threads run in two directions, at right angles to each other. The lengthwise grain goes the length of the fabric, as it comes off the bolt, and the crosswise grain runs along the width of the fabric, perpendicular to the selvage edge.
Lay the paper templates on the fabric with the arrows parallel to the lengthwise grain of the fabric. The long edge of the cigar and the kicker will be parallel to the selvage edge. The markings for the 2 inch openings will also be parallel to the selvage edge, as shown above.
Be sure to leave at least 1/4″ around each shape (that’s at least 1/2″ between two shapes that are next to each other) for the seam allowances.
You will be sewing right on the lines you will be drawing around the templates, and you will need to leave that space around the shapes when you cut them out.
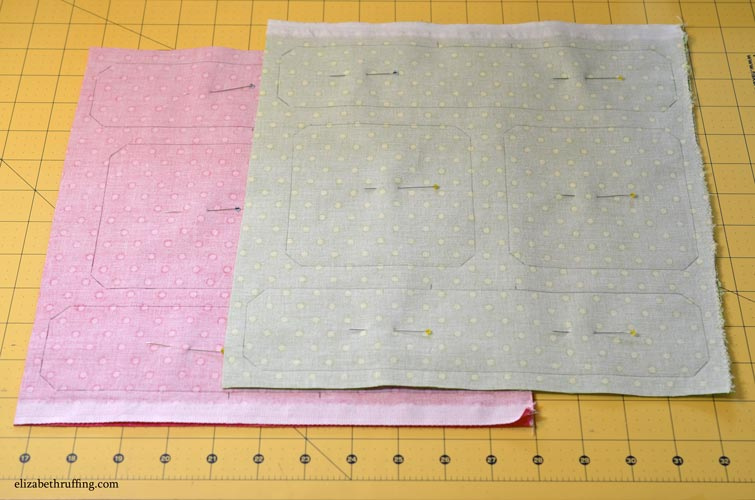
Trace around the paper templates with a pencil, drawing the lines on the fabric, marking the opening on each one for turning. I used a mechanical pencil to draw my lines. Putting a piece of fine sandpaper, with the grit facing upright, underneath my fabric, helps keep my fabric in place while I draw my lines.
My openings are 2″ long and centered on the long side of the cigar, and in the middle of the side of the square. It is easier to sew the toys closed if you mark the opening along the lengthwise grain, parallel to the selvage edge, as I have done above, because there will be less stretch. That will help you when you stuff the toys, and it will help you when you hand sew the openings closed. It is much easier to hand sew along lines that stay flat and smooth.
After you have drawn your lines onto your fabric, pin the fabric shapes together, and then roughly cut them apart, leaving at least 1/4 inch of fabric around each fabric shape for the seam allowances.
Sew right on top of the lines you drew on the fabric, leaving the 2 inch openings free. I used a tiny 1.2 stitch length. Start sewing immediately past the opening, sew around the edge, and stop when you reach the second mark for where the opening begins.
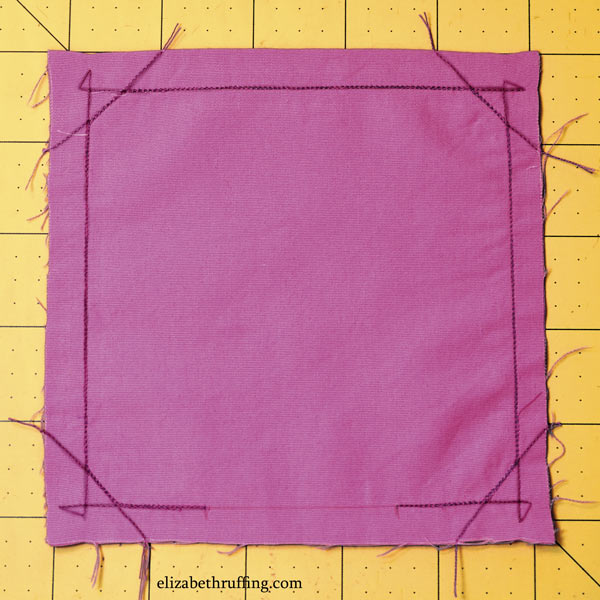
I wanted to reinforce my seams by sewing them twice and I wanted to reinforce the corners where I clip them. So, this is what I did: I started sewing at one opening mark. I sewed right past my turn at the corner, lifted the needle and presser foot, pulled the fabric a little so I could pivot, and then I continued to sew the next side of the shape, ignoring the crop line. I did this at each corner all the way to the other opening mark. Then, I pivoted and sewed back in the other direction along my line.
On the second pass through, I sewed the cropped corner lines. When I was back at the first opening, I lifted the needle and presser foot again, pulled the fabric free a little, and sewed across each cropped corner again, edge to edge, to reinforce it. I left the fabric right in the machine, and only pulled it as free as I needed to to sew.
When I was done sewing, I just clipped the threads to free the edges from each other. It sounds a little complicated, but I found it easier to do. As long as you end up with your sewing on top of the lines you drew, the rest doesn’t have to be terribly neat.
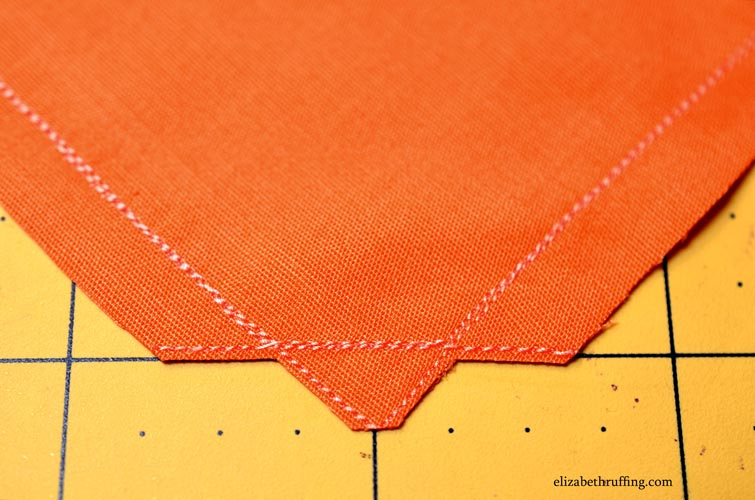
The picture above show what my corners looked like, once they were sewn, before any trimming.
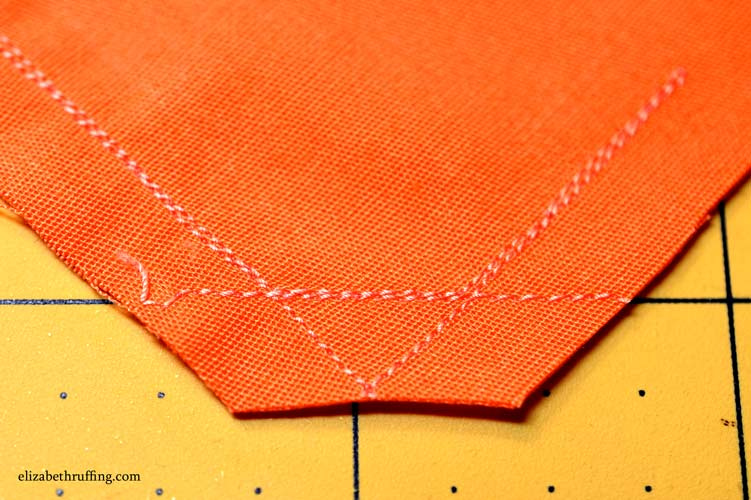
Now it is time to trim your seam allowances and clip your corners. You need at least 1/4 inch of fabric around the outside of your sewing lines. Your trimming doesn’t have to be very neat. Just make sure you have the extra fabric around the outside of your sewing lines. Treat the first corner clips the same way, leaving at least 1/4 inch of fabric outside the sewing line for your cropped corners, as shown in the picture above.
(If you made squared corners instead of cropped ones, you’ll have just this one clip, at a diagonal across the outside of the corner point. You will need to be careful not to clip too close to the sewing line at the corner point. Before clipping squared corners, I sew diagonally across my corners, to reinforce them, and then I trim next to the diagonal sewing line I just made, leaving about 1/32″ or about three thread widths of fabric outside the sewing line.)
Now for the corner clips. When clipping corners, the first snip you take is roughly parallel to the seam line you are facing with the scissors, and the second snip is parallel to the next seam line you are facing when you snip. The clip shape looks sort of like a mirror version of the seam lines. If you sewed yours the way I did mine, you will have the reinforced sewing lines to use as a guide, as shown above.
Clip close, but not right up to the stitching, leaving about 1/32″ or about three thread widths from the sewing line, on the outside edge, so you don’t poke a hole through when you turn and stuff your toys.
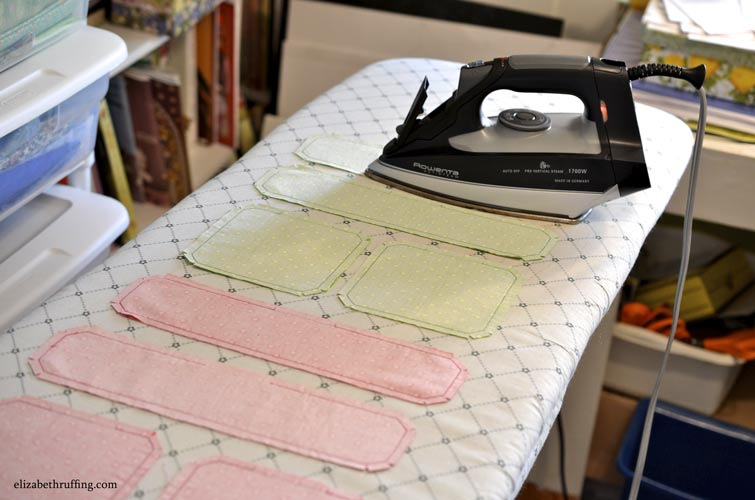
Press the shapes with a steam iron, at the appropriate setting for your fabric. I used cotton fabric, and a cotton setting on the iron.
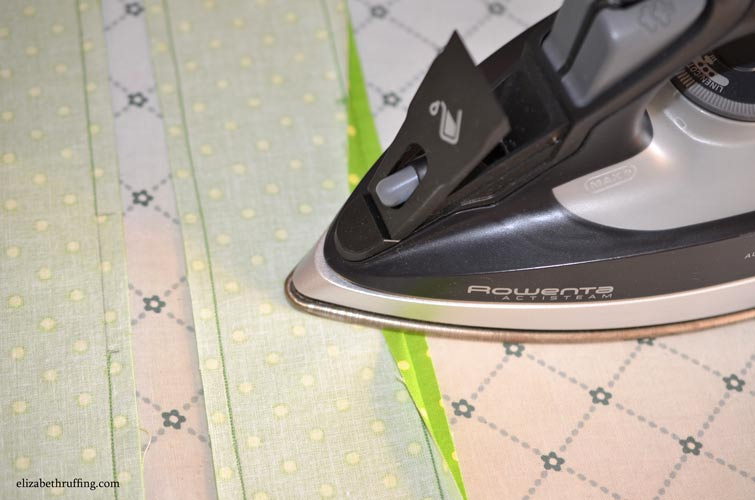
Fold back one side of your opening, along the drawn line. Press just the opening back along the drawn line. Flip the shape over, and fold the other side of the opening to match. Press just the opening.
The cigar and the square will now look like this, above.
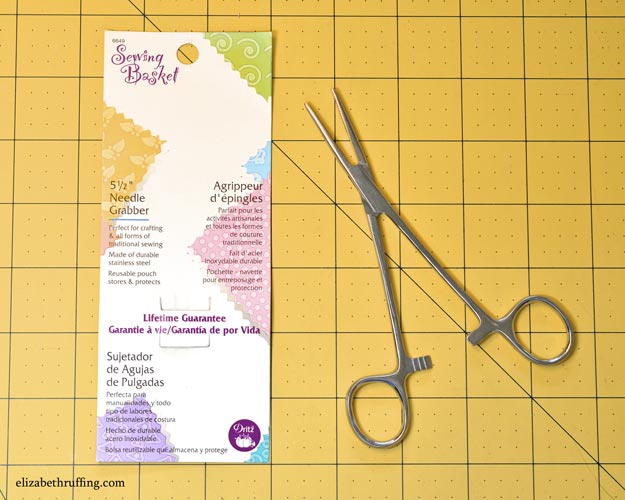
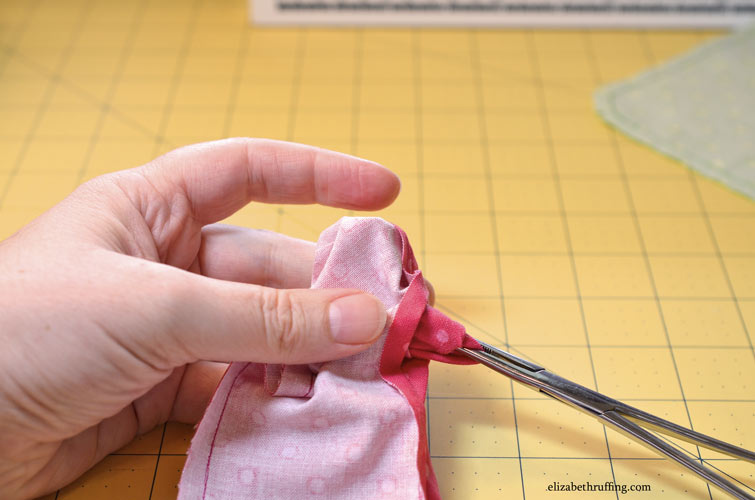
I used hemostats to turn my shapes right side out. Tube turners will work well also. I got my hemostats at Hancock Fabrics, but you can find them on eBay too. Mine have the teeth, which helps grip the fabric. The one I have is called a “Sewing Basket 5 1/2″ Needle Grabber”.
Hold the edge of the shape furthest from the opening, or one of the two, in the case of the cigar. Stick your hemostats inside your opening, and grab the edge you are holding, from the inside.
Pull gently until that edge comes out your opening.
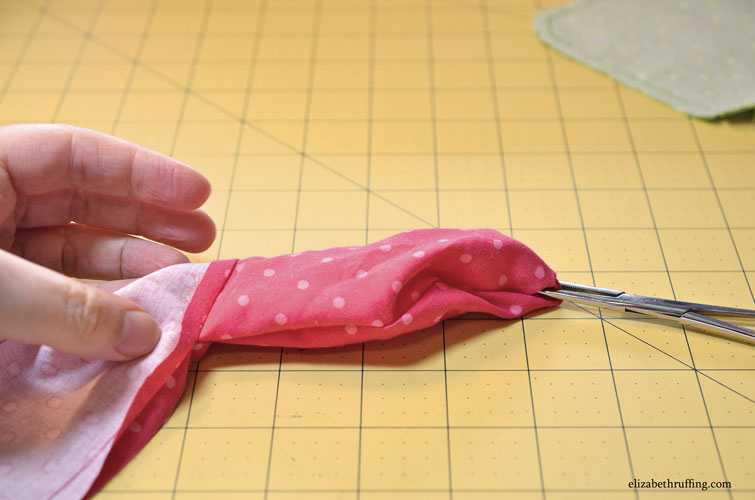
Carefully pull it all the way through. For the cigar, do the same thing for the other half of your shape.
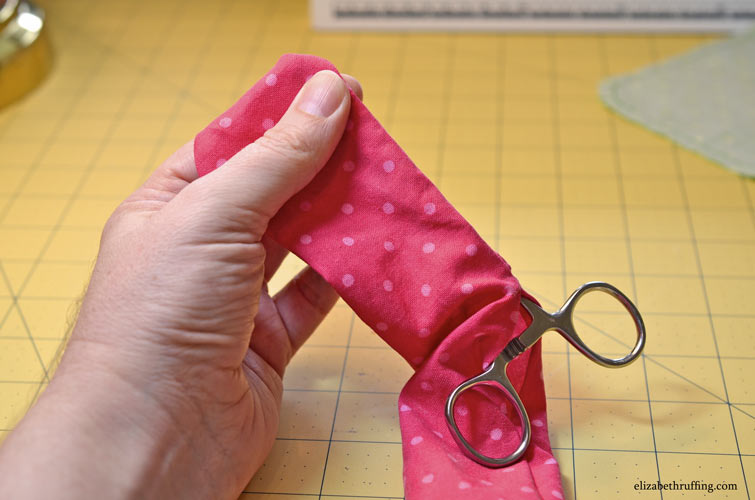
Stick your hemostats back inside the opening and use them to gently push along the seam lines to completely turn the shape right side out. Don’t poke your corners too hard, especially if you are using squared corners instead.
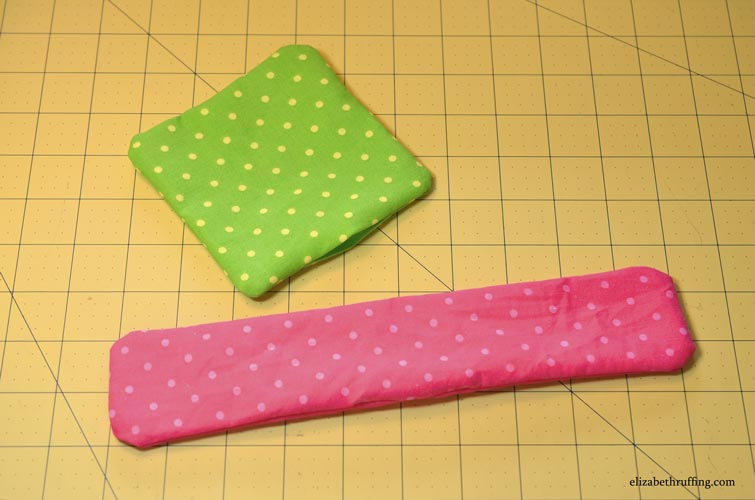
Now your shapes look like this, above.
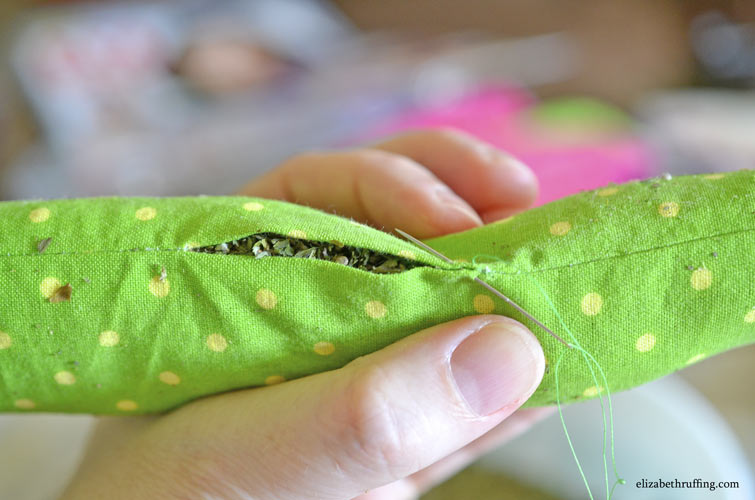
I poured my catnip into a bowl, so I could scoop it into my openings a little at a time with a spoon. I filled the cigars, shown above and below, on one end, then the other, and then filled in with catnip in the middle.
Fill your toys as firmly as you want with the catnip. Our cats seemed to prefer the ones that were more floppy, like bean bags, and weren’t filled all the way.
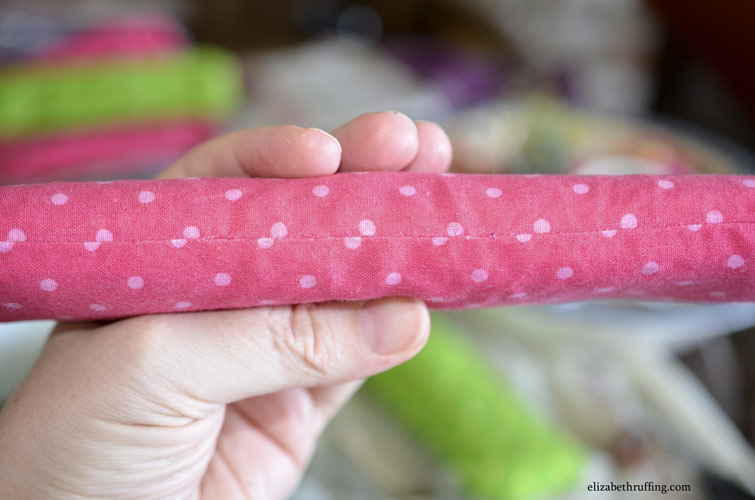
When you are ready to close your catnip toys up, pinch the folded edges of your opening together and sew them closed by hand with a slip stitch or a ladder stitch. Your closure will be neat and won’t be very visible, as shown below. You can even open the slip-stitching to replace the catnip with fresh catnip later.
The catnip squares are filled the same way, with spoonfuls of catnip. They are a little easier. You can fill them, and pin the openings together before hand sewing them shut. Just be absolutely sure to remove your pins!
These are some recycled catnip squares. I bought these from Alley Cats and Angels, the local cat rescue, and after some wear, I emptied them, hand washed them inside out, pressed and sewed them using my 4 inch square templates, and refilled them. I liked the fabrics so much, I wanted to keep them going. They look almost good as new.
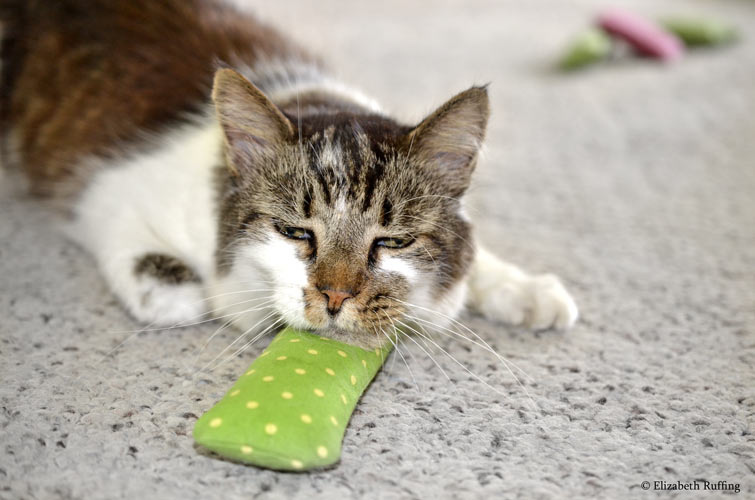
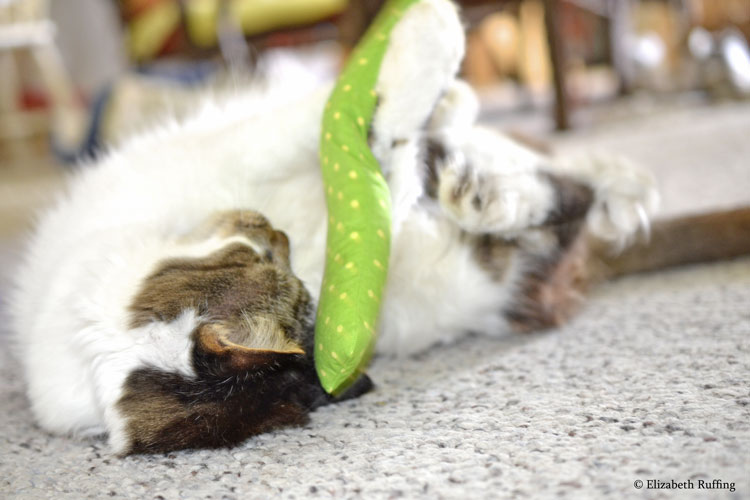
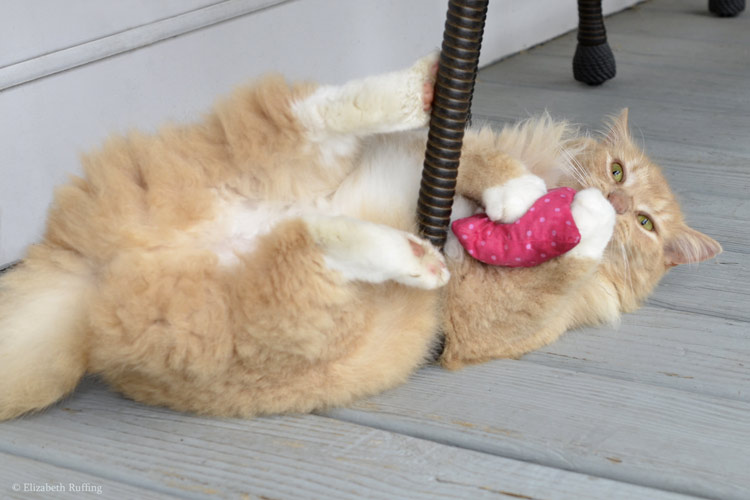
Below is one of my finished catnip kickers, which is wider than the catnip cigar, having a soothing effect on Bindi.
I hope my free catnip toy tutorial is helpful to you and that your kitties will enjoy the catnip toys you make for them!
They are popular here. Santana the Peeping Tom Cat, who is a visitor from our neighbors’ house, has his own collection.
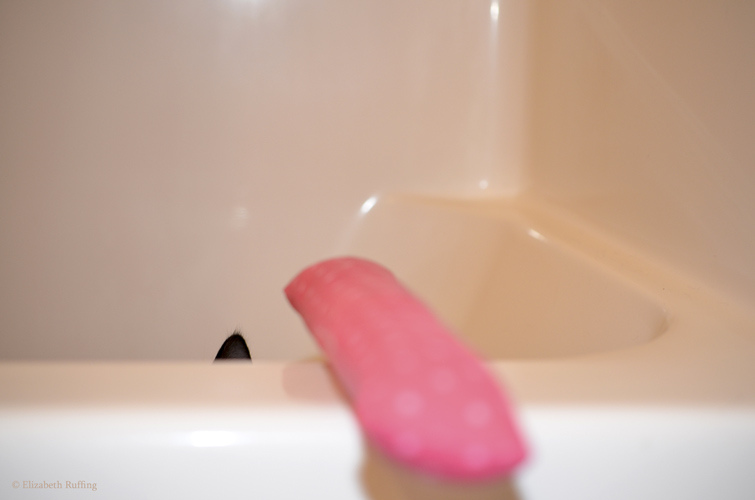
Here is Jojo playing with her cigar. She loves to hide in the tub and sneak up on it. I call her a tub-shark:
I hope you enjoyed my catnip toy tutorial. Patterns and instructions are copyright Elizabeth Ruffing. Please don’t sell my patterns. You are welcome to use the catnip squares, cigars, and kickers patterns to make all the catnip toys you want. Please feel free to make toys to use for fundraisers, to donate to shelter cats, and to give to your friends!
If you need any help finding anything on our site or have any questions, please contact us at [email protected]
We will be posting our creations in our Ruffing’s shop, here on this website, and are in the process of moving everything here. If you are looking for something and don’t see it yet, please feel free to ask!

 Since I last wrote about getting eyeballs for my toys printed on custom fabric from Fabric on Demand, which came out great, I went a bit berserko and decided I needed about eight billion varieties.
 I contacted Oliver Bunny’s veterinarian and asked what shaped pupils he thought various animals would have, round or oval, and if the oval pupils would be vertical or horizontal. I am lucky he and his colleagues enjoy questions.
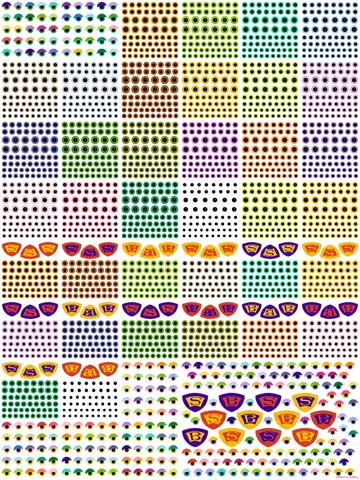 Then I went about designing an exhausting array of colored eyeballs, most of which don’t exist in nature, with both round and oval pupils, along with emblems for my superhero stuffed animals, my Super Slugs and Wonder Bunnies.
 It took a while to get my custom fabric back from the printer, but my eyeballs and emblems look pretty awesome.
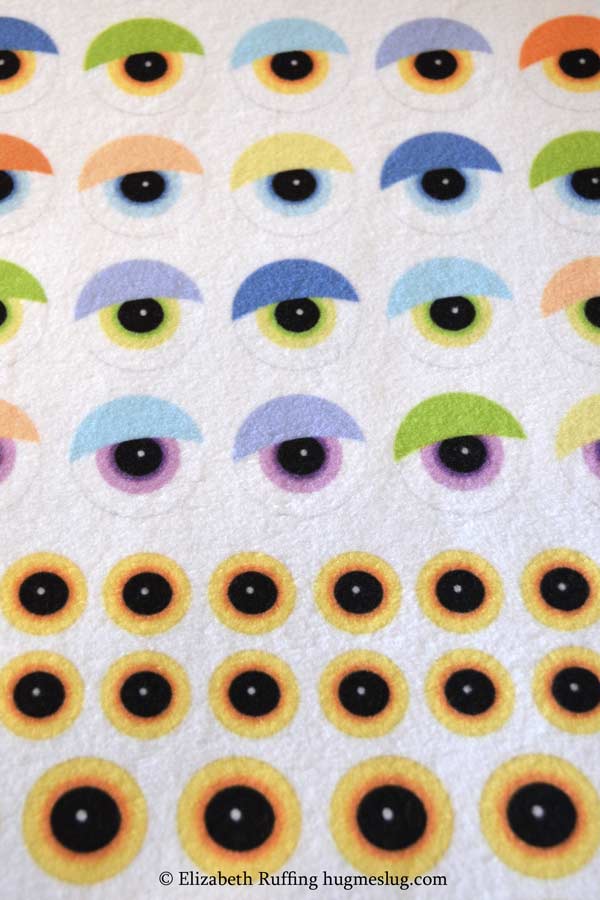 They came out of the washer and dryer a little softer looking, which is no surprise with fleece, since it has a fuzzy texture. I am trying to decide if I want to pre-wash my fleece custom fabric. If I do, I will do it by hand, by gently dunking it in the sink, and hang it to dry next time, to preserve the sharpness. The blacks came out nice and black too.
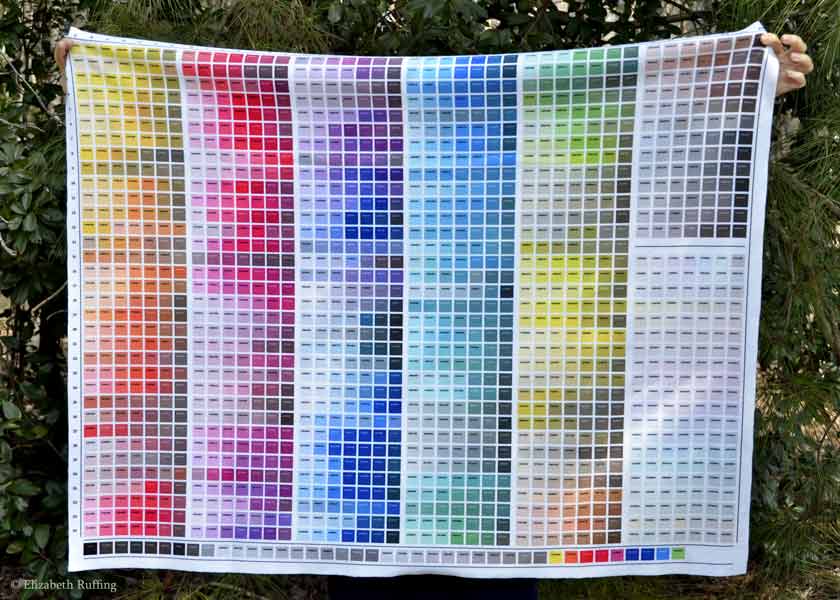 I downloaded a color map with the hex code numbers for a rainbow of colors, from the popular custom fabric printing business, Spoonflower. I moved the row of blacks and grays to the bottom so I could make the color map a little wider, since fleece fabric is wider than cotton. It still fit on a yard, and I printed that as well.
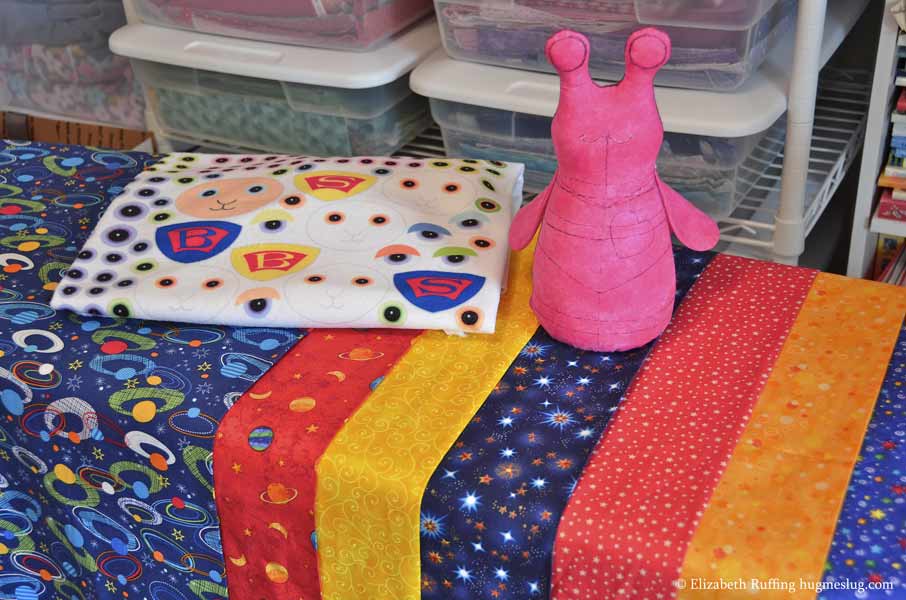 I am working on revising my Super Slug stuffed animal superhero pattern. I ordered some special cape fabrics. I’m going to make a Wonder Bunny plush rabbit superhero cohort for him.
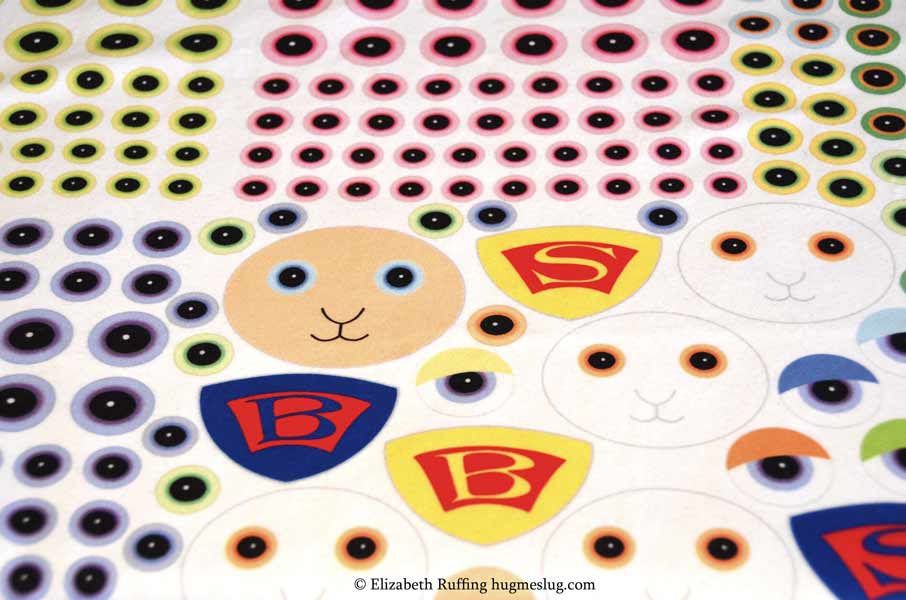 I’m also going to make some Hug Me Lambs stuffed animals, and I think, some lop-earred bunnies similar to the lambs, with fleece faces and ears, and either cotton print or fleece bodies.
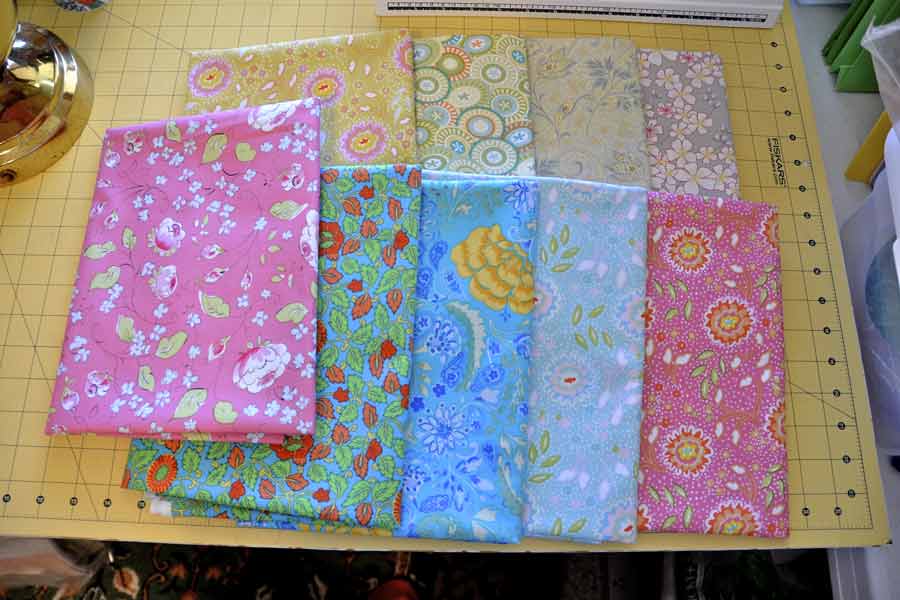 I just received a group of really pretty planet and star fabrics, to use for capes for my superhero plush toys, from Brooklyn Fabric Company in Iowa. They have a sale until tomorrow, and they shipped them very quickly.
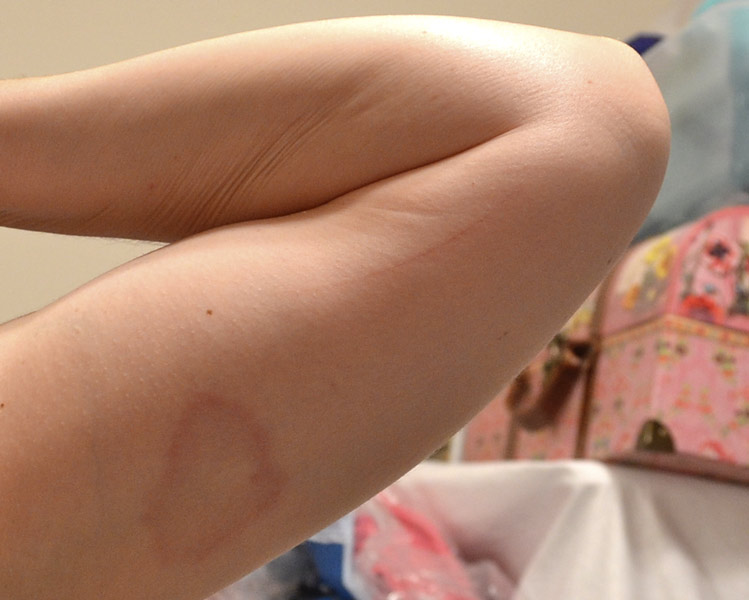 In other news…I’ve been feeling so tired! I know it seems like I’ve been doing a lot, but I have had so much fatigue.
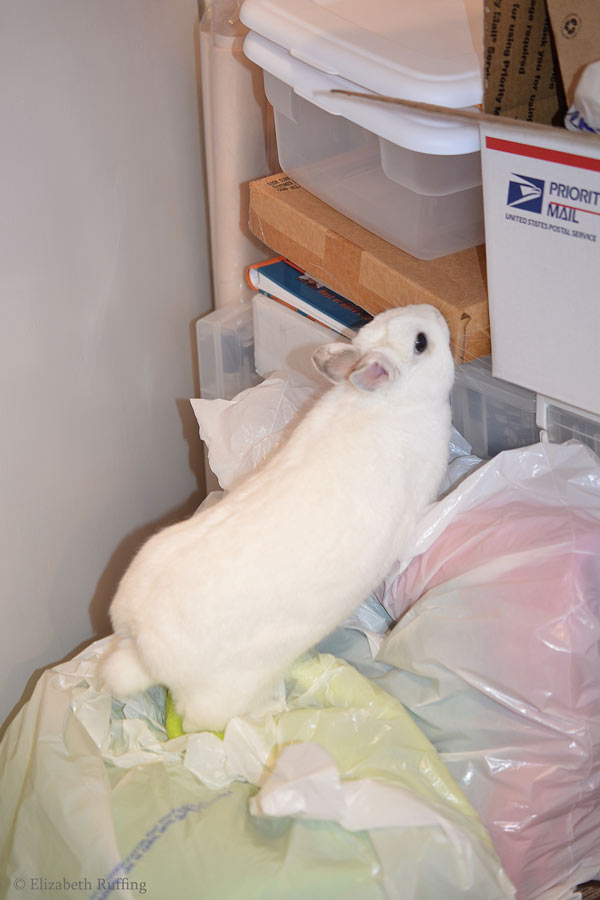 I have bushes and trees to plant and a certain little furry man to take for his checkup. I’ll see how I do. I’ve been warned to expect some side effects from the Amoxicillin.