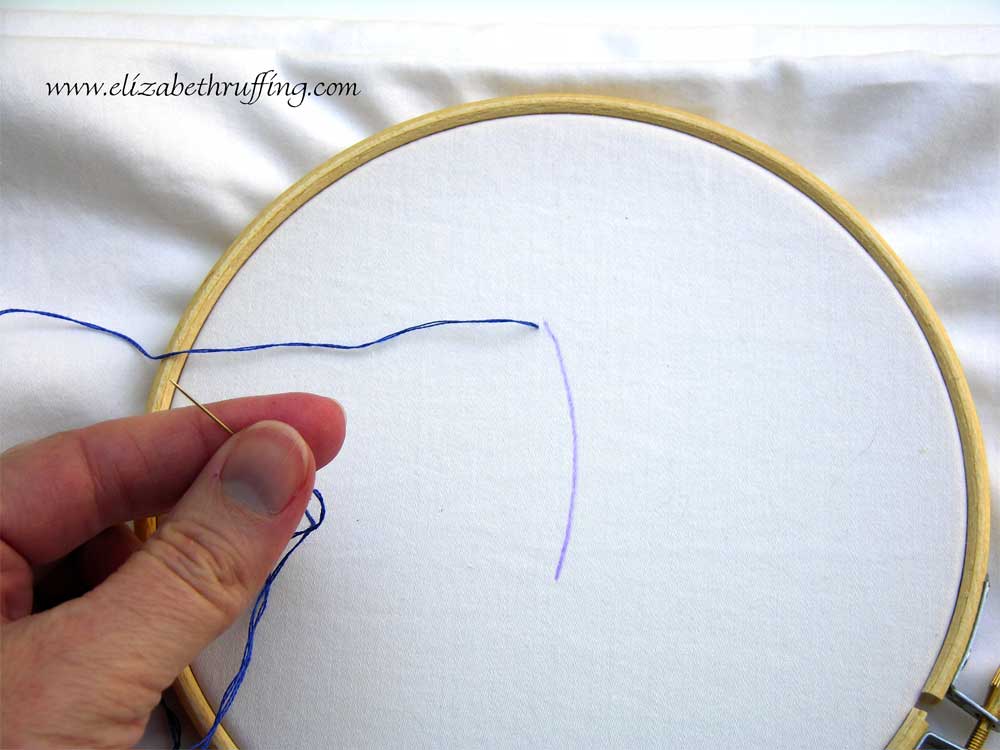
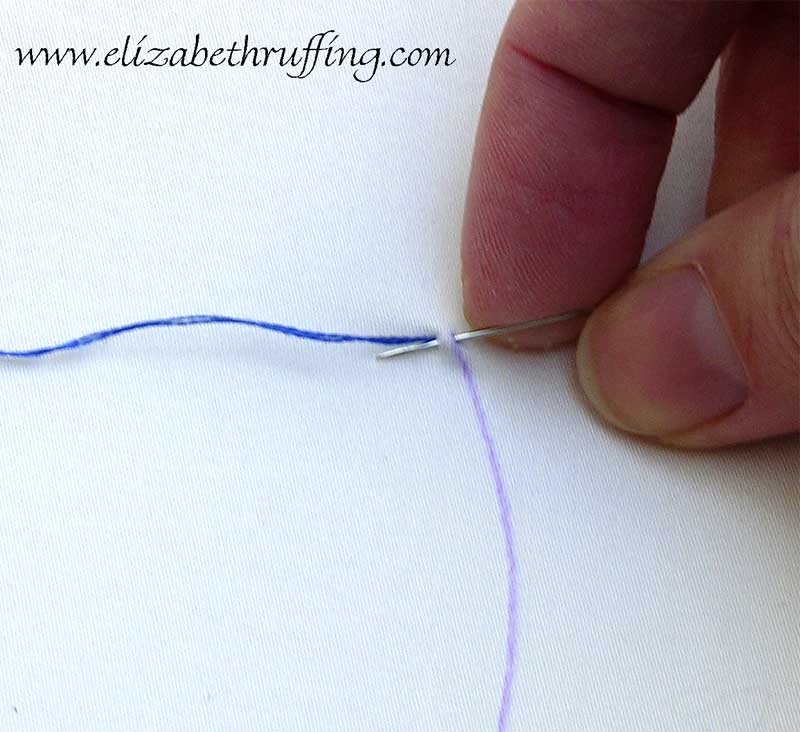
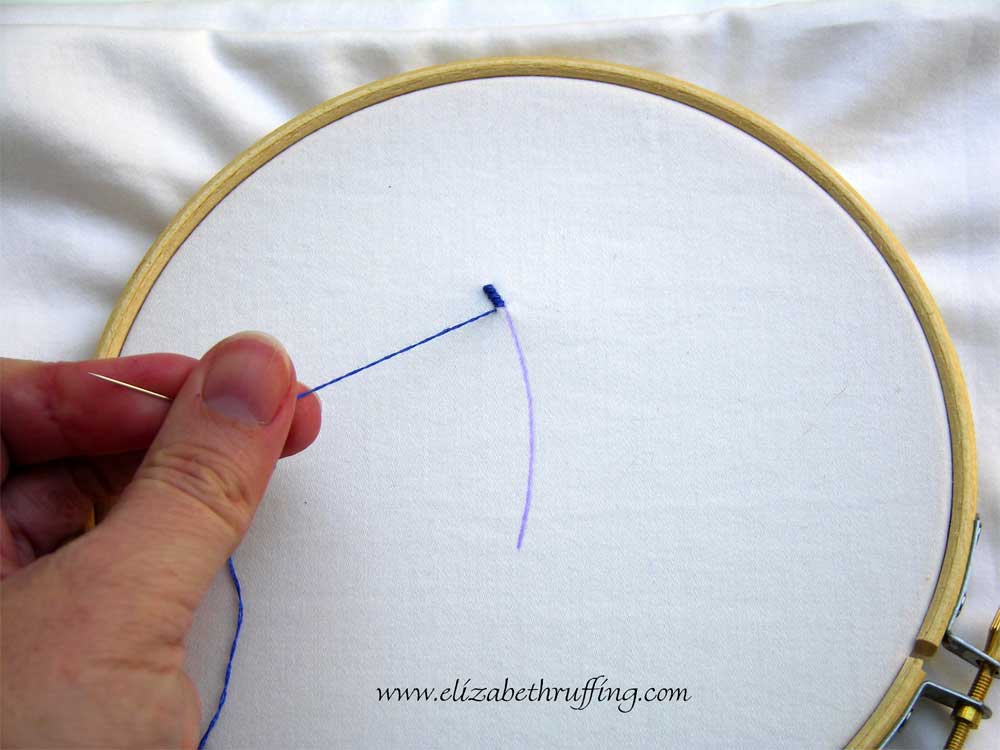
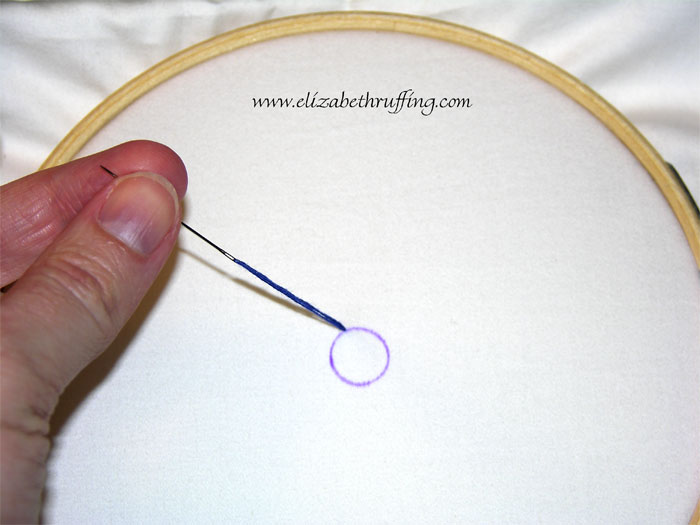
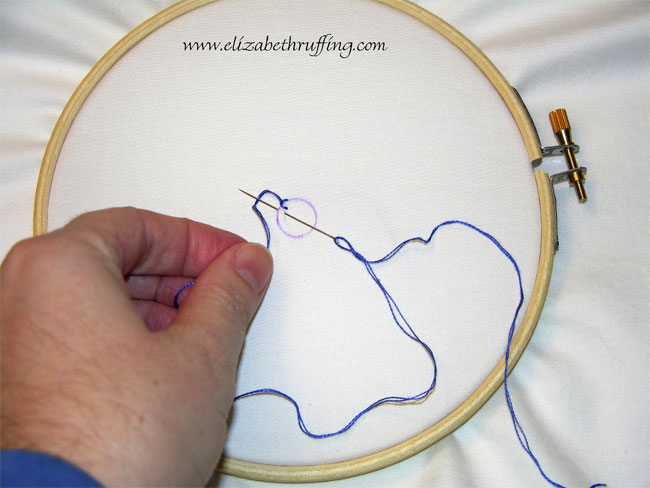
 Okay, I’m back…We are about to start embellishing the bluebird quilt block with hand embroidery stitches. If you would prefer to use machine stitching, a zig zag or satin stitch along the raw edges of the appliqué will work fine, or you can try out the decorative stitches that might have come with your machine. I’m going to start with a hand-embroidered blanket stitch. Here are the basics of the blanket stitch before we start on the block itself. The first stitch is made by poking your needle through from the back of the fabric to the front of the fabric, along the raw edge you want to finish (shown here with a purple line).
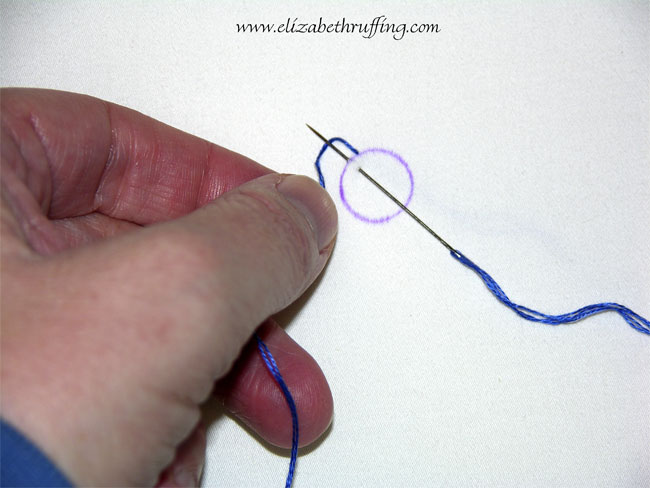
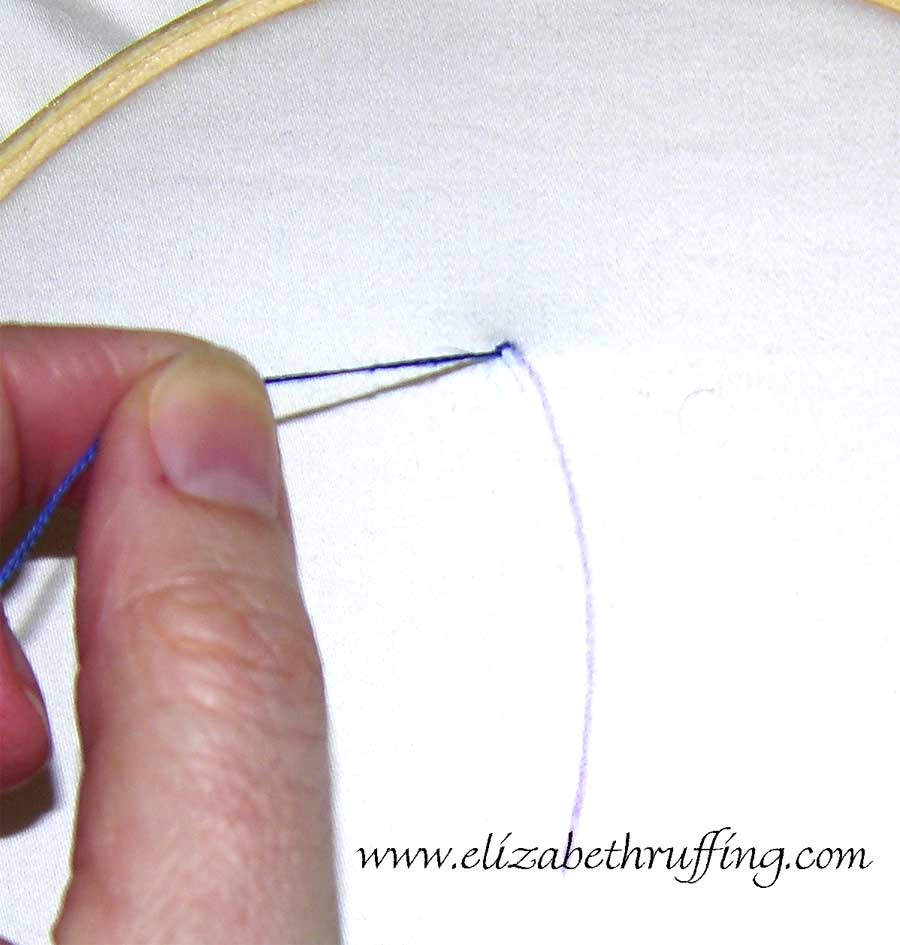
The second stitch is made by taking a stitch from the front to the back of the fabric, just to the side of your first stitch, but inside the raw edge you want to finish. In one movement, poke the needle back out to the front of the fabric, along your raw edge, just next to the first stitch, while holding the embroidery floss from your first stitch down so your needle will be
on top of the loop of embroidery floss from the last stitch. (You can click on my pictures to make them larger, for anyone who might not know that already.)
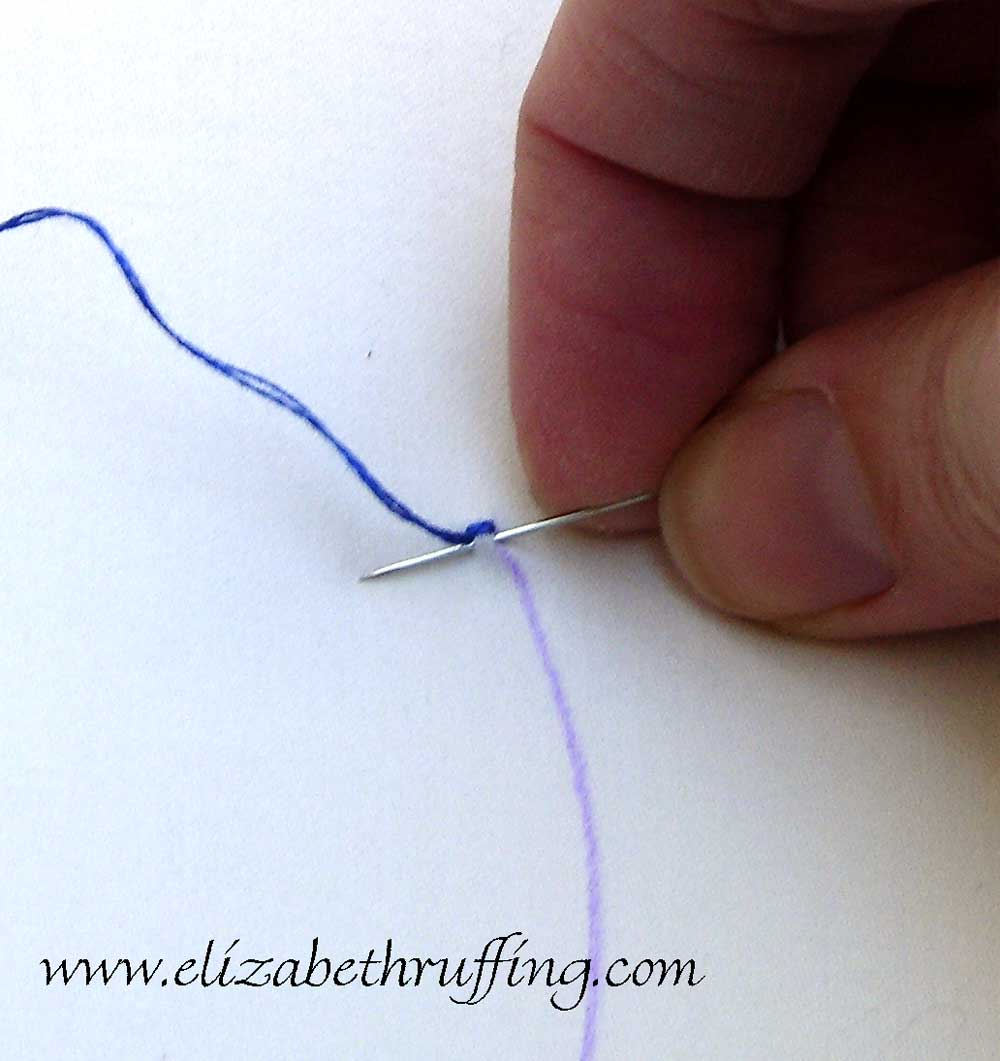
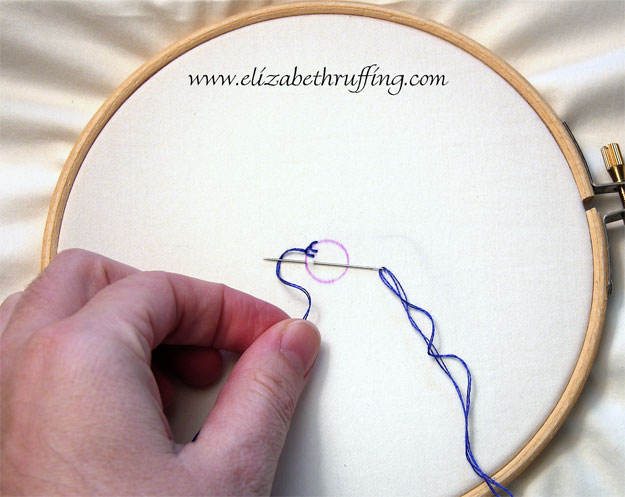
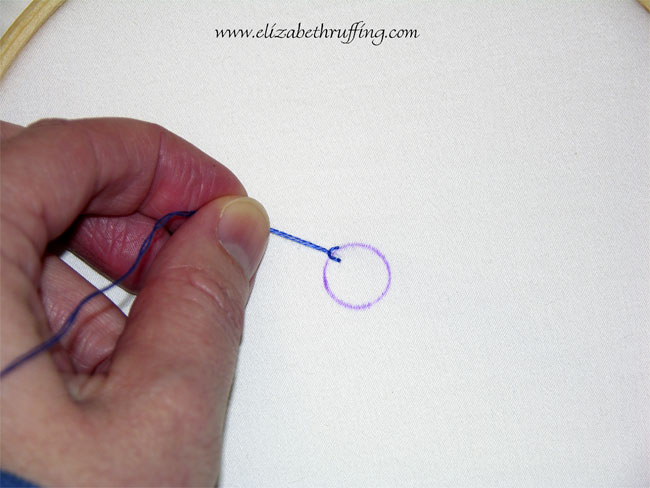 Pull your embroidery floss taut, not too tight to make the fabric pucker, but just enough that the stitch is smooth. It helps to smooth it with your finger as you go. These are the essential steps. You will just keep repeating them along your raw edge.
 Poke your needle in and out of your fabric again, coming our on top of the last loop of floss. Keep your stitches an even distance apart. When stitching around a circle, point your needle from the middle centerpoint of the circle outward to make the stitches fan out nicely.
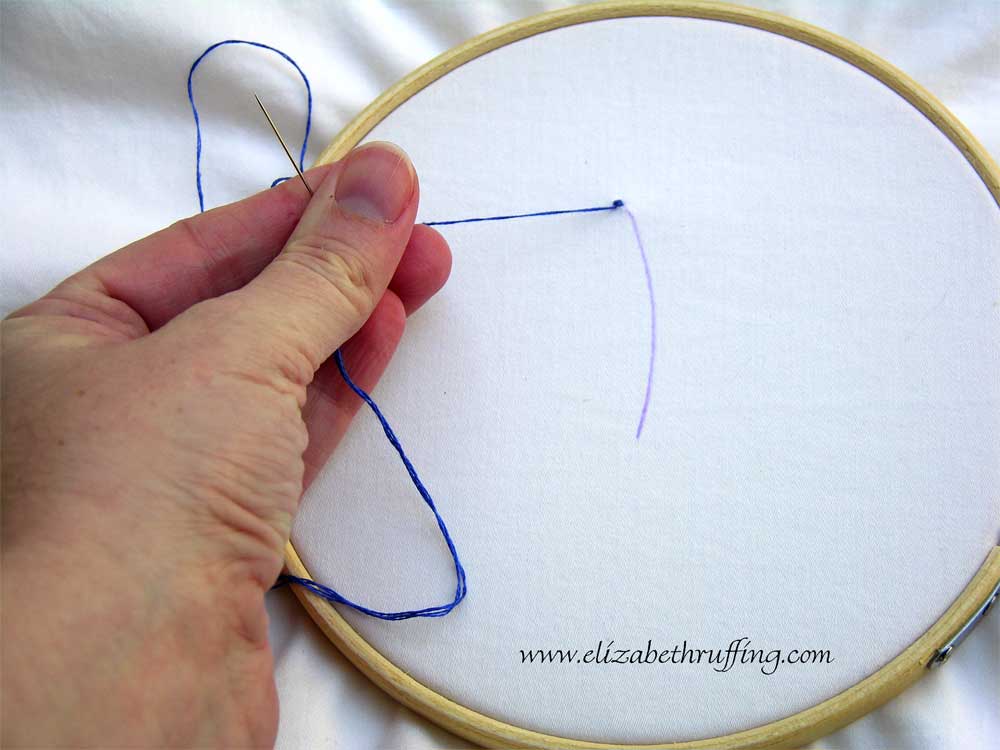
 Pull them taut as you go.
 Repeat the same stitch.
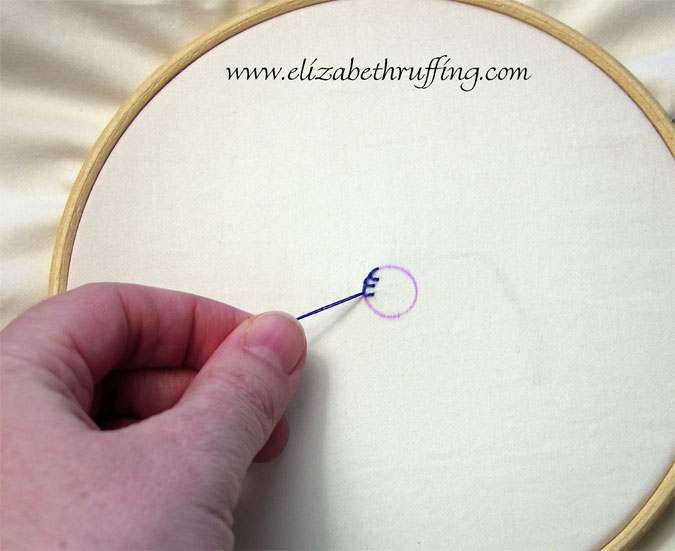 Pull it taut, and continue all the way around. You will take one little stitch almost in place to lock it down when you reach your starting point again. Then you will carry your floss along the wrong side (back) of the fabric to the next raw edge you want to finish, or you will take a backstitch on the back of the fabric and cut the floss to end it. I make a little knot just to be safe. Since this block will be quilted and it will have batting behind of it, it doesn’t need to lie perfectly flat.
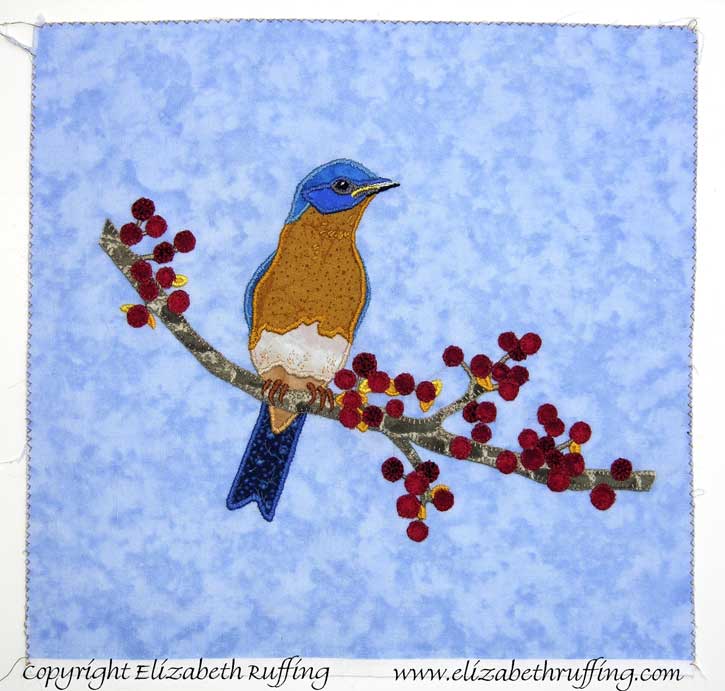
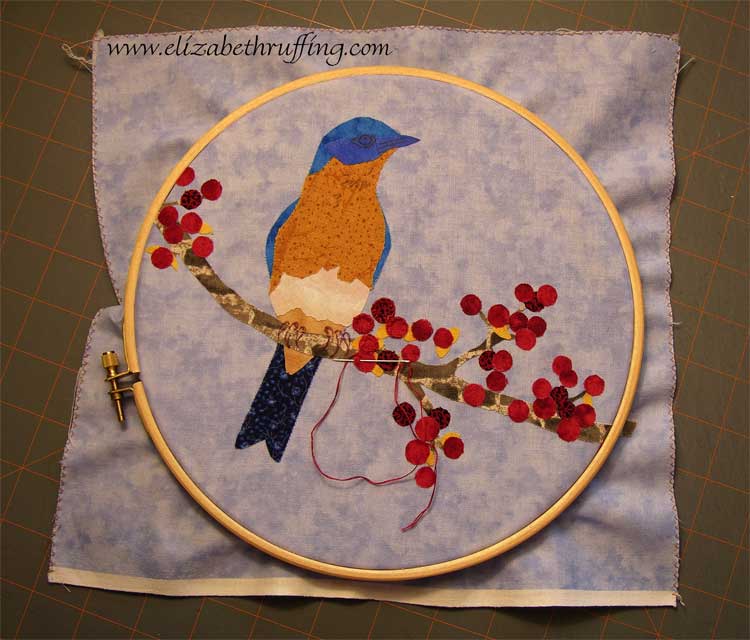 Okay…onto the bluebird block. Once again, you will need a few things:
- A hoop (I used a 9 inch wooden embroidery hoop, but you may need a smaller one if your square is smaller than mine, which was 11 1/2 inches)
- Embroidery floss (I used DMC 3777, but you will match your floss to the red of your berries)
- An embroidery needle (I think I used a size 10)
Put your quilt block in your hoop, keeping the fabric taut, and tighten the screw on the side of the hoop to make it snug. Cut a length of embroidery floss about 20 inches long and separate out two strands of floss from the rest. Thread your needle with the two strands. A needle threader helps, but I just wet the ends with my tongue and cut them at a slant to make threading easier.
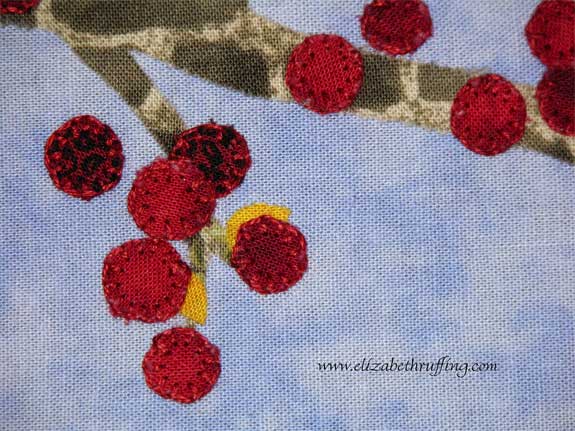
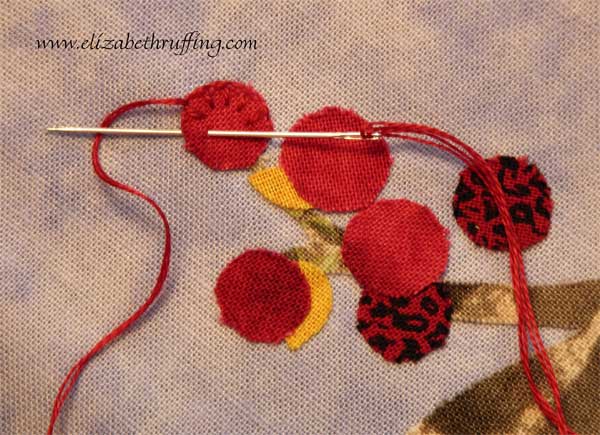 Pick a berry and start your blanket stitch as described above. Take a little lock stitch almost in place as you reach your starting point and carry the floss along the back of your fabric to the next berry. Repeat the process, ending and starting a new thread as you run out. I tried to work in clusters so I didn’t have to make my floss travel too far across the back. I used the blanket stitch on all the red berries.
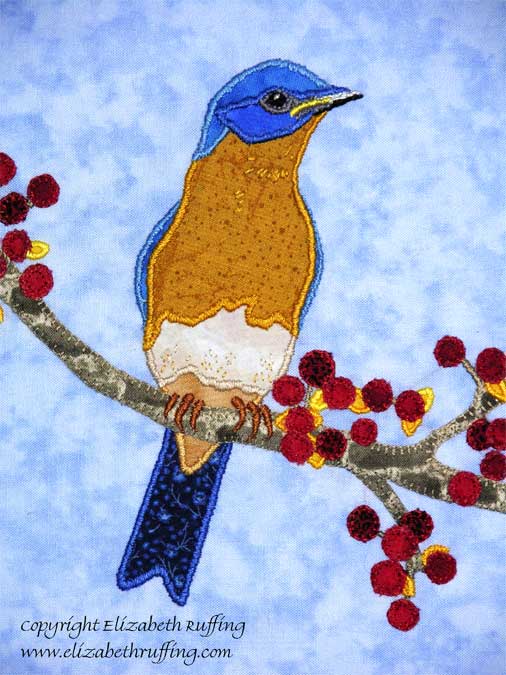
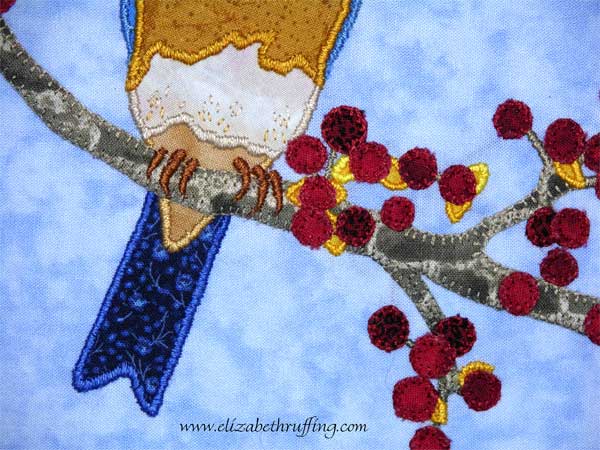
 My fabric appliqués lifted for the wear, and so I steam pressed them down again when I was done, following the manufacturer’s instructions for my paper-backed fusible.
Here’s a closeup of my blanket stitch. I found I got a little better at it as I went along. It would probably be possible to use this stitch on most of the raw edges, if you wanted to, but I think I will experiment with another stitch for the next area I do. More later…
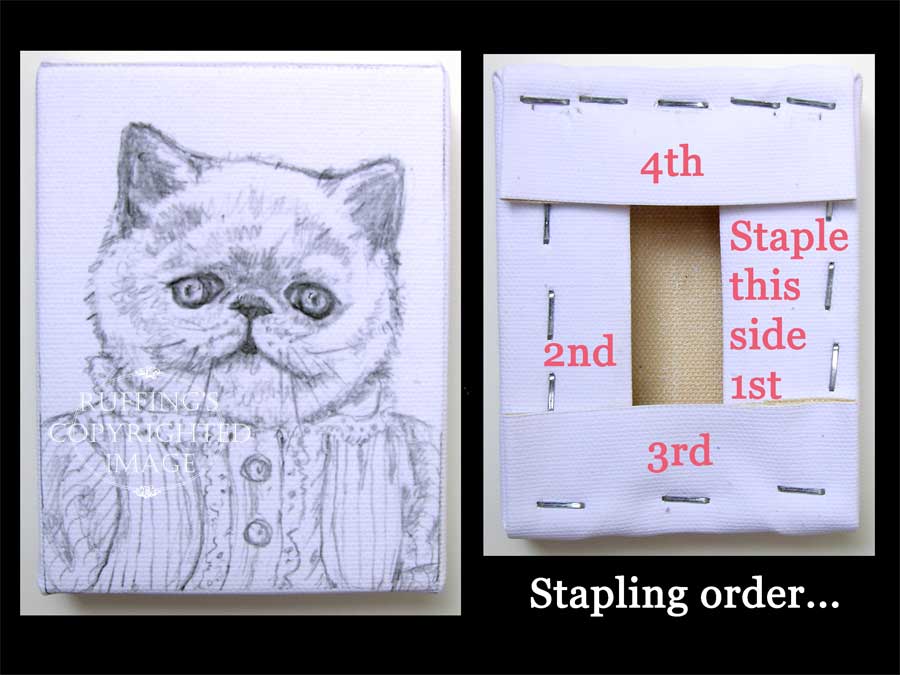 Here is the stapling order, which is in the video, in case it goes by too fast, or you want to click on the photo to get a bigger picture.
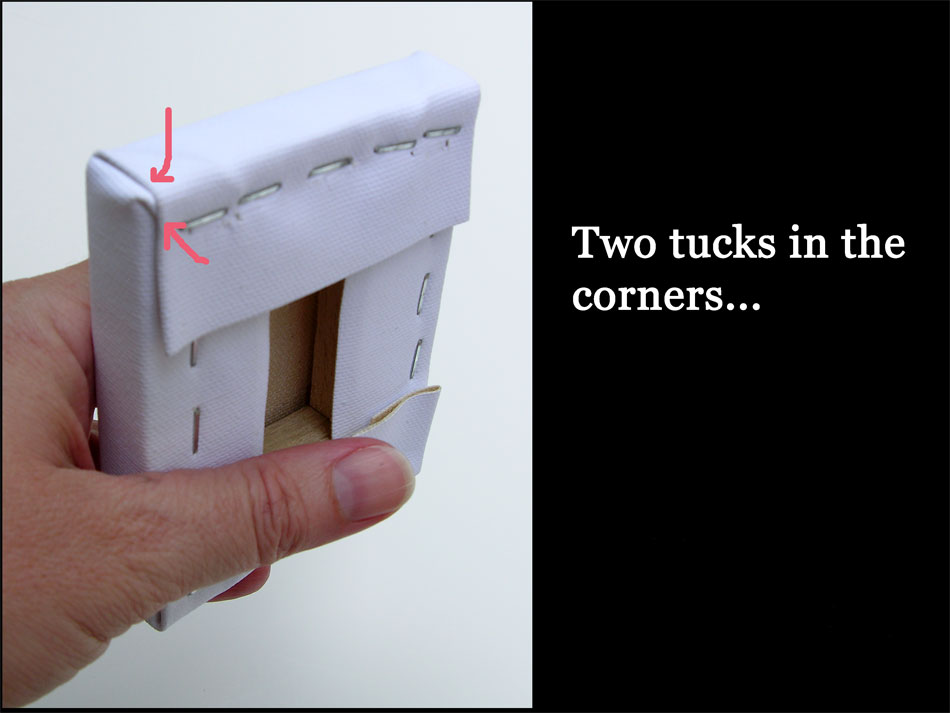 And here is a photo of the two tucks in the corners that you make when you do a gallery wrap, which means the staples are around the back instead of on the sides. Again, you can click on the photo to make it bigger.