Posted on

Halloween musings

Renaissance gown, McCall
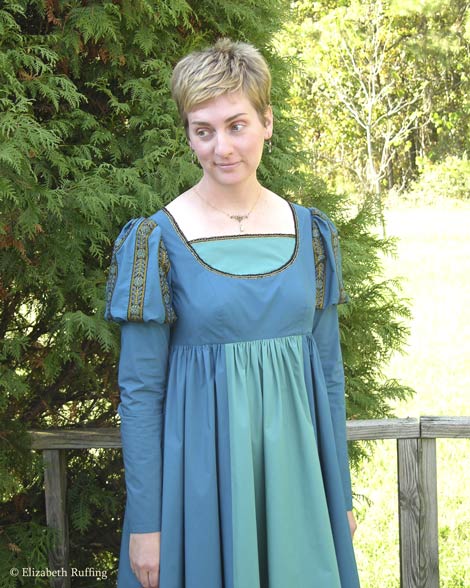
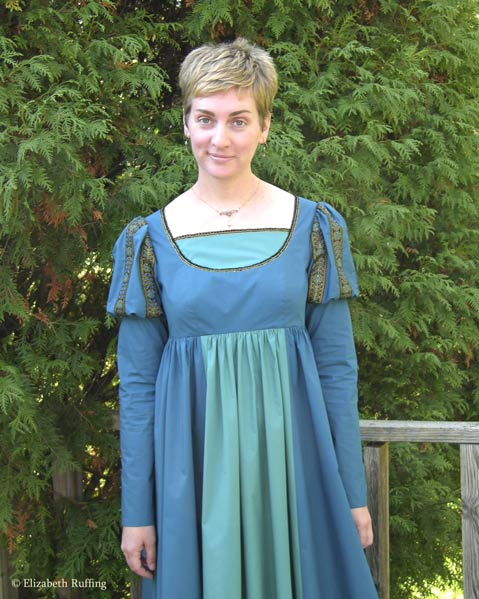
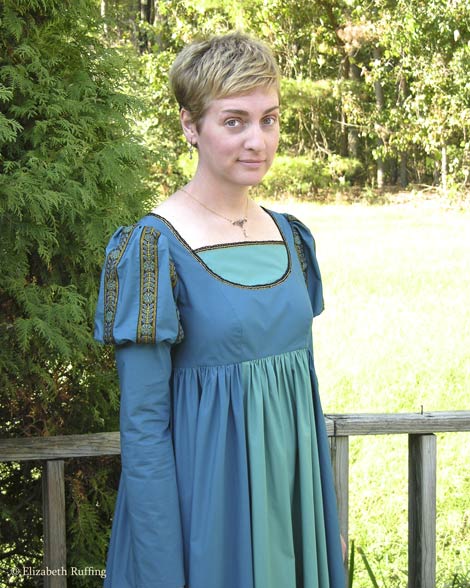
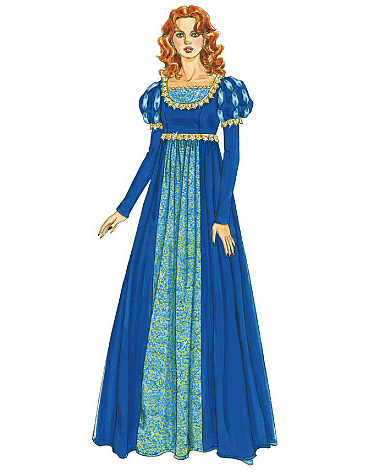
Happy Halloween! A few weeks ago, I decided I really wanted to make a Regency Era gown, and ordered a beautiful Sense and Sensibility pattern. I think I will make one for springtime. As Halloween got closer, a week away actually, I suddenly decided I was going to make a similar gown for a costume. I ran into town and got McCall’s pattern 6141, which is really a Renaissance costume, but rather similar in style to the Regency gowns.

Renaissance gown, McCall
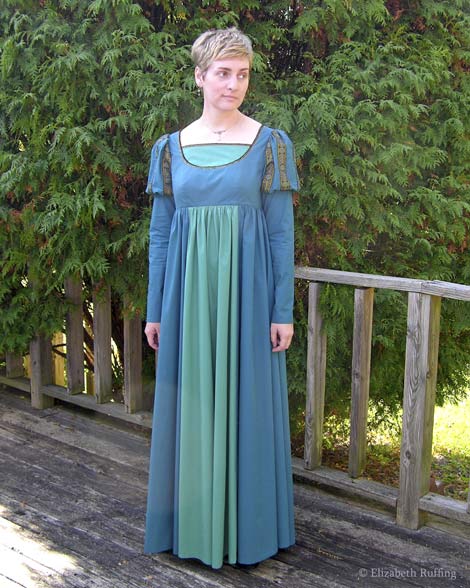
I had recently gathered up a bunch of sheets to use for fabric for other projects, and I grabbed a blue twin sheet set out of the pile, along with a teal sheet for contrast. I spread the sheets, one at a time, out on my carpet and cut out my pattern pieces. I added some trims I got at Hancock Fabrics, to the sleeves and the neckline, and managed to get the whole gown sewn and hemmed by Saturday night, just in time for Jill’s party, which was a lot of fun. I got to talk to some great people, and made good friends with Jill’s corgi too, who followed me all over the house for in exchange for pets.

Renaissance gown, McCall
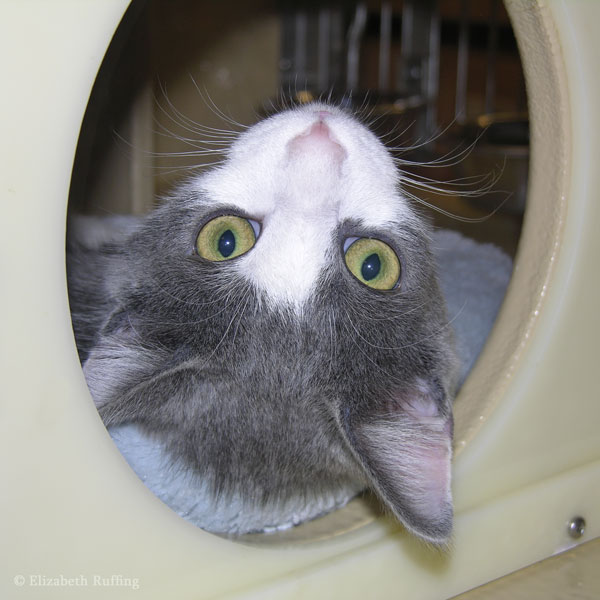
Jill, and a lot of the people who were there volunteer a local cat rescue, fostering cats and kittens. Just a really nice group of good-hearted people. I enjoyed myself very much.

Renaissance gown, McCall
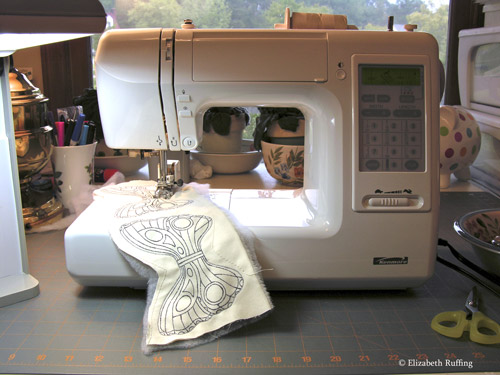
It also did me some good to make something just because. It’s hard to give myself permission to make something just for fun, but I think I will have to do that some more. I even did a hand-picked zipper for the first time.

It’s funny what makes other things come into perspective. You make a dress, and you realize that you need to give yourself permission to paint a painting too, or take up photography, or make something only you might like, that might never sell or be of interest to anyone else, because those are the projects that come out the best and make you feel good about your abilities.

Renaissance gown, McCallAnd you meet some nice people, and you realize that when you like someone, you just like a person. There’s no trying to like them, or trying to be fair, or trying to look past their bad points. You just like them. Since we moved here, I’ve been thinking that people are just different here, harder for me to relate to, but that isn’t true. I just met the wrong people, dated the wrong people, and didn’t like their friends, all for the same reason…they weren’t my kind of people. I had a date once, with a psychiatrist, who tried to tell me this, that people are either nice or they aren’t. I had been saying that people here seemed harder to get to know, more evasive, more secretive, and he said no. People are either open, or not, honest or not. He told me if I had trouble sorting them out, just call him and ask, because he could tell me right away. I’m realizing more and more, that I do know right away too. I just thought I was in a strange land, when I was really just trying to relate to the wrong people. I’m feeling a lot better about these things lately, where I live, what I do, and who I am.

Posted on

Bits and pieces

Sewing fairy wings on my sewing machineI’ve been sewing Pixie Kitten bodies, and have a few of them in progress. I received most of what I spent on my ill-fated Viking Platinum from the Post Office, after the shipping disaster that cracked it to bits, and instead of buying a new sewing machine, I’ve been adding parts to my Kenmore 19233, to make it more versatile. I showed you the walking feet I’ve been using to sew, but I also found a straight stitch needle plate that fit.

Straight stitch, single hole throat plate for Kenmore 19233It’s a Janome part number 200093305, which I bought online from Sewing Machines Plus. Janome made the Kenmore, and so I did some research until I found one that matched mine. This one fits the Kenmore 385 series. It’s easy enough to put on and take off. The larger screw in the upper left corner is what holds it in place. It’s good to remove the needle plate to clean out lint anyway. So, when you change plates, you can get in there to clean too.

Organizing my presser feet and sewing machine partsWith two machines, I’m accumulating a lot of presser feet and miscellaneous parts, and so I got a plastic organizer at Michaels to keep them in order. Some of the feet are left over from the Platinum, but these seem to work on my Viking Sarah, with the exception of the buttonhole sensor foot, which I will have to sell sometime.

Organizing my sewing machine bobbinsI divided up my bobbins by machine too, each group in their own case. I had been finding them here and there, tangled together. I finally got my other shelf up in my workroom, and a couple more boxes to house fabrics. Sometimes I feel like I live in a storage facility, but it is better to have everything somewhat organized. I’m amazed how nice having just one open patch on a table can feel.

Adopt a pet from your local animal shelter or rescue groupI’m still trying to expand my very limited knowledge of photography as well, while hoping to upgrade to a DSLR at some point. I’ve been practicing using my camera when I can. This is Spunky. He and other adorable kitties are at adoption events this weekend. The kitties have been patient with me while I’ve tried to figure out how to photograph them. My camera doesn’t handle the low light or motion very well. Since I now don’t necessarily need to put my postal insurance funds toward a sewing machine, I hope to be able to put it toward a camera instead. This just feels like something I’d like to be able to do better. I’m not sure where that will lead right now, but learning something new, especially something that can be used creatively, is appealing to me.

Posted on 20 Comments

How to attach a walking foot to your sewing machine

How to attach a walking foot to your sewing machineI now have a walking foot for each of my sewing machines, my Viking Sarah, and my Kenmore 19233. Sears has a set of feet for the Kenmore that includes a walking foot, which I bought for about five dollars more than the walking foot alone cost. I thought that was a good deal. I bought my Viking walking foot on eBay, but I see it is tricky to get an authentic Viking foot online. Some people post some confusing information. Be sure to check out the part number to see that it matches the one recommended for your machine on the Husqvarna Viking site. You can find your correct one here by looking for a “dual feed foot”, under the “Quilting” accessory category. Genuine Viking walking feet say “Husqvarna Viking” on one side of the feet themselves, and the part number on the other. They are available from dealers, and online. I’ve ordered miscellaneous parts from Sewing Machines Plus before, as well as from Discount Sewing Machine Service, with good success.

How to attach a walking foot to your sewing machineTo attach a walking foot, the first thing you generally need to do is remove the presser foot ankle from your sewing machine. I’m showing this on my Viking Sarah. It’s the part that holds your presser feet. On some machines, the ankle and the foot are all one piece.

How to attach a walking foot to your sewing machineUnscrew it using the miniature screwdriver that came with your machine, and take it off. I have this larger thumb screw (shown above) on my machine, and it’s the one I used to attach my walking foot. I got a spare here, Viking Presser Foot Screw #412 40 97-01.

How to attach a walking foot to your sewing machineThere are two things you need to line up, when attaching the walking foot itself. You may need to use your hand wheel to raise and lower your needle so you can get that forked bar over the screw that holds your needle in place. This is important because this is what makes the foot go up and down when your needle goes up and down.

How to attach a walking foot to your sewing machineOn the Kenmore, which is made by Janome (so many Janome machines will be similar), that bar on the walking foot rests on top of the bar that holds the screw for the needle (shown above). Either way, the bar goes over the part that holds the needle in place, the one that sticks out.

How to attach a walking foot to your sewing machineOn the other side of the foot, is the part that accepts the same thumb screw that held your presser foot ankle in place. Attach it the same way the ankle was attached. There is a hole right in the metal bar. All you need to do is line it up where the indentation for it is, and make sure it fits snuggly in place. Tighten up the screw and you are ready to sew.

How to attach a walking foot to your sewing machineAgain, it looks a little different on the Kenmore (shown above), but the idea is the same. One side attaches like a presser foot ankle, and the other part rests over the needle screw. You might need to wiggle it a little to get it to pop into place, but once it is secure in its proper place, it doesn’t jiggle around. With some walking feet, there is also a hole, in the back of the walking foot, that accepts a metal guide bar. You can just slip the guide bar in the hole, if and when you want to use it, and slide it out to the correct distance from the needle that you want to use. You line the edge of guide bar up with your last row of stitching, as you sew, to keep an even distance.

Now you can sew through layers without so much shifting of one fabric over another. It helps too when you don’t have a presser foot pressure adjustment option, which some machines don’t have. I’ve noticed some newer machines come with built-in walking feet. I decided to try mine out for regular sewing too, and I’ve been having good results.

Posted on

Siamese Hug Me! Kitty Decorative Pillow

Siamese Hug Me! Kitty appliqued decorative throw pillow by Elizabeth RuffingMy Siamese kitty pillow is all finished and is up in my Etsy shop. I machine appliquéd quilting cottons onto an oatmeal cotton fabric this time. The background has a pattern of diagonal textured lines, but it is all of one natural cotton color. It’s nice and soft.

Siamese Hug Me! Kitty appliqued decorative throw pillow by Elizabeth RuffingI fused all my appliqué pieces onto my background with Wonder-Under, much in the same way as I did with my bunny pillow, only I was able to use a cotton setting on my iron and skip the press cloth, since cottons can withstand more heat than poly fleece.

Siamese Hug Me! Kitty appliqued decorative throw pillow by Elizabeth RuffingI used a machine zig zag stitch to sew around all the raw edges. A stitch width of 2.5 and a stitch length of 0.5 worked well for me. Once the pillow front was appliquéd, I pressed it with some steam, and made my envelope closure for my pillow back. I basted the two back pieces together, pressed them, and then squared them up with a rotary cutter and a quilting ruler. I sewed my front to my backs, pressed again, turned them right side out, and put my pillow insert inside.

Oatmeal-colored cotton, decorative throw pillow with an envelope closureI took some photos and all done!

I also photographed another wide-eyed kitten this week. This is Ian. He and a bunch more equally cute and playful kittens and cats are at PetSmart this weekend, hoping to find their forever homes.

Ian, gray and white kitten for adoption from Alley Cats and Angels, in the Triangle area, Apex, NCPlease consider adopting a pet. There are so many sweet animals out there waiting for homes. I fall in love with one or two or three every week or so! All our kitties are rescued kitties, and they make wonderful family members. Check out sites like Petfinder and Adopt a Pet to find available adoptable pets in your own area. And go visit them too. They love the attention! It makes them happy 🙂