 I decided I wanted to try my appliqué throw pillow designs using polyester fleece, only I couldn’t find any tips or tutorials anywhere for doing this by fusing the fleece and using machine stitching, like I’m doing with cottons. I snapped photos as I experimented so I could put together my own tips and a tutorial on the basics.
For starters, you’ll want to cut your background fleece at least 1/2 inch bigger on each side than your pattern says. When you fuse, the fleece shrinks a bit, and machine stitching pulls it in a little too. You’ll also need a paper-backed adhesive web. I prefer Wonder-Under for this. You’ll need a press cloth too. A heavy piece of cotton sheeting worked for me. I find tracing my final design onto tracing paper is very helpful for lining everything up before fusing.
I did my machine stitching both with Sulky rayon thread and regular cotton thread. I used DMC embroidery floss, sewing with one strand, for the smaller appliqués because I was using a machine without adjustable presser foot pressure, which was distorting my smaller pieces. If you don’t have adjustable foot pressure either, and you do have a walking foot, that might work for this too.
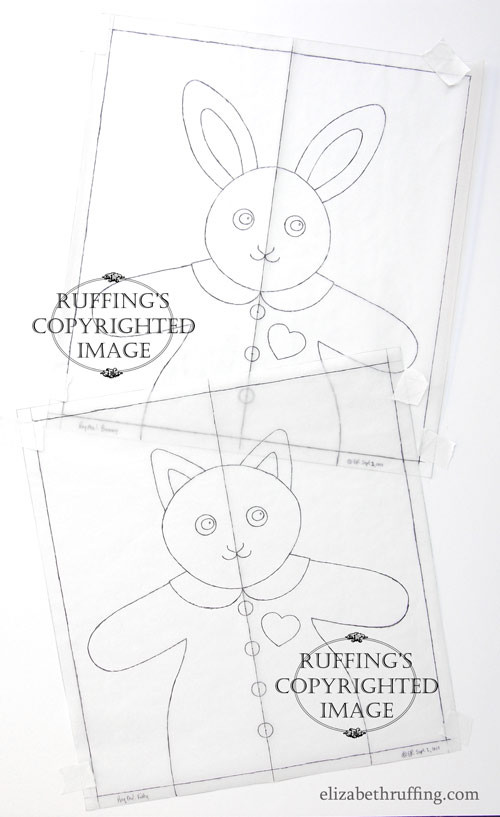
 To start, using an appliqué pattern of your choice, trace the individual appliqué shapes onto the Wonder-Under, on its paper side, reversing your shapes when necessary. Your final shapes will be in reverse when you fuse, and so you need to keep that in mind. I use a mechanical pencil to trace my shapes. You’ll need to leave an additional scant 1/4 inch of fleece around any area that will be tucked under another shape, and so keep that in mind too as you trace, leaving marks where necessary, as reminders. Usually, these areas are indicated by dotted lines on appliqué patterns.
Once you have traced your shapes onto the Wonder-Under, cut them out leaving a scant 1/4 around the outer edges. Lay your Wonder-Under shapes on the wrong side of your fleece, if you are using fleece with sides that are different. I found the low-pile fleece, the non-anti-pill kind, worked better for this project. Fuse the Wonder-Under shapes on to your fleece, using the synthetic setting on your iron, without steam. This is enough heat for this part of the process.
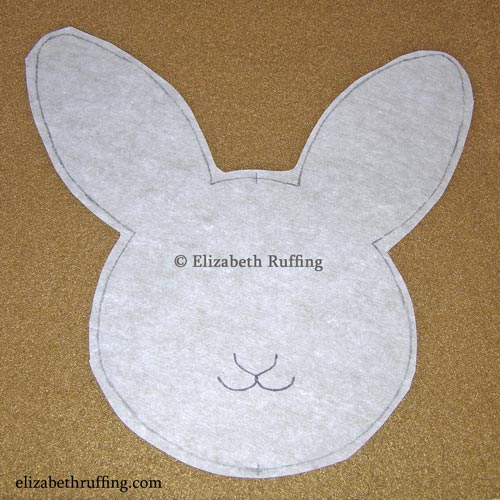
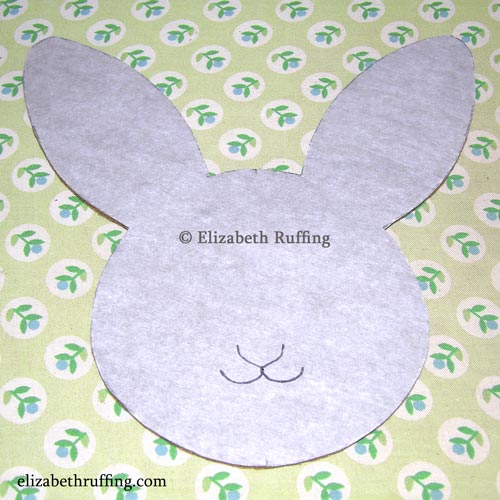
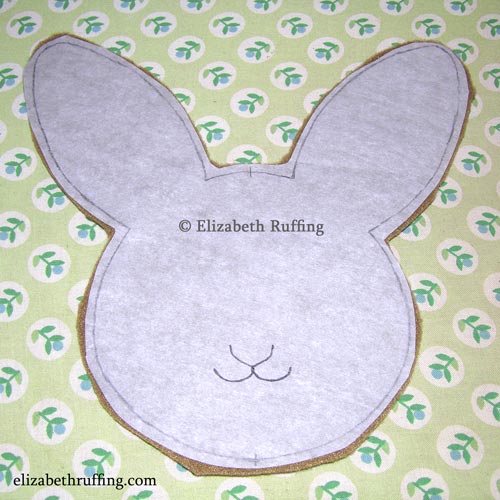 Cut your shapes out of your fleece, and then trim by cutting on the lines for shapes that will be on top of other shapes, and leave the scant 1/4 inch where shapes need to be tucked under other shapes. This bunny head goes on top of my design, and so I cut directly on the line.
 Now to fuse the shapes onto the background fleece…This got tricky, and so be sure to do a trial run on some scrap first to get the right heat setting on your iron. You will need a press cloth because you will need to use a higher setting than is safe for ironing directly on the fleece.
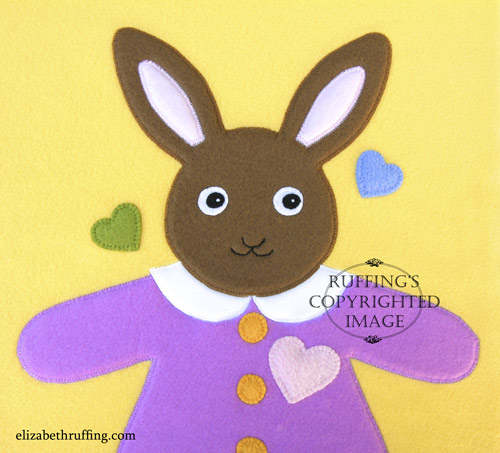
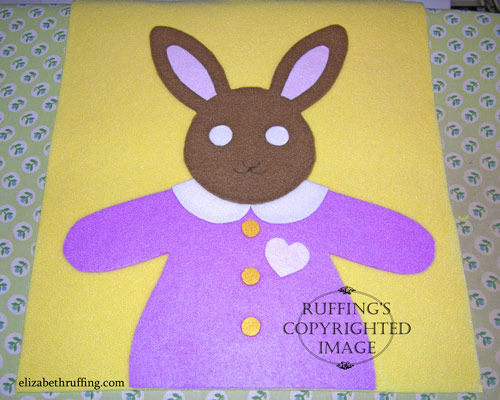
Start by peeling the paper off your shapes, now that they have cooled. Arrange them on the right side of your fleece background, fusible side down, using your traced design, if you made one, as an overlay to line up your pieces. I recommend fusing only one layer of fleece at a time to the background. For this design, I started with the body, collar, and head. Then I added the details, like the eyes, buttons, and heart, once I’d fused the first parts down. It’s hard to get enough heat through the layers to get them to stick. They just need to stick enough to hold them in place while you sew.
When you are ready to fuse your shapes in place, lay your press cloth over the entire background. I found I needed to set the heat on my iron to the minimum temperature that would allow me to use steam, in order to get the shapes to stick to the background. For me, that was the lowest cotton setting. On other irons, this might be the wool setting. Test this temperature on scrap fabric first! Do not put the iron directly on the fleece at this temperature. You will want to keep your iron level as you press, using as little pressure as possible. You may need to hover the iron just over the surface, and use the steam to fuse, so you don’t make pressing lines in the fleece. It takes some experimenting.
 Once all your layers are fused onto your background, you’re ready to stitch. I used a machine blanket stitch. If your machine doesn’t have this, a zig zag stitch will work. Again, you’ll want to try this out on scrap first to see how condensed you want your stitch to be, by playing with the stitch width and length. I used a stretch needle for knits. Mine was 90/14 size. If you have adjustable presser foot pressure, you are lucky! I have it on one machine but not the one with the blanket stitch I wanted to use. It helps to lighten the pressure for fleece, even to a “1”. Once again, experiment to see what works best. A walking foot is another alternative (mine fits my other machine that has the adjustable foot pressure. I’ll have to see if I can use an adaptor to fit it to the machine that has the blanket stitch next time).
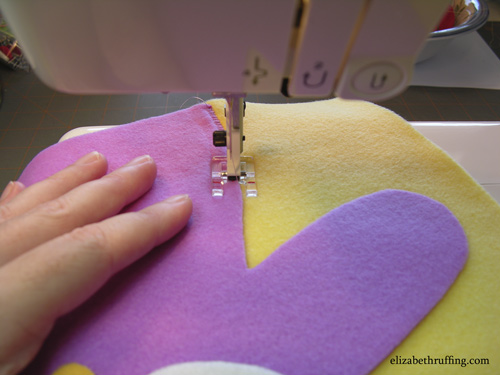 Without the presser foot adjustment, I was able to sew around all the larger shapes. I used an open-toe foot so I could see what I was doing. With a blanket stitch, be careful to pivot at the right times. My machine went over each stitch twice, and so, if yours does this, you’ll want to pivot after the second pass the needle makes, or the machine will back stitch right into your background fabric, which looks messy.
I tried to machine appliqué the small parts, but my foot kept shoving the little pieces out of whack. I did a lot of complaining over this! I believe there was just too much pressure from the presser foot to do this right, and so I used a single strand of embroidery floss to blanket stitch all the small pieces. I have a tutorial on doing a blanket stitch by hand here. The entire design could be done by hand, if you preferred to do it that way.
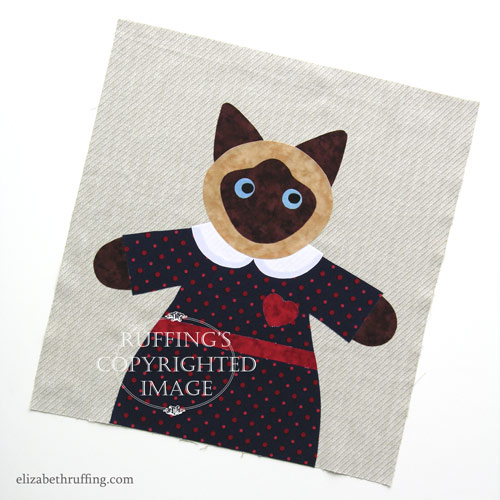
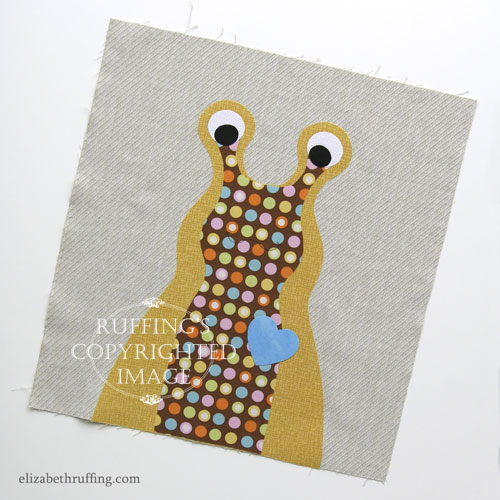
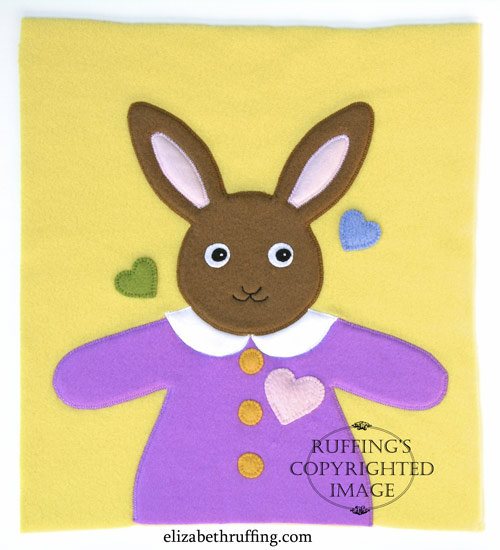 And finally…all appliquéd! I’ll need to trim and square this later, since it pulled in somewhat in the middle areas. In all honesty, this was a difficult project with the machine I used. It took a lot of trial and error, but next time, I will be so much more ready!
Some day, I hope to again have a sewing machine with all the features I wish I had, and did have on my poor ill-fated Viking. But, again, hand stitching works fine for this too, if you aren’t making a lot of appliqués, which I hope to do. I’ve been checking out the various sewing machines on the market, but the the ones that are equivalent to what I had are all so expensive. I’m not done looking yet though. Hopefully, one will have my name on it.