 I now have a walking foot for each of my sewing machines, my Viking Sarah, and my Kenmore 19233. Sears has a set of feet for the Kenmore that includes a walking foot, which I bought for about five dollars more than the walking foot alone cost. I thought that was a good deal. I bought my Viking walking foot on eBay, but I see it is tricky to get an authentic Viking foot online. Some people post some confusing information. Be sure to check out the part number to see that it matches the one recommended for your machine on the Husqvarna Viking site. You can find your correct one here by looking for a “dual feed foot”, under the “Quilting” accessory category. Genuine Viking walking feet say “Husqvarna Viking” on one side of the feet themselves, and the part number on the other. They are available from dealers, and online. I’ve ordered miscellaneous parts from Sewing Machines Plus before, as well as from Discount Sewing Machine Service, with good success.
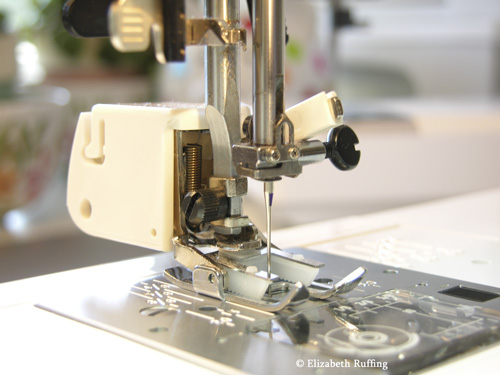
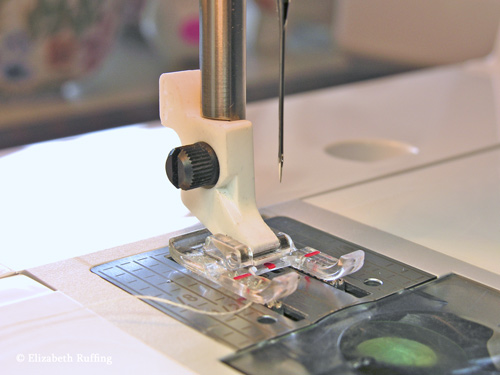 To attach a walking foot, the first thing you generally need to do is remove the presser foot ankle from your sewing machine. I’m showing this on my Viking Sarah. It’s the part that holds your presser feet. On some machines, the ankle and the foot are all one piece.
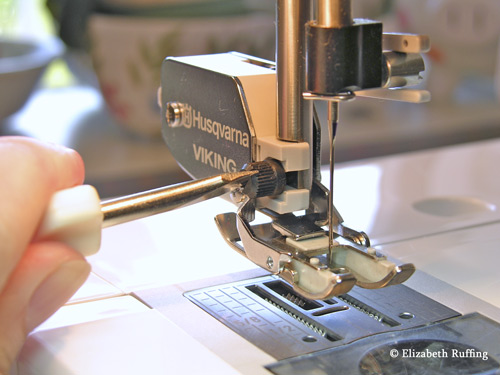
 Unscrew it using the miniature screwdriver that came with your machine, and take it off. I have this larger thumb screw (shown above) on my machine, and it’s the one I used to attach my walking foot. I got a spare here, Viking Presser Foot Screw #412 40 97-01.
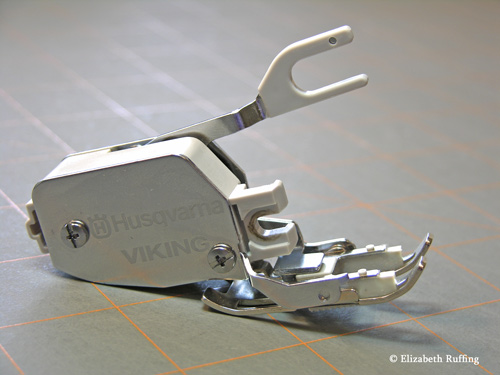
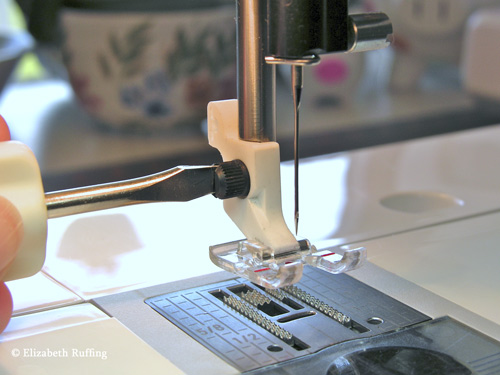
 There are two things you need to line up, when attaching the walking foot itself. You may need to use your hand wheel to raise and lower your needle so you can get that forked bar over the screw that holds your needle in place. This is important because this is what makes the foot go up and down when your needle goes up and down.
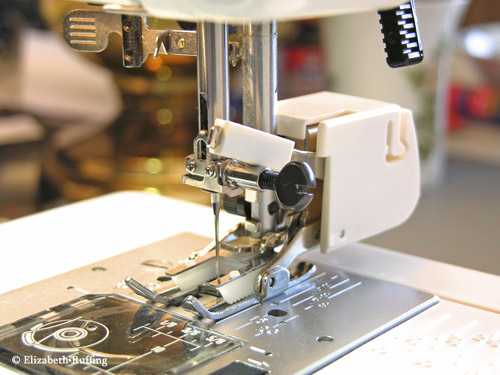 On the Kenmore, which is made by Janome (so many Janome machines will be similar), that bar on the walking foot rests on top of the bar that holds the screw for the needle (shown above). Either way, the bar goes over the part that holds the needle in place, the one that sticks out.
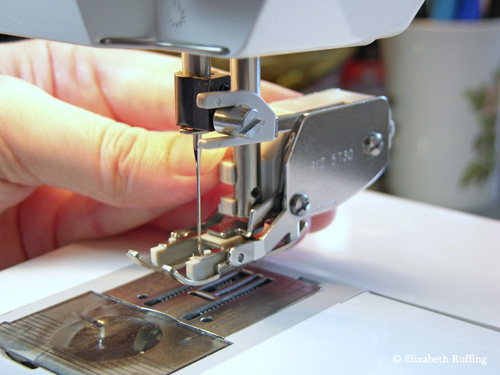
 On the other side of the foot, is the part that accepts the same thumb screw that held your presser foot ankle in place. Attach it the same way the ankle was attached. There is a hole right in the metal bar. All you need to do is line it up where the indentation for it is, and make sure it fits snuggly in place. Tighten up the screw and you are ready to sew.
 Again, it looks a little different on the Kenmore (shown above), but the idea is the same. One side attaches like a presser foot ankle, and the other part rests over the needle screw. You might need to wiggle it a little to get it to pop into place, but once it is secure in its proper place, it doesn’t jiggle around. With some walking feet, there is also a hole, in the back of the walking foot, that accepts a metal guide bar. You can just slip the guide bar in the hole, if and when you want to use it, and slide it out to the correct distance from the needle that you want to use. You line the edge of guide bar up with your last row of stitching, as you sew, to keep an even distance.
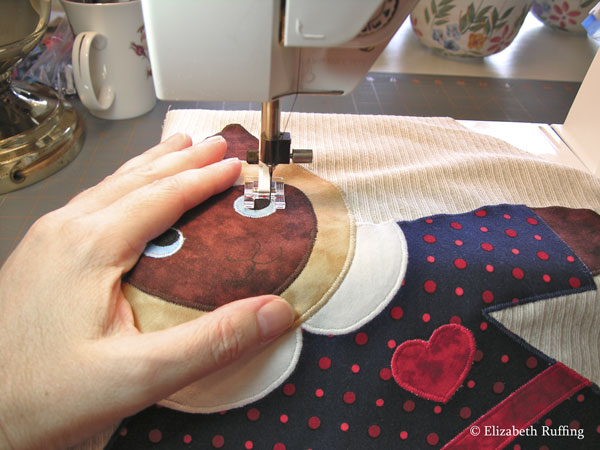
Now you can sew through layers without so much shifting of one fabric over another. It helps too when you don’t have a presser foot pressure adjustment option, which some machines don’t have. I’ve noticed some newer machines come with built-in walking feet. I decided to try mine out for regular sewing too, and I’ve been having good results.